Assign a random team to a user
Knowledge Level: Advanced
Purpose
In this tutorial, a bot will ask the user if they would like to be assigned a random football team.
If the user taps 'Yes', a webhook in Make(formerly Integromat) will be triggered to randomly assign a team to the user. The team name will be posted back to the bot user via a Webhook response.
Prerequisite
For this tutorial we will need:
- A bot
- A Make(formerly Integromat) account
- A Google Sheet with two sub-sheets, one to list the teams and the second to record the assigned teams. You can use this template here
- Your favorite beverage (I went with a classic cup of joe for this one).
Setting up the bot
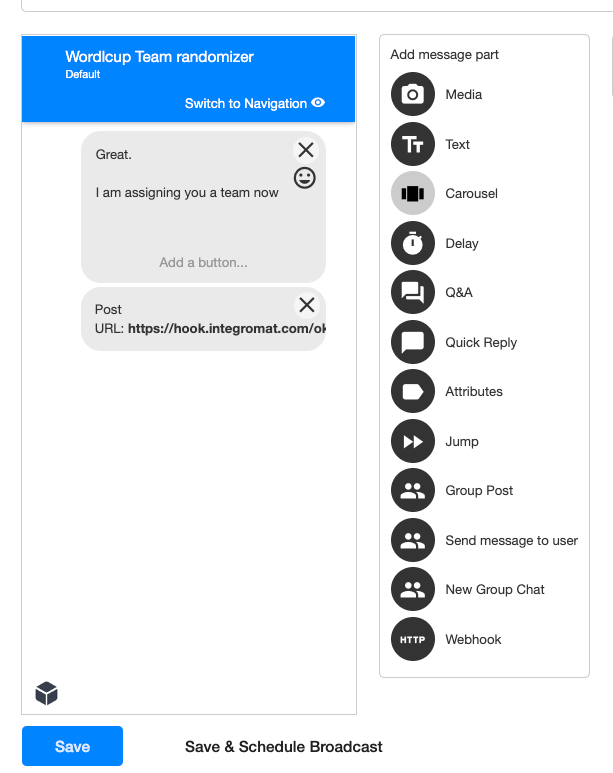
To set this up, our bot will need two message parts:
- A welcome message asking the user if they would like to be assigned a team
- A confirmation message that a team is being assigned to them


In the message builder, we will add the webhook in this message part to trigger our webhook in Make(formerly Integromat).
Setting up the Make(formerly Integromat) scenario
Now that we have the bot setup, it's time to setup our Make(formerly Integromat) scenario to enable random team assignment.
Login to your Integroamt scenario and create a new scenario. Click the + sign to add a new connection. From the list, search for ‘Webhook’ and choose ‘Custom Webhook:
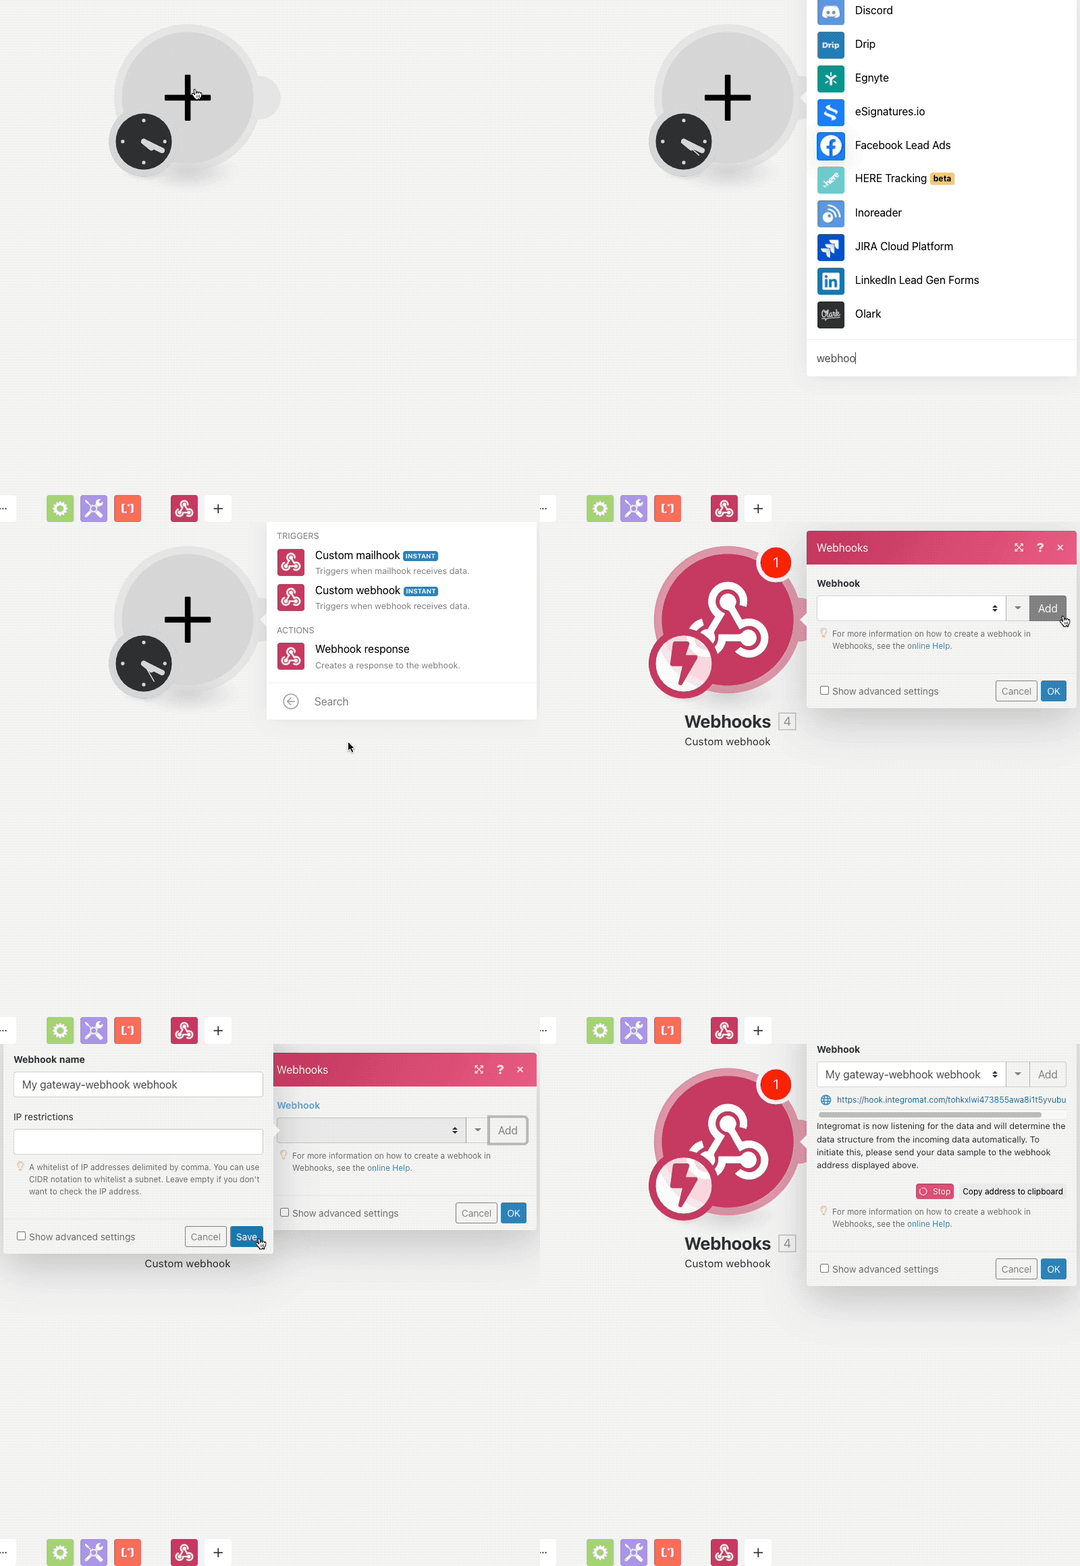
On the next screen, click on ‘Add’ and give the webhook an appropriate name. Click on Add, your webhook is now ready to receive information from the web.
Before clicking 'Ok', make sure you copy the Webhook url and paste it in the second message part of the bot so we can trigger the webhook when a user taps 'Yes' for assigning a team.
Triggering the webhook
Before we build our complete scenario in Make(formerly Integromat), we will need to do a test to ensure the webhook is working correctly and it is receiving the required information about the bot user.
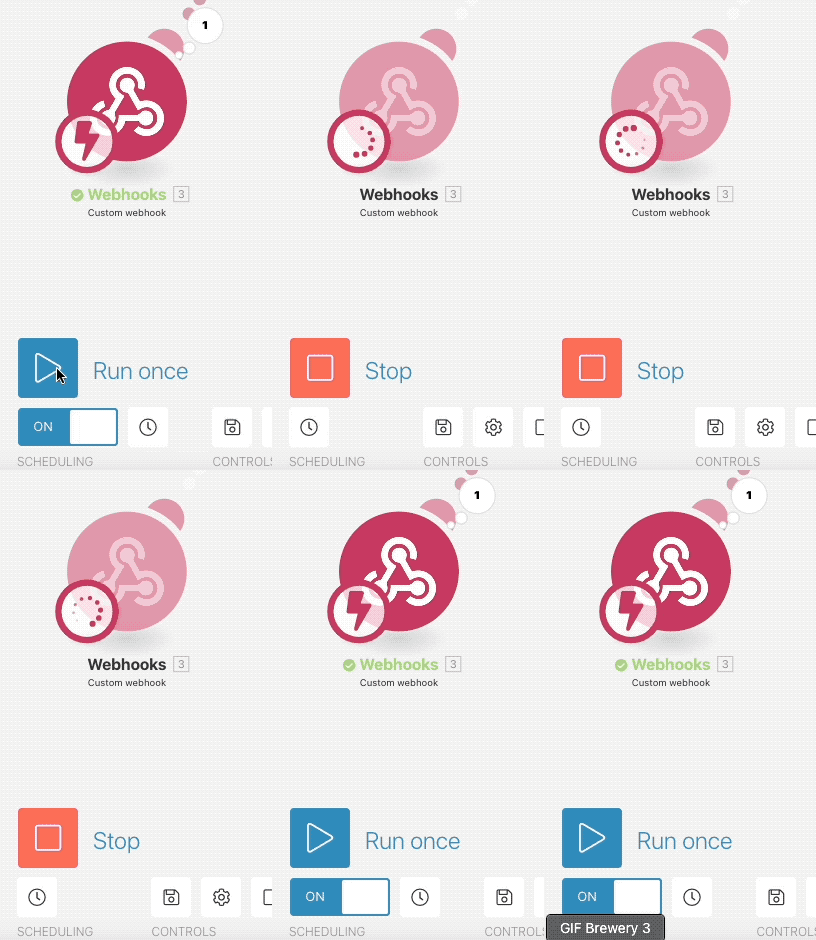
On your Integroamt scenario, click on 'Run Once' to activate the webhook.
Go to your bot and start the conversation, you can do this by assigning a keyword to the bot.
Click 'Yes' from the welcome message which should take you to the second message part of the bot
Go back to your Make(formerly Integromat) scenario, you should now see a bubble pop-up at the top of the webhook indicating that the webhook has triggered.
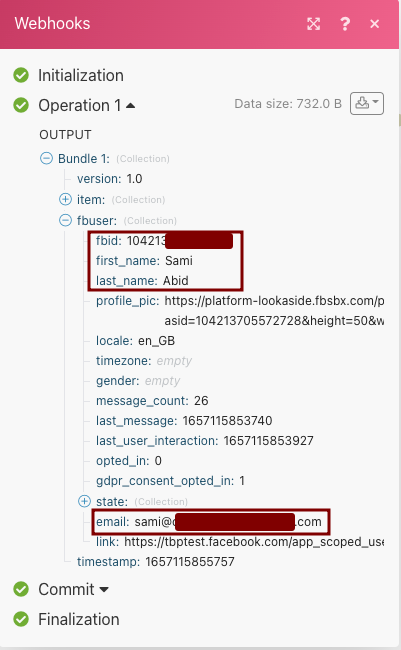
After triggering the webhook successfully, click on the pop-up bubble to see the output. We only need a few pieces of information to use through the rest of the scenario, they are highlighted below:
Search rows in Google Sheet
After the webhook, our first step will be to add a 'Search rows in Google Sheet' module. We need to do this to check if a user requesting to be assigned a team hasn't already been assigned one. The rest of the scenario will run based on this initial search.
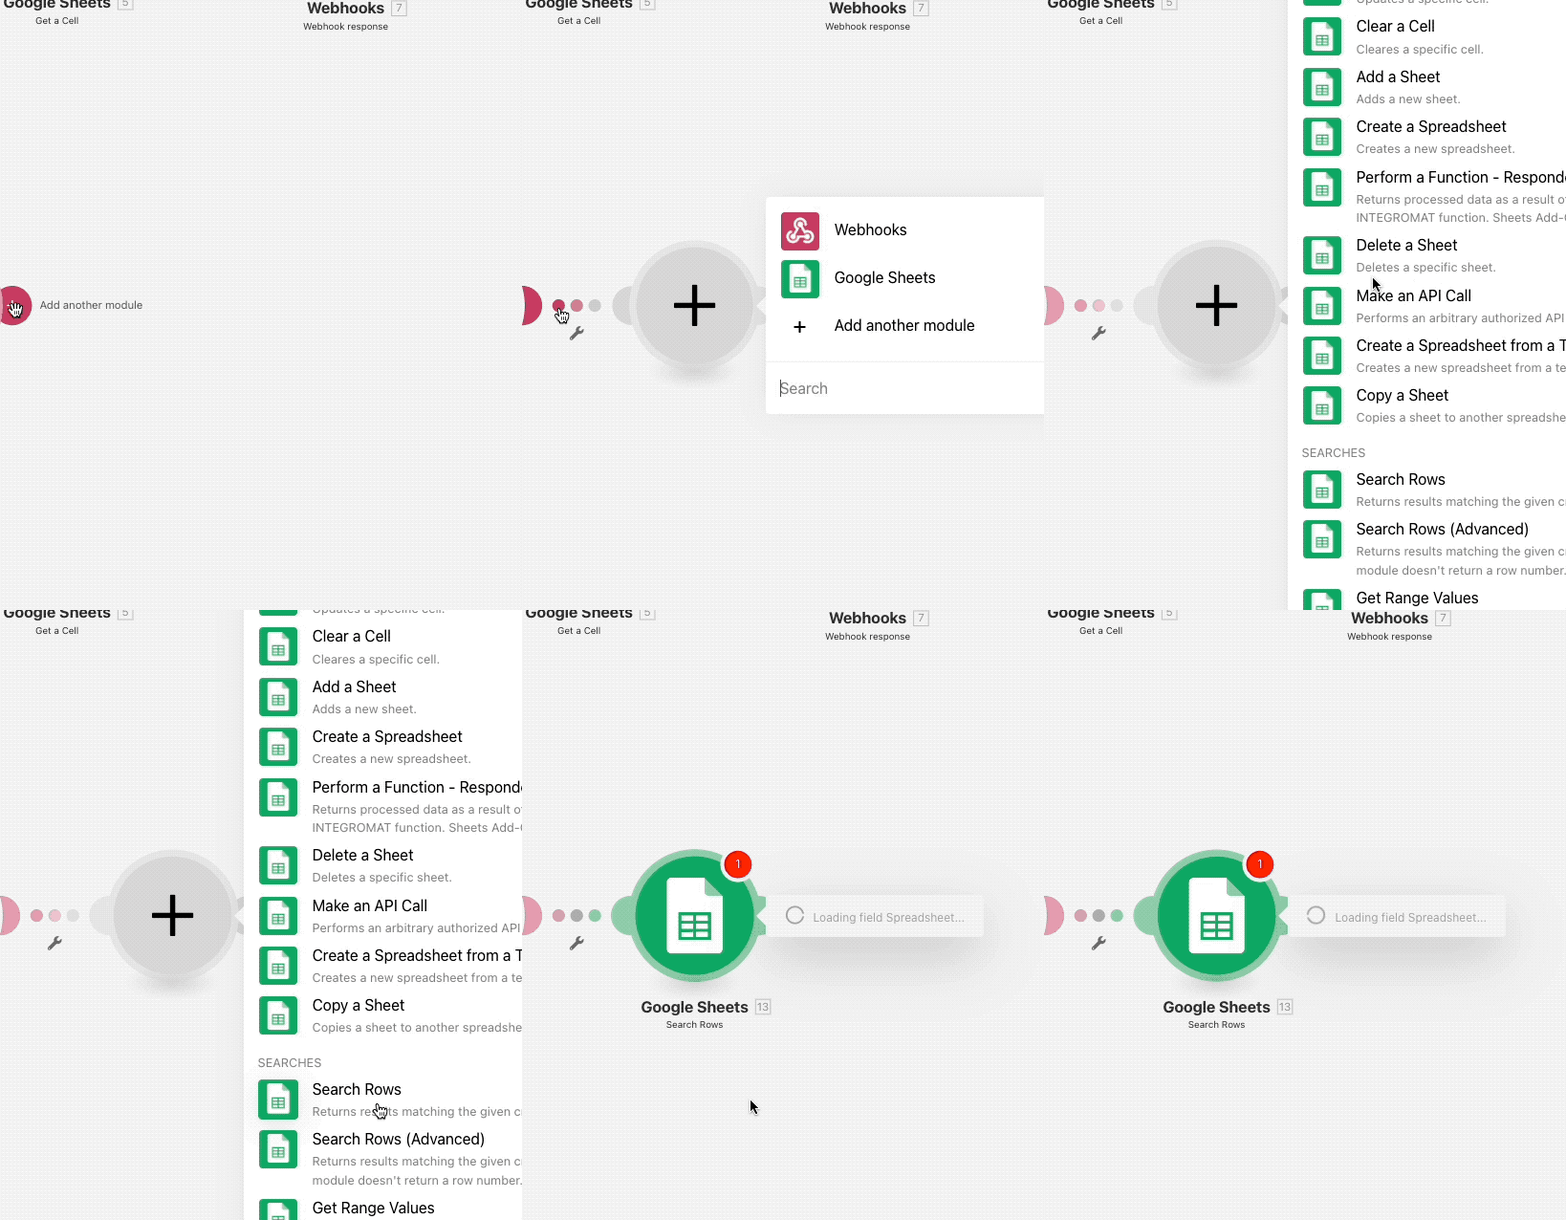
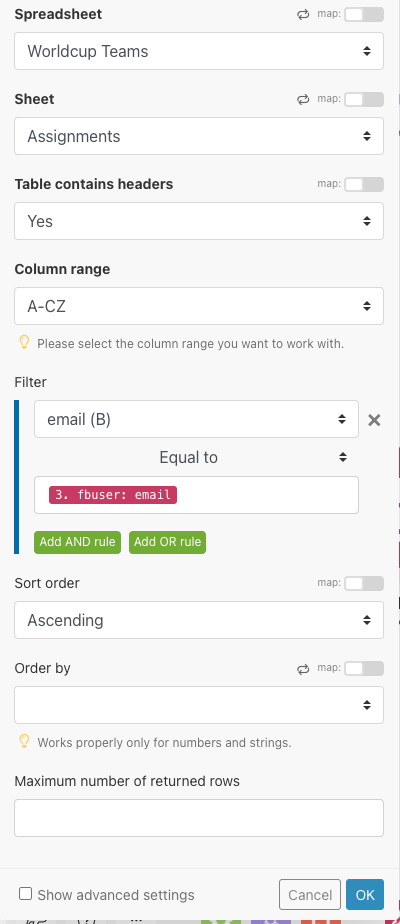
Click on the '+' button after the webhook module and look for 'Search rows in Google Sheet'. Choose the appropriate Google Sheet and in the filter criteria, select the email address column in the Sheet and the email address field coming through the webhook.
See example below:
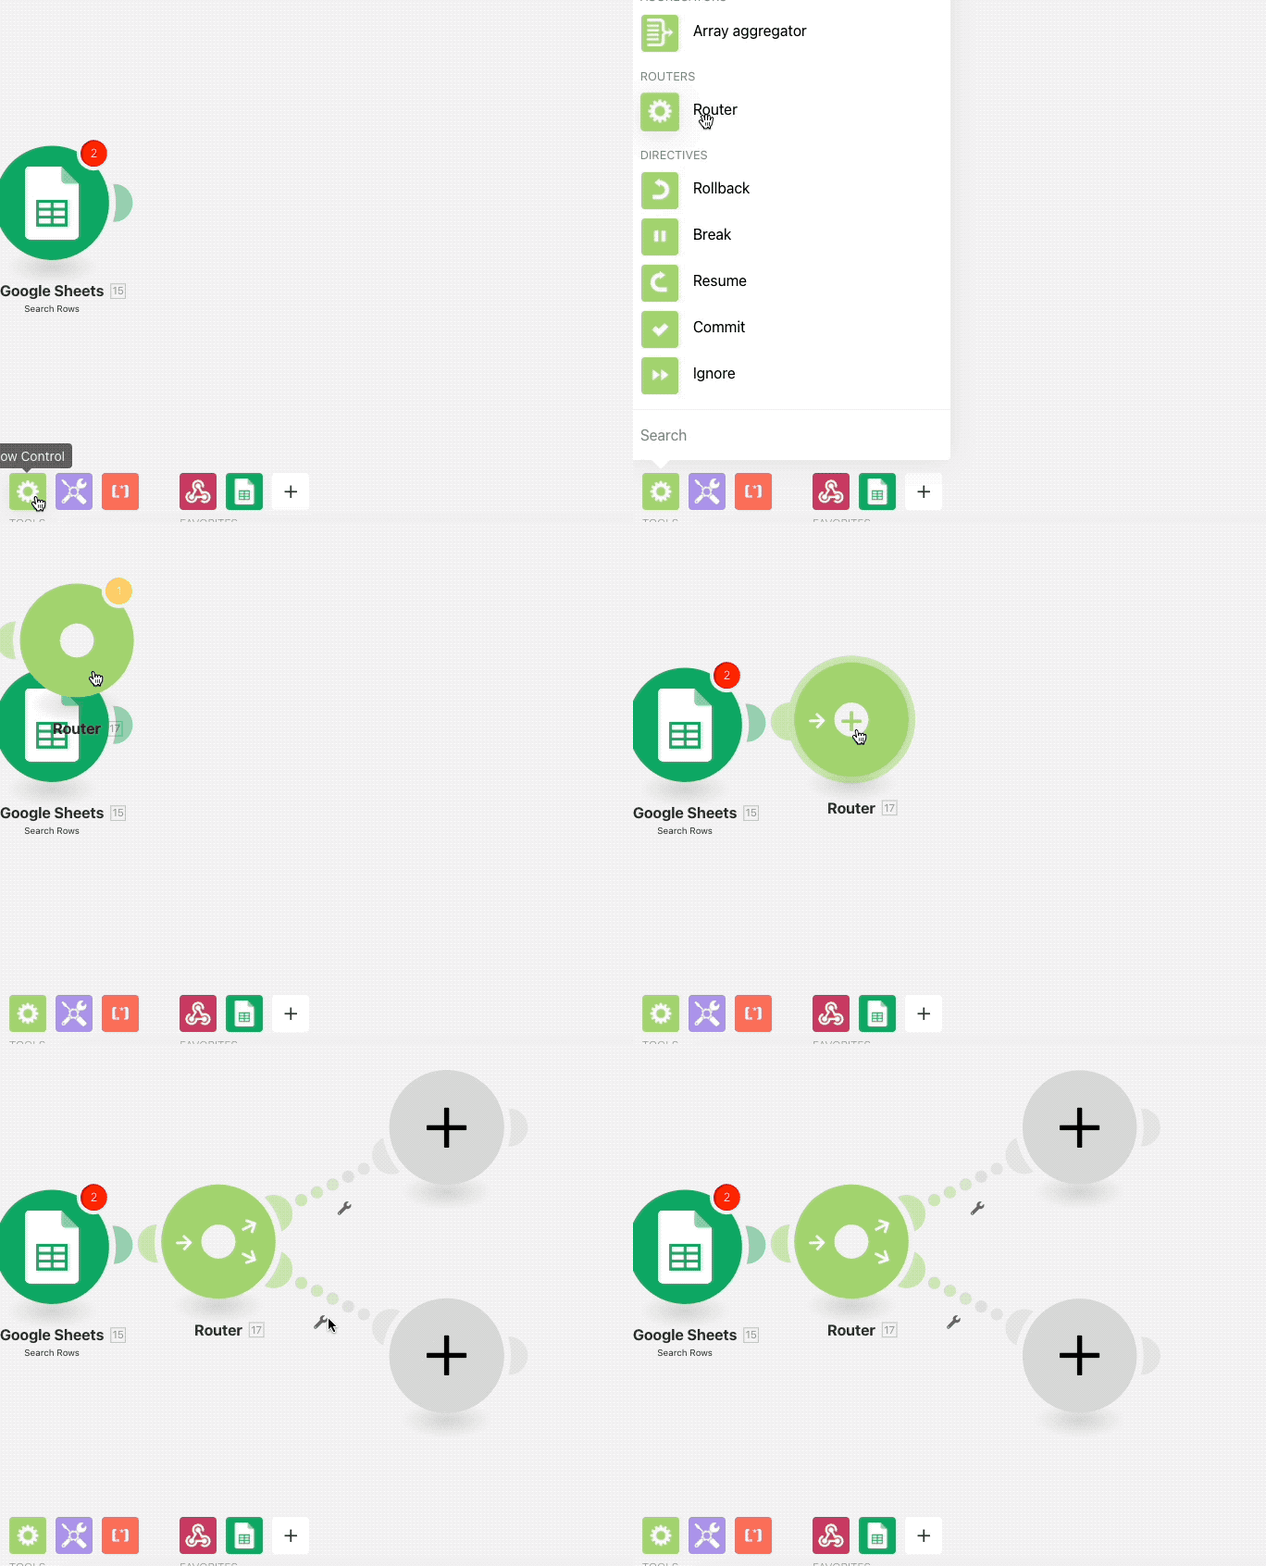
Adding a router to filter the scenario
After searching for an assigned team, we need to direct our Make(formerly Integromat) scenario flow based on the search result. We have two conditions we can use after this:
- Users who have not been assigned a team yet
- Users who already have a team assigned.
We will use the above conditions to route the response of the bot. To do this, add a 'Router' to your Make(formerly Integromat) scenario after the 'Search rows' module.
Configuring the conditions
After setting up the router, let's configure the filter criteria.
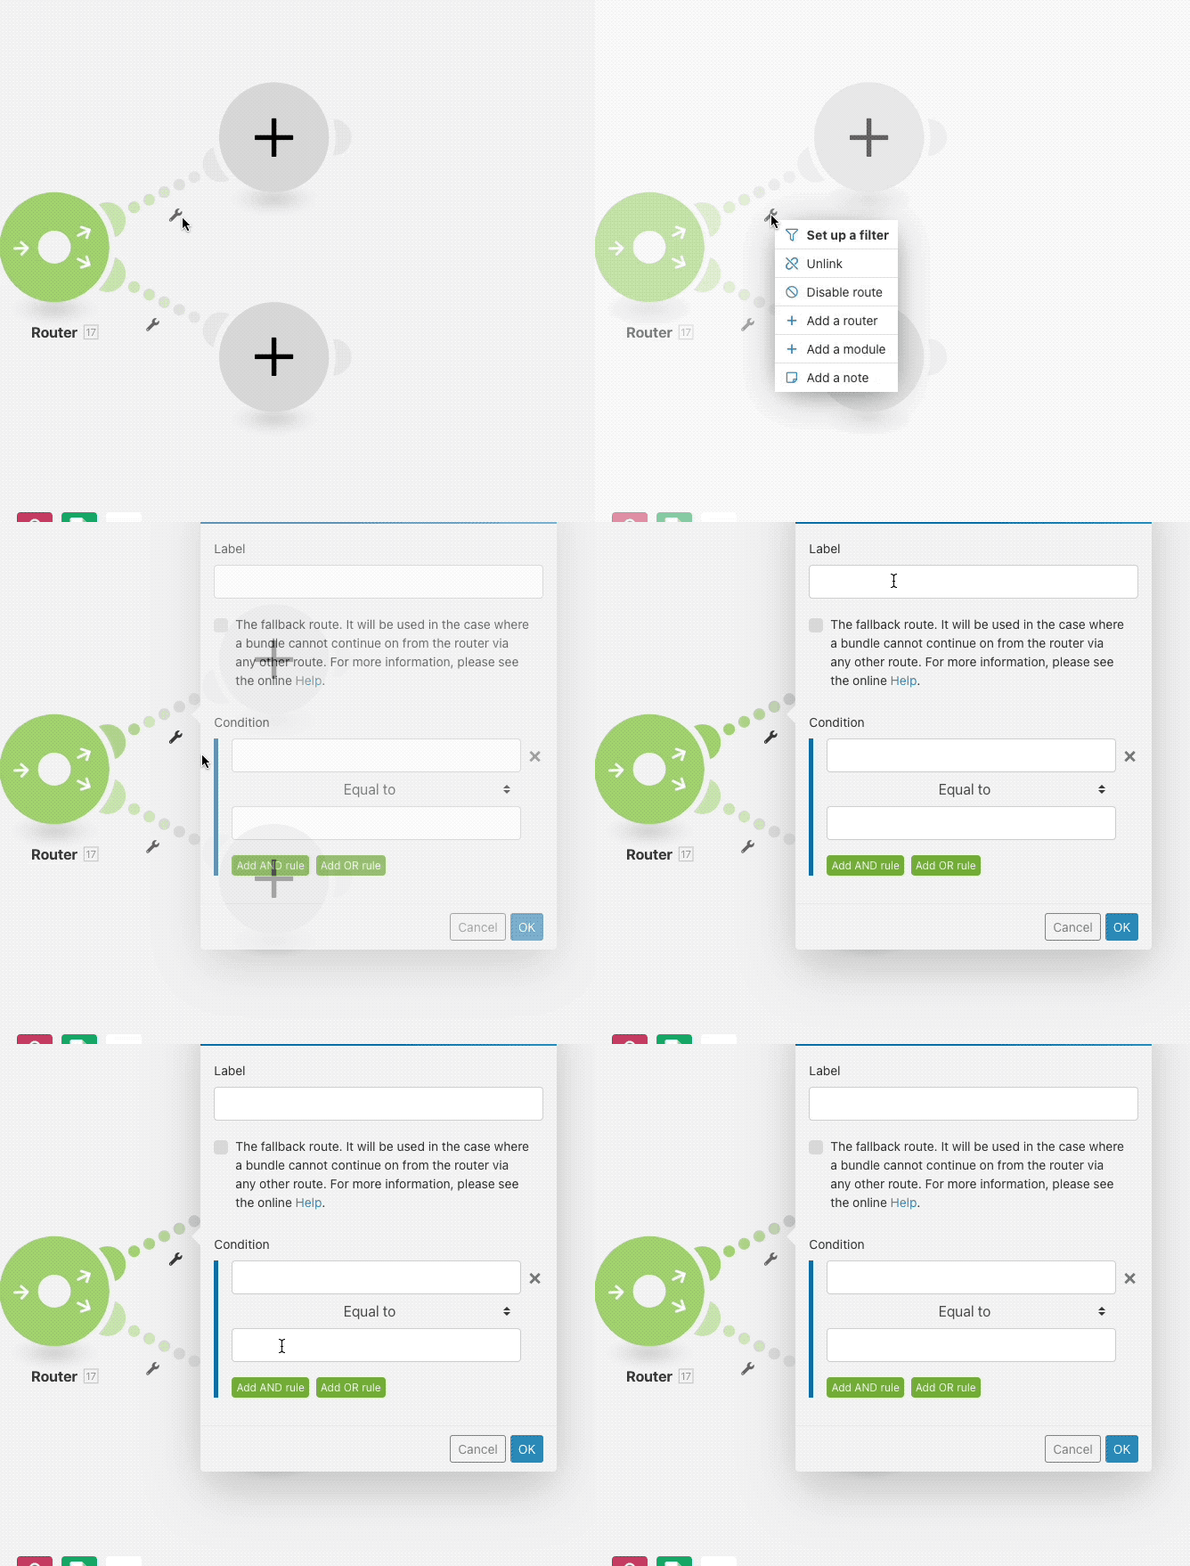
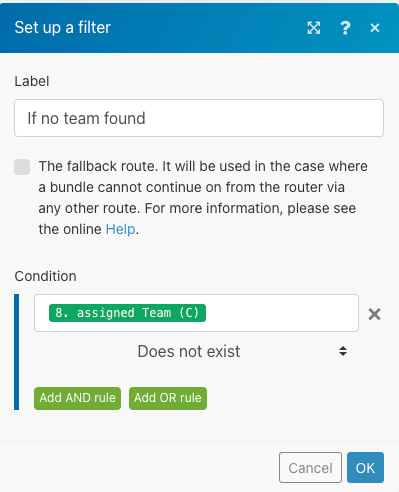
Our first criteria needs will involve users who have not been assigned a team. After adding the router in the above step, click on the wrench icon after the router flow. Assign at an appropriate label, in this example we've used 'If no team found'. In the condition area, we used the output '8. assigned Team' from our Google Sheet search result. In the condition filter below it, select 'Does not exist'.
See screenshots below for further understanding of this step:
Condition if no team assigned is found
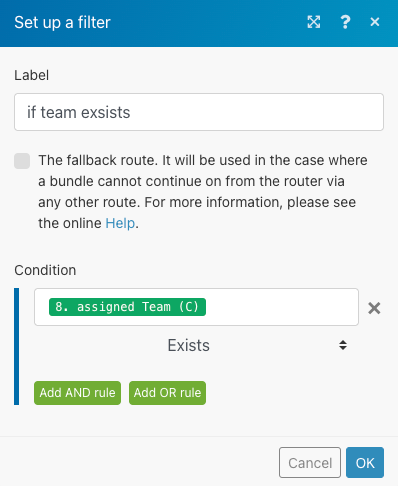
Condition if a team is already assigned
Repeat the above instructions for the second flow but our conditions will slightly change, instead of the 'Does not exist' condition, we will use 'Exists'.
Configuring flow: Assigning a team to a user
There are a few modules in this step to let the scenario assign the team to a user.
Let's begin by configuring our random number selection. We will use a module in Make(formerly Integromat) to pull a random number between 2 to 31.
To setup the above, add a new module and look for 'Set Variable' module. Name it appropriately, we used 'random' in our case. Leave the 'Variable lifetime' as it is. In the 'Variable value' section, paste the following code:
{{floor(random * 32) + 2}}
NoteThis range between 2 to 31 is applicable in our use case as we are using a pool of 32 teams. If your pool is larger or smaller, please adjust the number range accordingly.
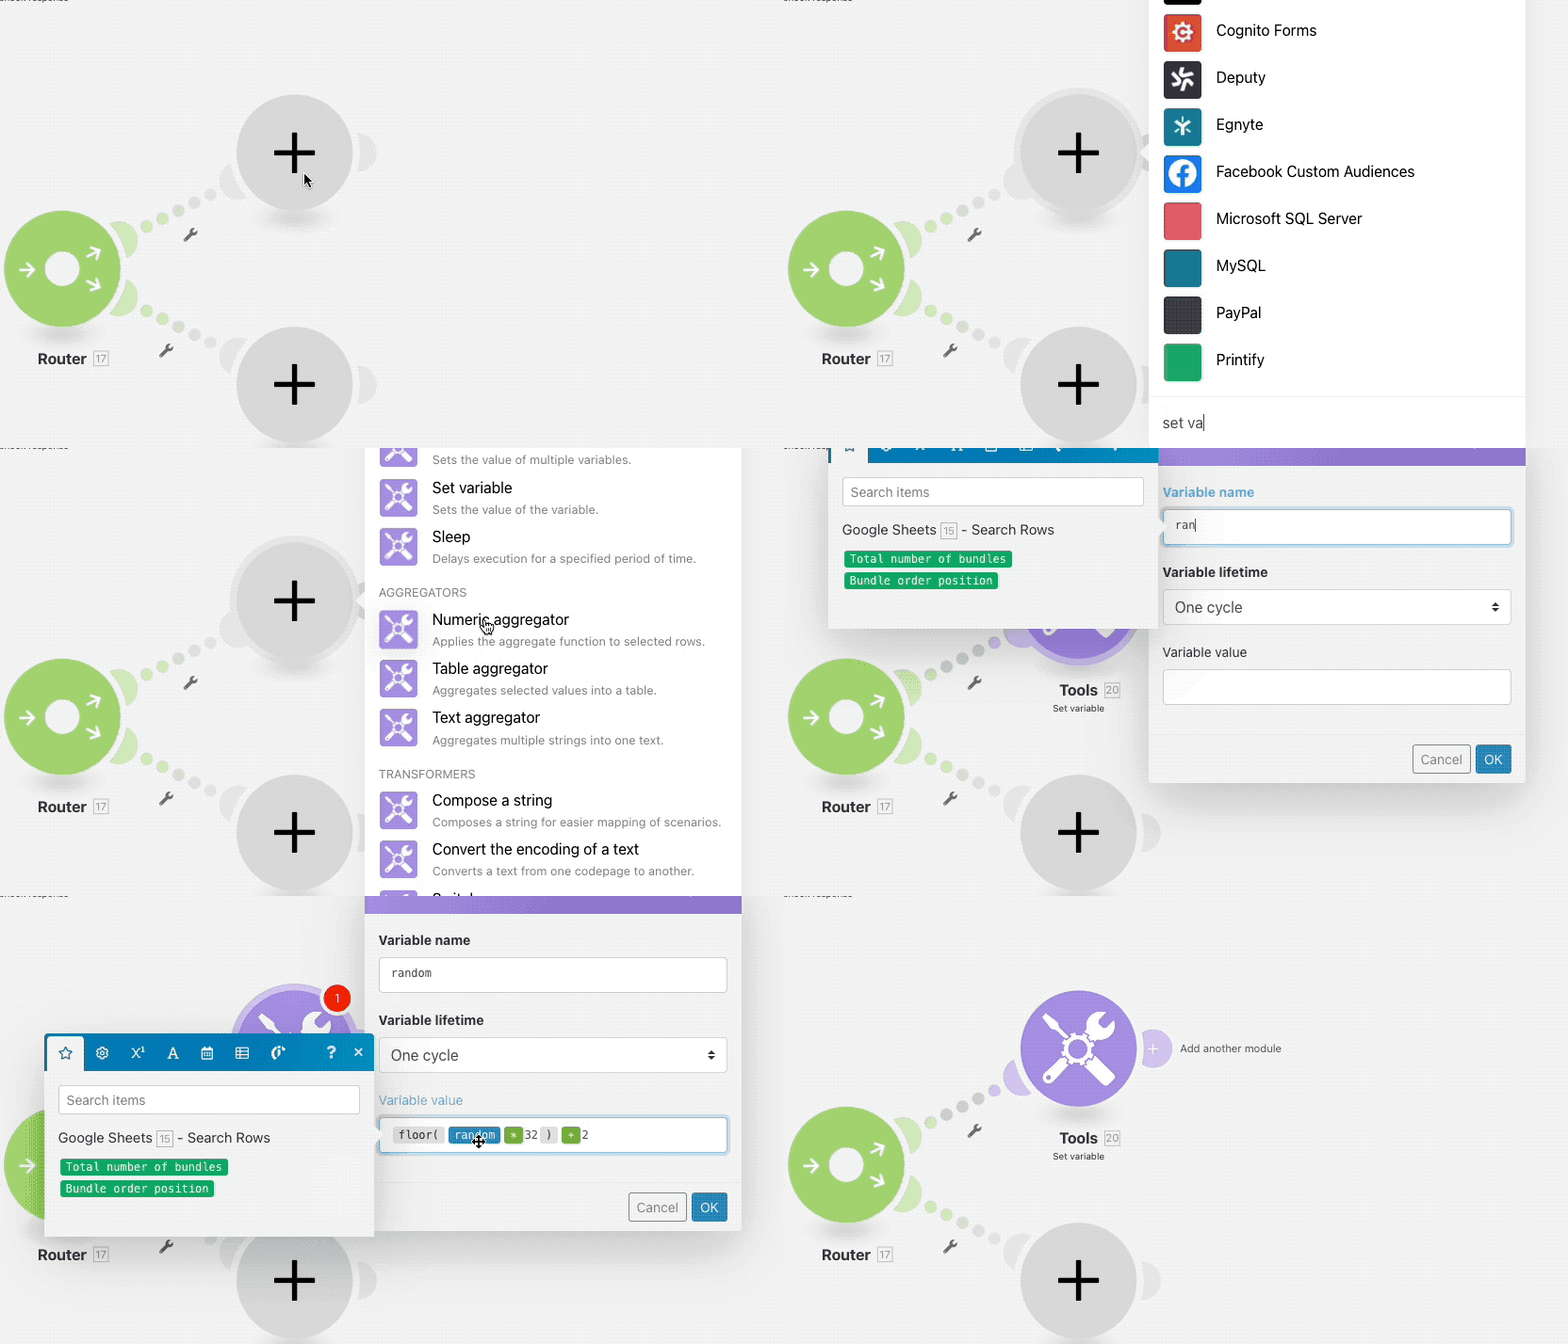
This will enable the module to generate a random number every time this part of the scenario is executed. If you run the scenario now, it should produce a random number between the range we provided.
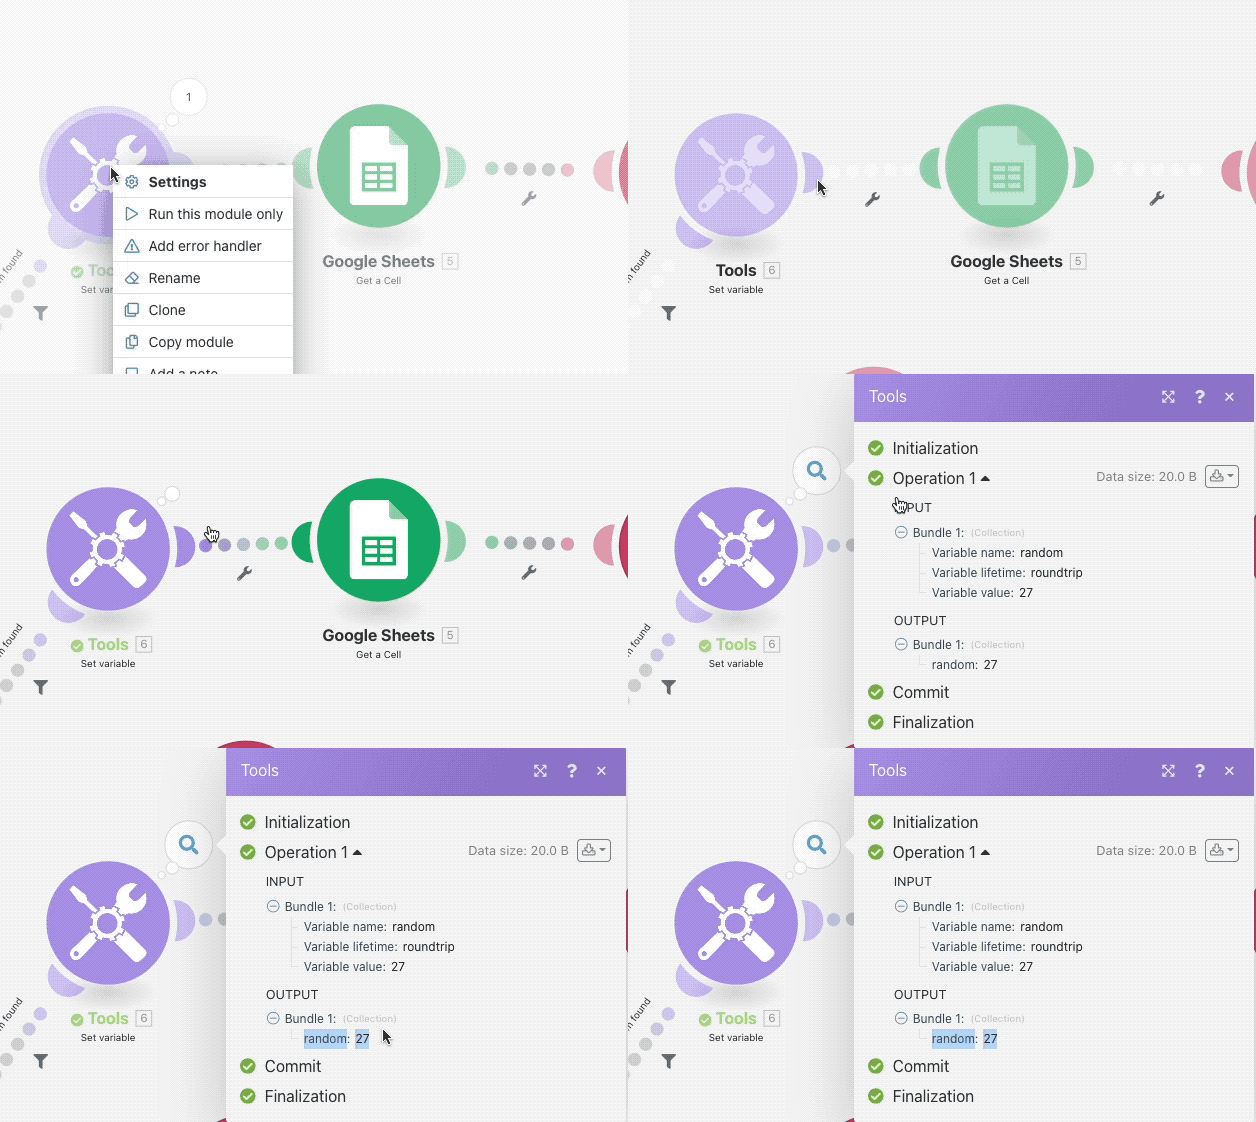
Great progress so far! We are able to generate a random number which takes us one step closer to completing our scenario.
Pulling a team name through the random number
Now that we have generated a random number, we can use this number to pull a team name from our Google Sheet. Subsequently, we will push this team name to the bot user using a webhook response module.
But first, let's setup the Google Sheet module to pull the team name. Add another module after the 'Set Variable' module and look for 'Get a cell' in Google Sheets.
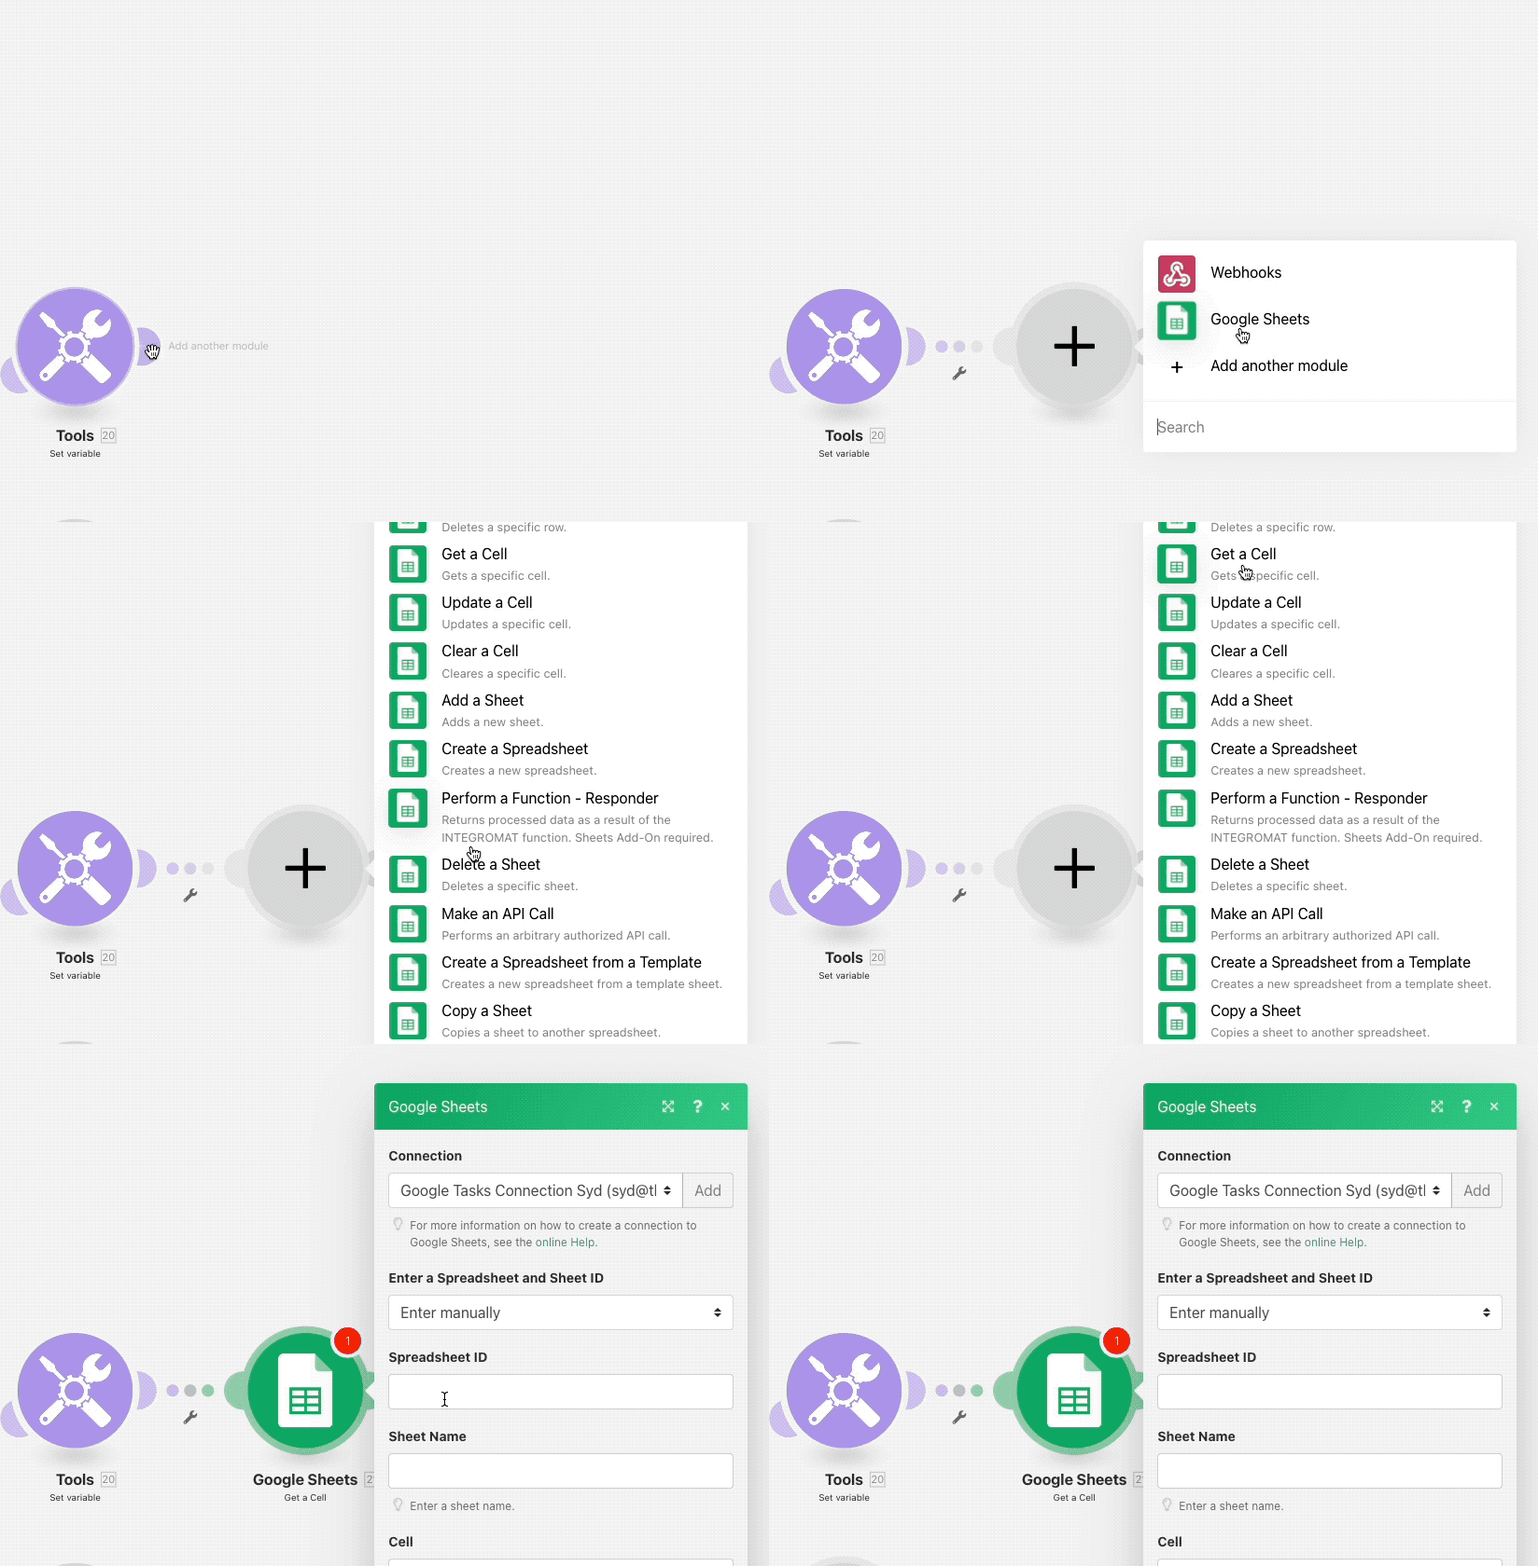
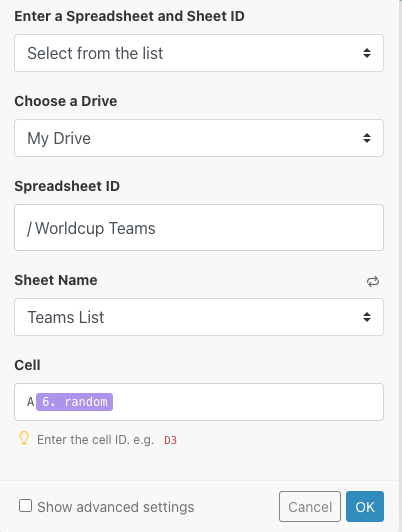
After adding the module, point out to our Google Sheet which contains the team name. In the 'Cell' value, type 'A' which is the cell containing all the team names. After 'A' add the output from the module which is generating our random number. In our use case, it's the variable 'random'.
If you have used the same variable name when setting up your module, you can use the following code to paste in the 'Cell' section:
A{{6.random}}The scenario will look like this:
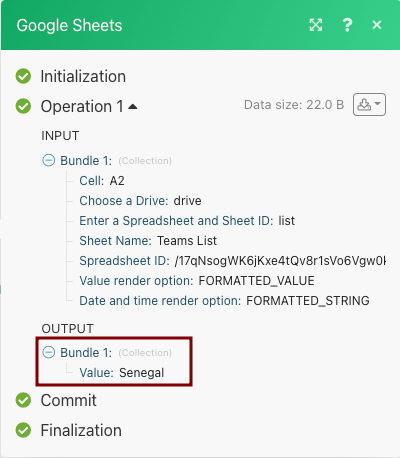
If you run the scenario now, the 'Get a Cell' module output should display a team name as you can see below:
Setup the Webhook response
In this step, we will configure our webhook response to send the team name back to the bot user as a message.
Along with the message, we are also assigning the team name to an attribute 'team' to store it within our bot platform. This can come in handy in setting up segmented messaging in the future from within the platform.
After the 'Get a cell' module, add another module and search for 'Webhook Response'
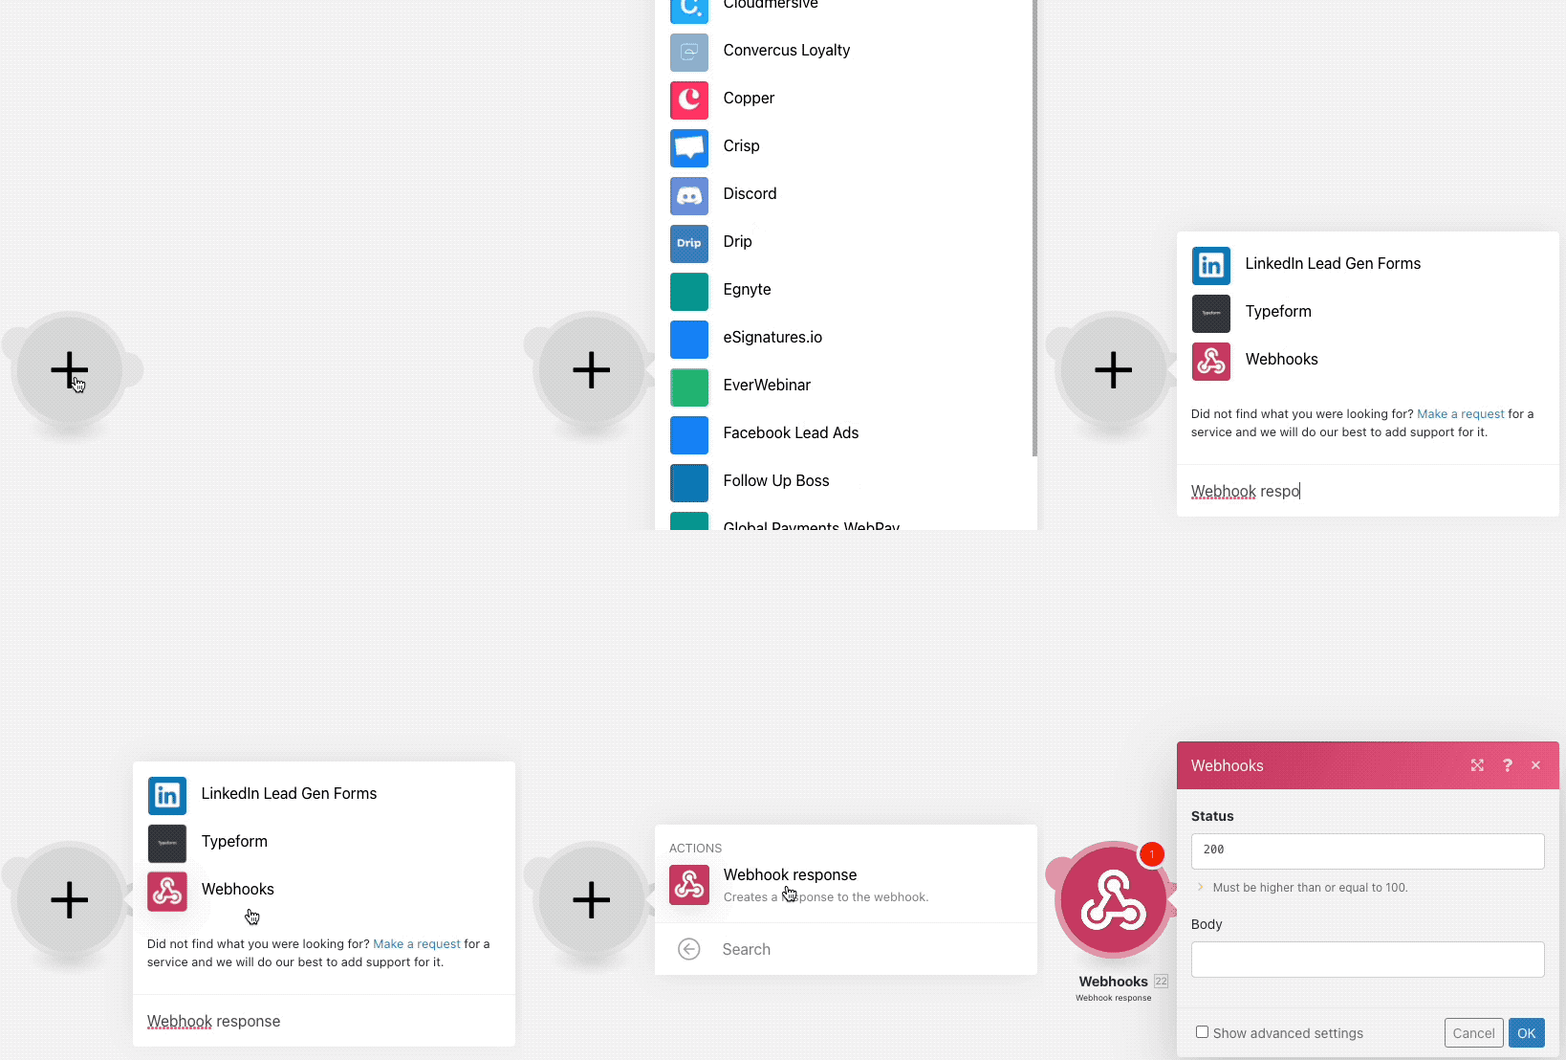
Use the following JSON code for your webhook response:
{
  "recipient": {
    "id": "{{3.fbuser.fbid}}"
  },
  "message": {
    "text": "Your team for the torunament is {{5.value}}"
  },
"set":{
"$team":"{{5.value}}"
}
}
Note
- The 'fbuser.fbid' output is taken from the webhook, this identifies the bot user who is receiving the Webhook response.
- The team name in our use case is from the output variable '5.value'. This can be different for your use case, use the team name output value from your 'Get a cell' module if the variable title is different.

At this point, our scenario will be able to find a random team and send it back to the user as a bot message. We can extend this scenario further and capture the assigned team name in a Google Sheet if you don't want the user to go through multiple team selections.
Capture team assignment in Google Sheet
This is the second-last step of our Make(formerly Integromat) scenario. Here, we will add another module after webhook response to capture the assigned team name and some other pieces of information about the user. Capturing this information will ensure the assigned teams are recorded against the bot users.
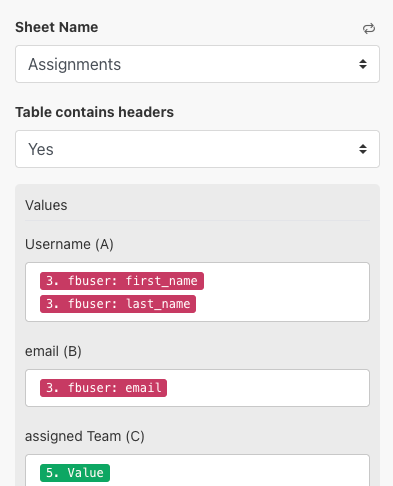
Add the Google Sheet module and look for 'Add Rows'. If you are using the template used in this tutorial, we will input the following values:
- Username (From the webhook module)
- email (From the webhook module)
- Assigned Team (From the 'Get a cell' module)

The 'Add row' configuration will look like below:
The captured information should look like below:

Final step: Configure webhook response when a team is already assigned
The above step will come in handy when our webhook is initially triggered and it goes through the 'Search Rows' module. If it finds the user's email address in the 'Assignments' part of the sheet, the flow will not assign the user with a new team name.
In this last step, we will configure another webhook response to let the user know that a team is already assigned to them. This webhook response will be added to the second part of our 'Router' module configuration:
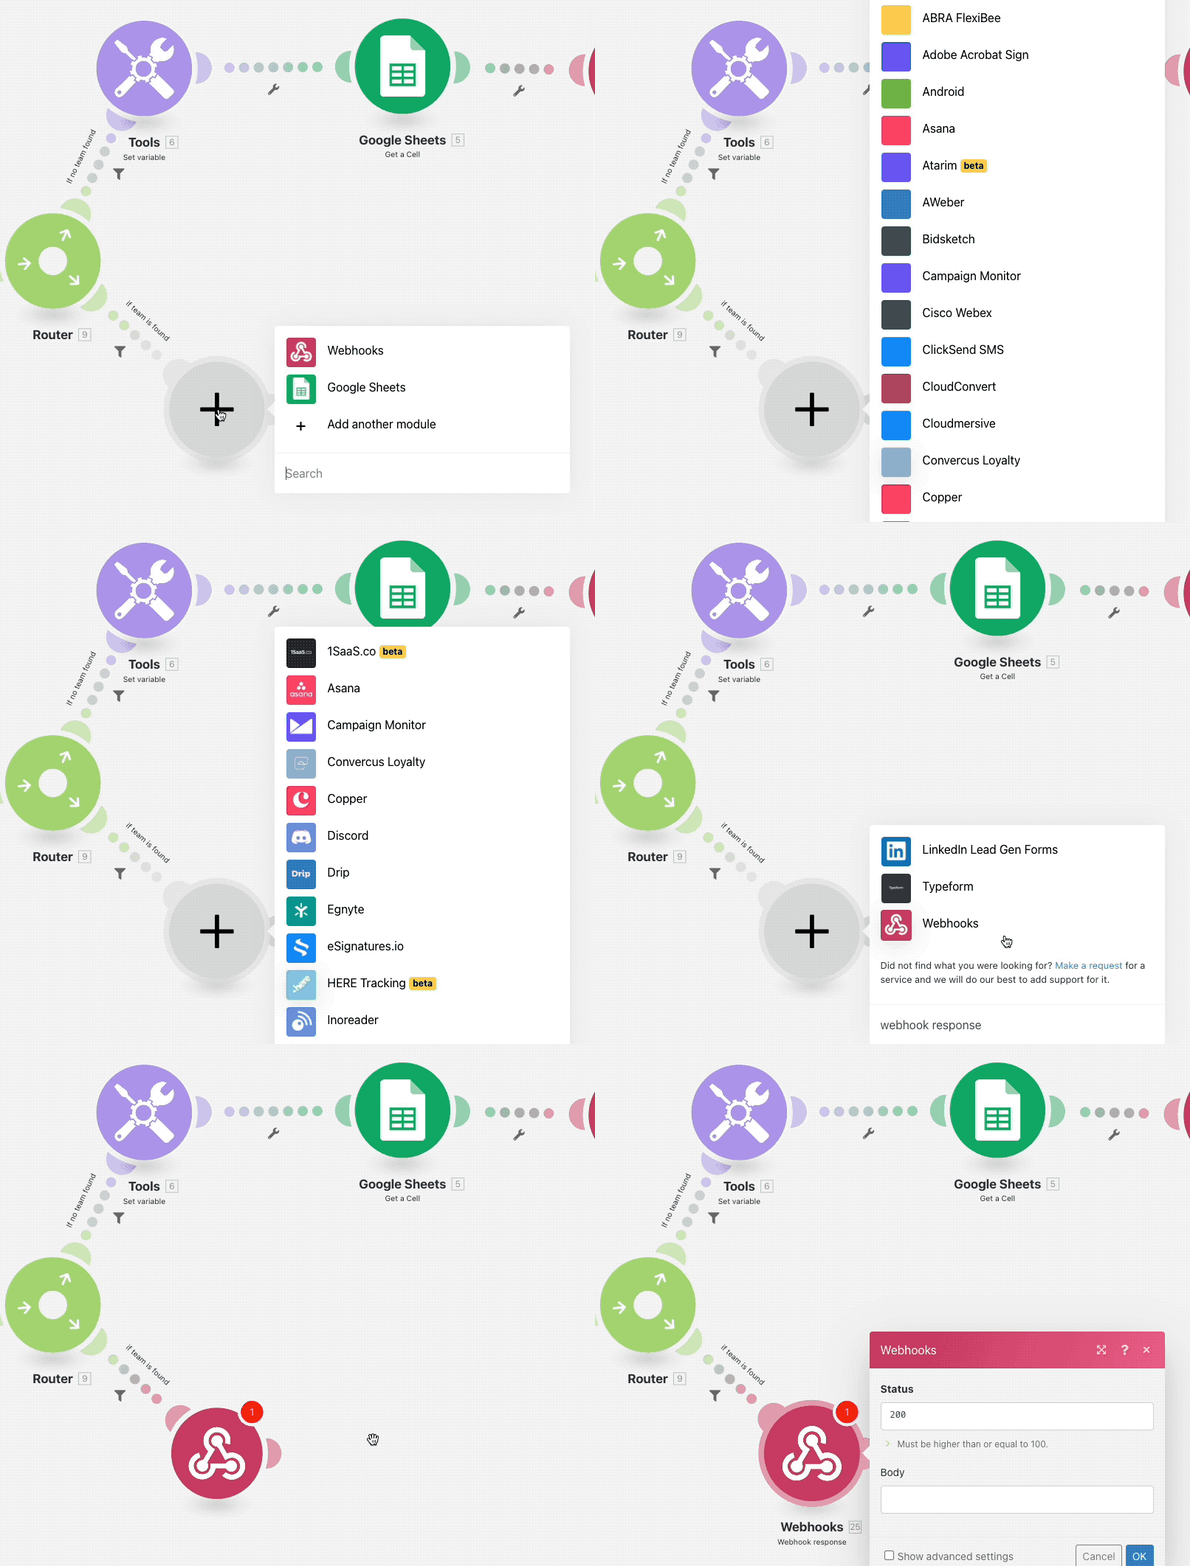
We will compose a simple text response, inputting the name of the assigned team to let the bot user know that a team is already assigned to them.
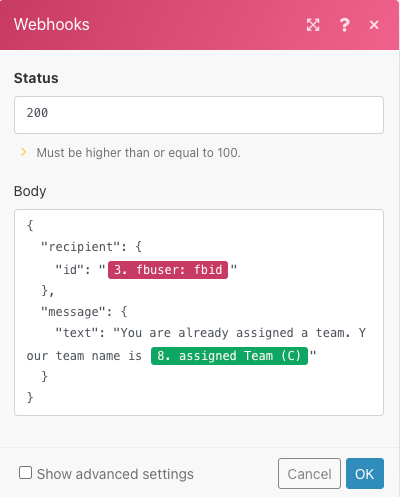
You can use the code below:
{
  "recipient": {
    "id": "{{3.fbuser.fbid}}"
  },
  "message": {
    "text": "You are already assigned a team. Your team name is {{8.`2`}}"
  }
}
Adjust the variables in the example based on your use case. We are pulling the following information from previous modules:
- The fbid of the bot user (from webhook module)
- The assigned team name (from the 'Search rows' module)
Your configuration will look similar to the example below:
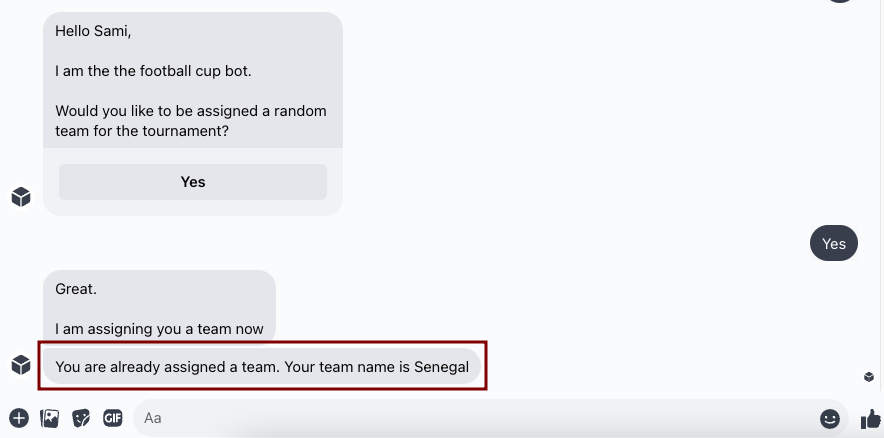
Now if a bot user with an already assigned team try to initiate the team assignment message again, they will get the above message.
All done!That was the last step, you are all done.
Have fun and good luck with your team assignment!
Updated 9 months ago
