Creating a Secret Santa Bot
Knowledge Level: Advanced
Purpose
In this tutorial, we will show you how to create a Secret Santa bot. The bot will collect all users who sign up in a spreadsheet. Then it will randomly match each person up and after a certain date, it will send them out a message to tell them who they have been matched with.
Pre-requisite
For this tutorial we will need:
- A bot
- A Make account
- A Google Sheet
- A beverage. Based on the season, I went with a Caramel Brulée Latte from Starbucks.
Setting up the bot
Our bot flow for the sign up process is super simple. We have a welcome message which asks if they want to join in with secret Santa and two buttons; yes and no. Each of those then goes to its own message with a confirmation that they either have or haven’t signed up. We have also added in questions that capture the user's address and asked them to list a few things they like. In the signed up message, we will also add a webhook which will trigger our Make(formerly Integromat) scenario.
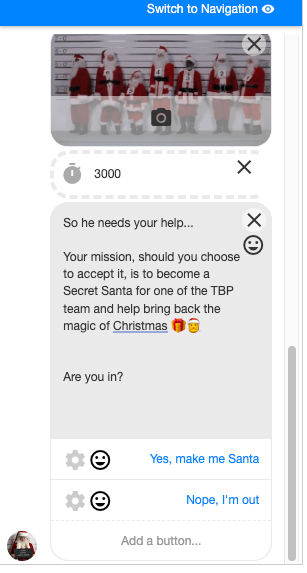
Welcome message with a Yes/No option.
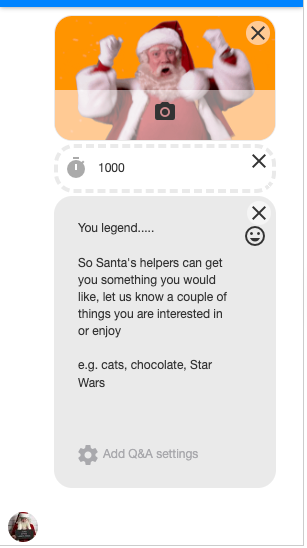
Asking user what they are interested in e.g cats, chocolates, star wars
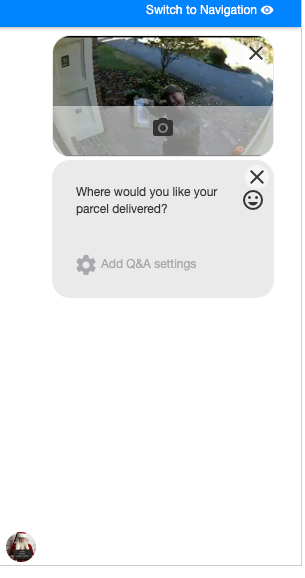
Asking user for delivery address
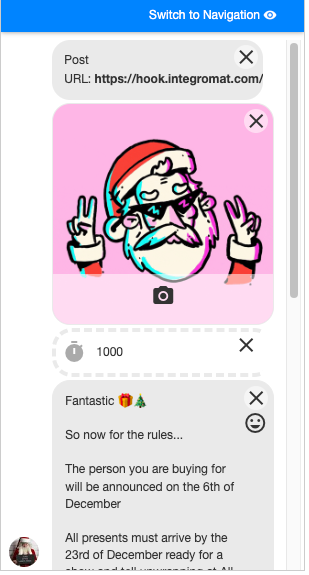
Confirmation of user submission and webhook trigger
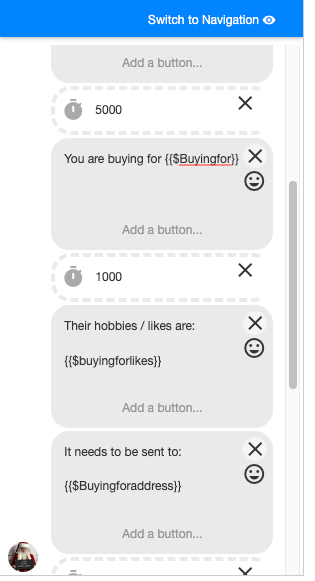
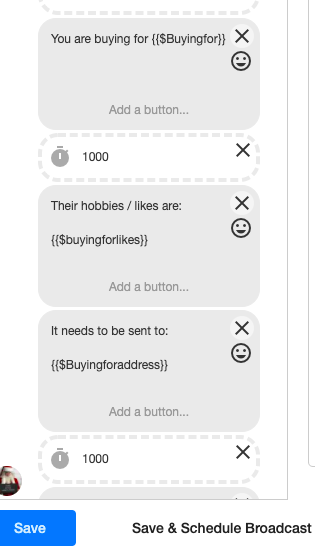
Announcement message part telling the user who they are buying for and what do they like
Setting up the Spreadsheet
Now we need to create a spreadsheet to collect our sign ups and match people up. In our spreadsheet, we want three columns, the name of the person who has signed up, their email address and a column for the name of the person they have been matched with.

Setting up the Make(formerly Integromat) scenario
a) Configure and test the webhook
Let’s head over to Make(formerly Integromat) and set up a new scenario.
Add a custom webhook module and add a new webhook.
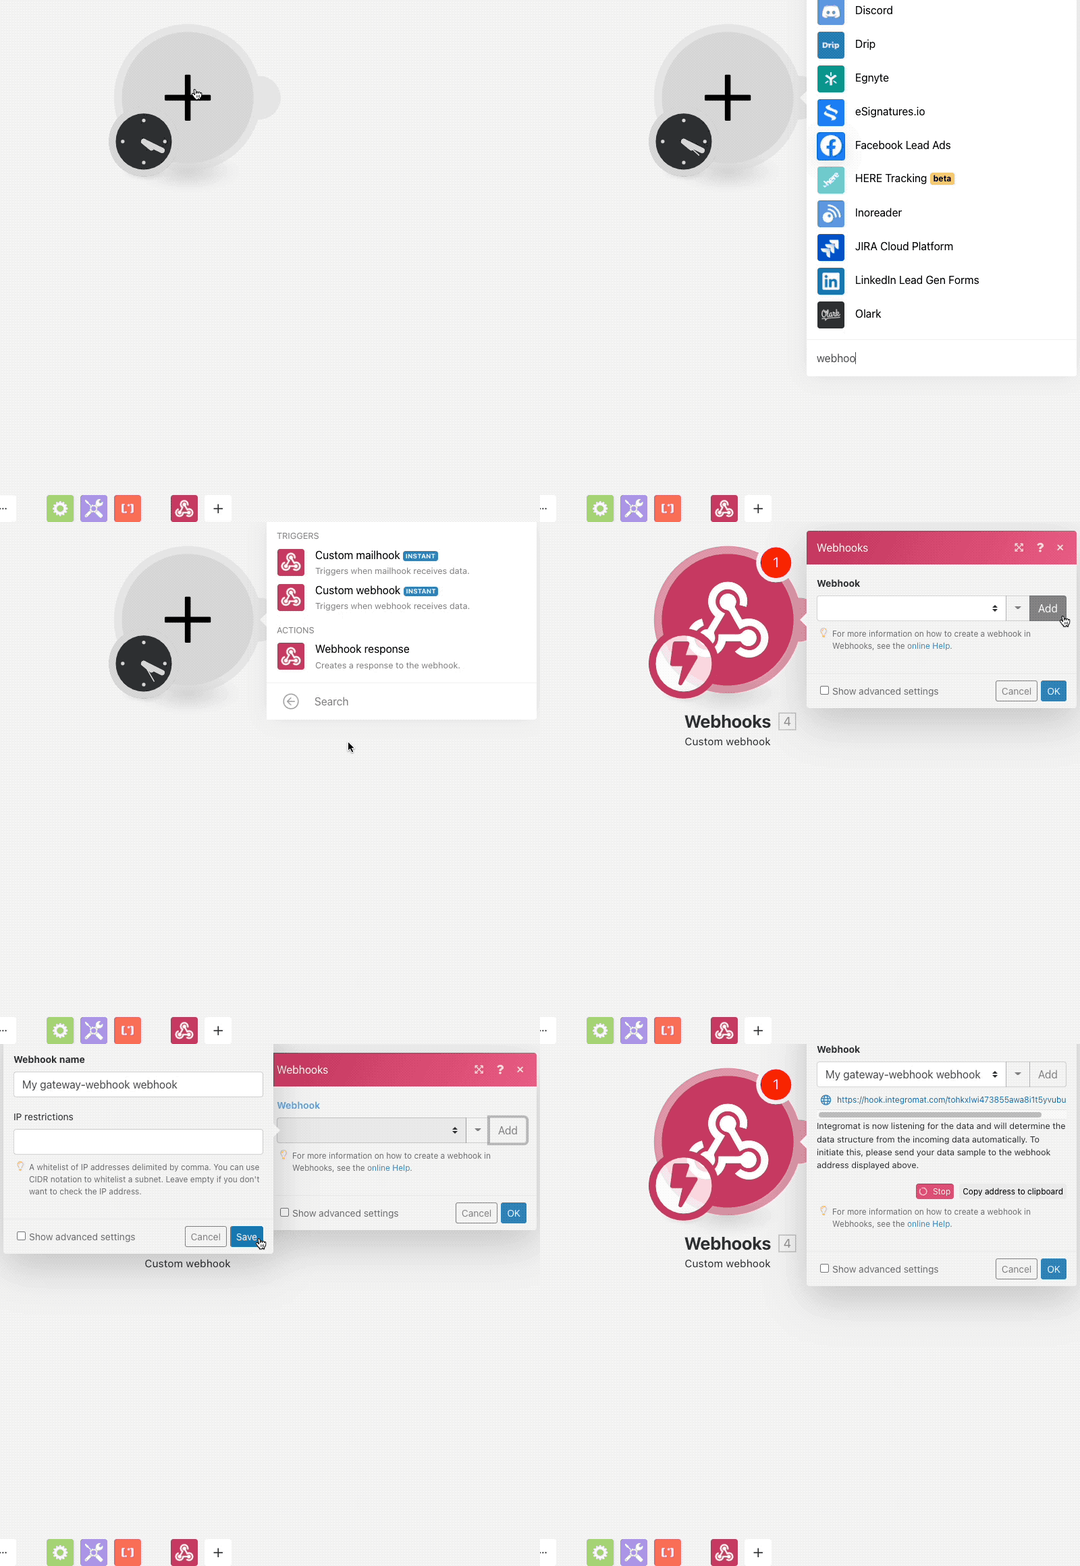
Copy and paste the URL into your bot in the webhook message as shown above in the section where we setup out bot.
Now hit the run once button in Make(formerly Integromat) and go through the entire bot conversation until the point where the webhook is triggered. This will allow us to pull through data in the webhook that we can use in the rest of our scenario.
b) Add Google Sheet (Search Rows) module
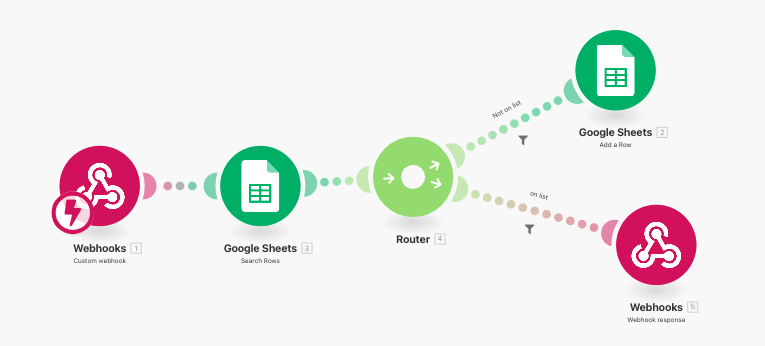
Now we need to add a Google Sheets search rows to check to see if the person has signed up already. So, add a Search Rows module from Google Sheets
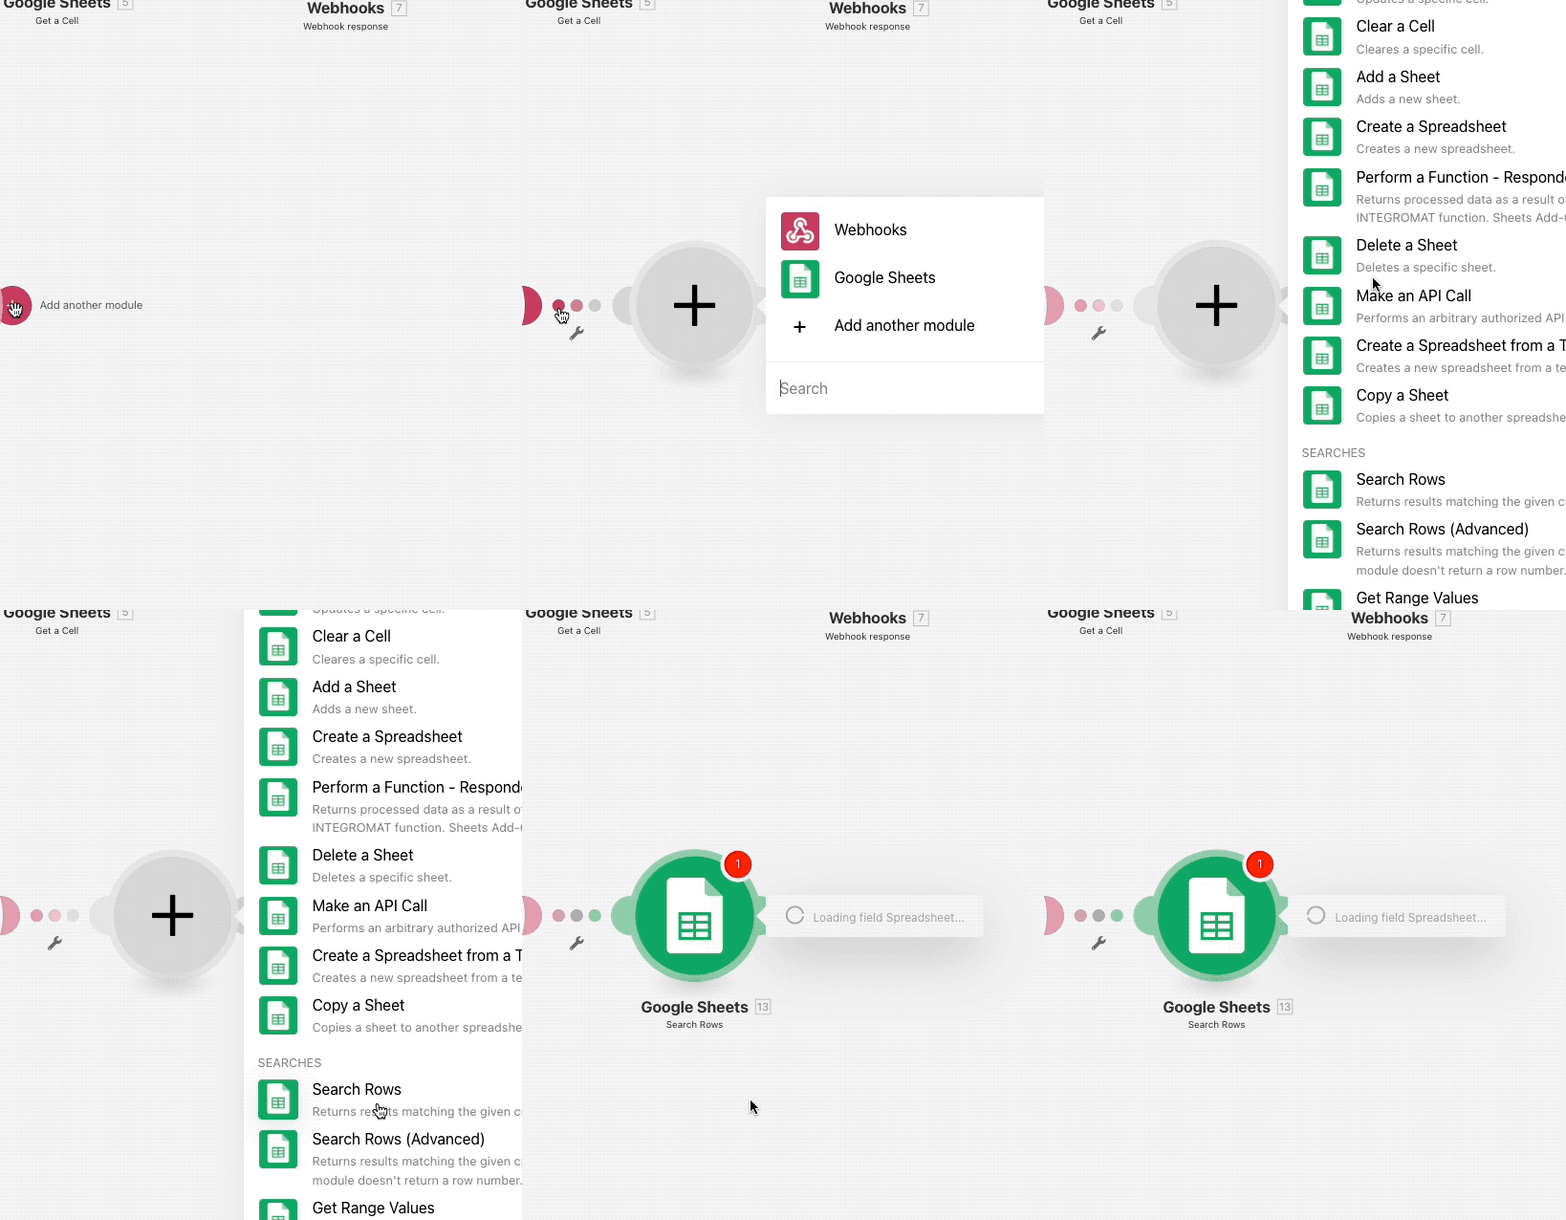
We don't want someone taking part more than once!, to avoid this we will add a search filter in this module to look for any existing entries.
Configure the filter with the webhook information as shown below:
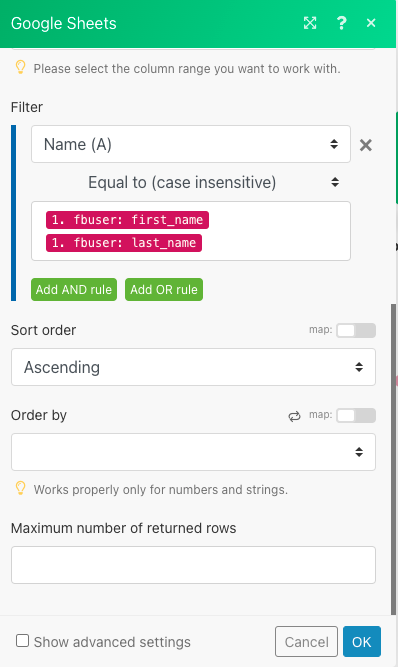
In the filter, check to see if the name column, contains (case insensitive) the firstname and lastname pulled through from your webhook.
b) Add a router module to control the scenario flow
Then we want to add a router module. This allows us to filter out those who have already added themselves to the list and those that haven't.
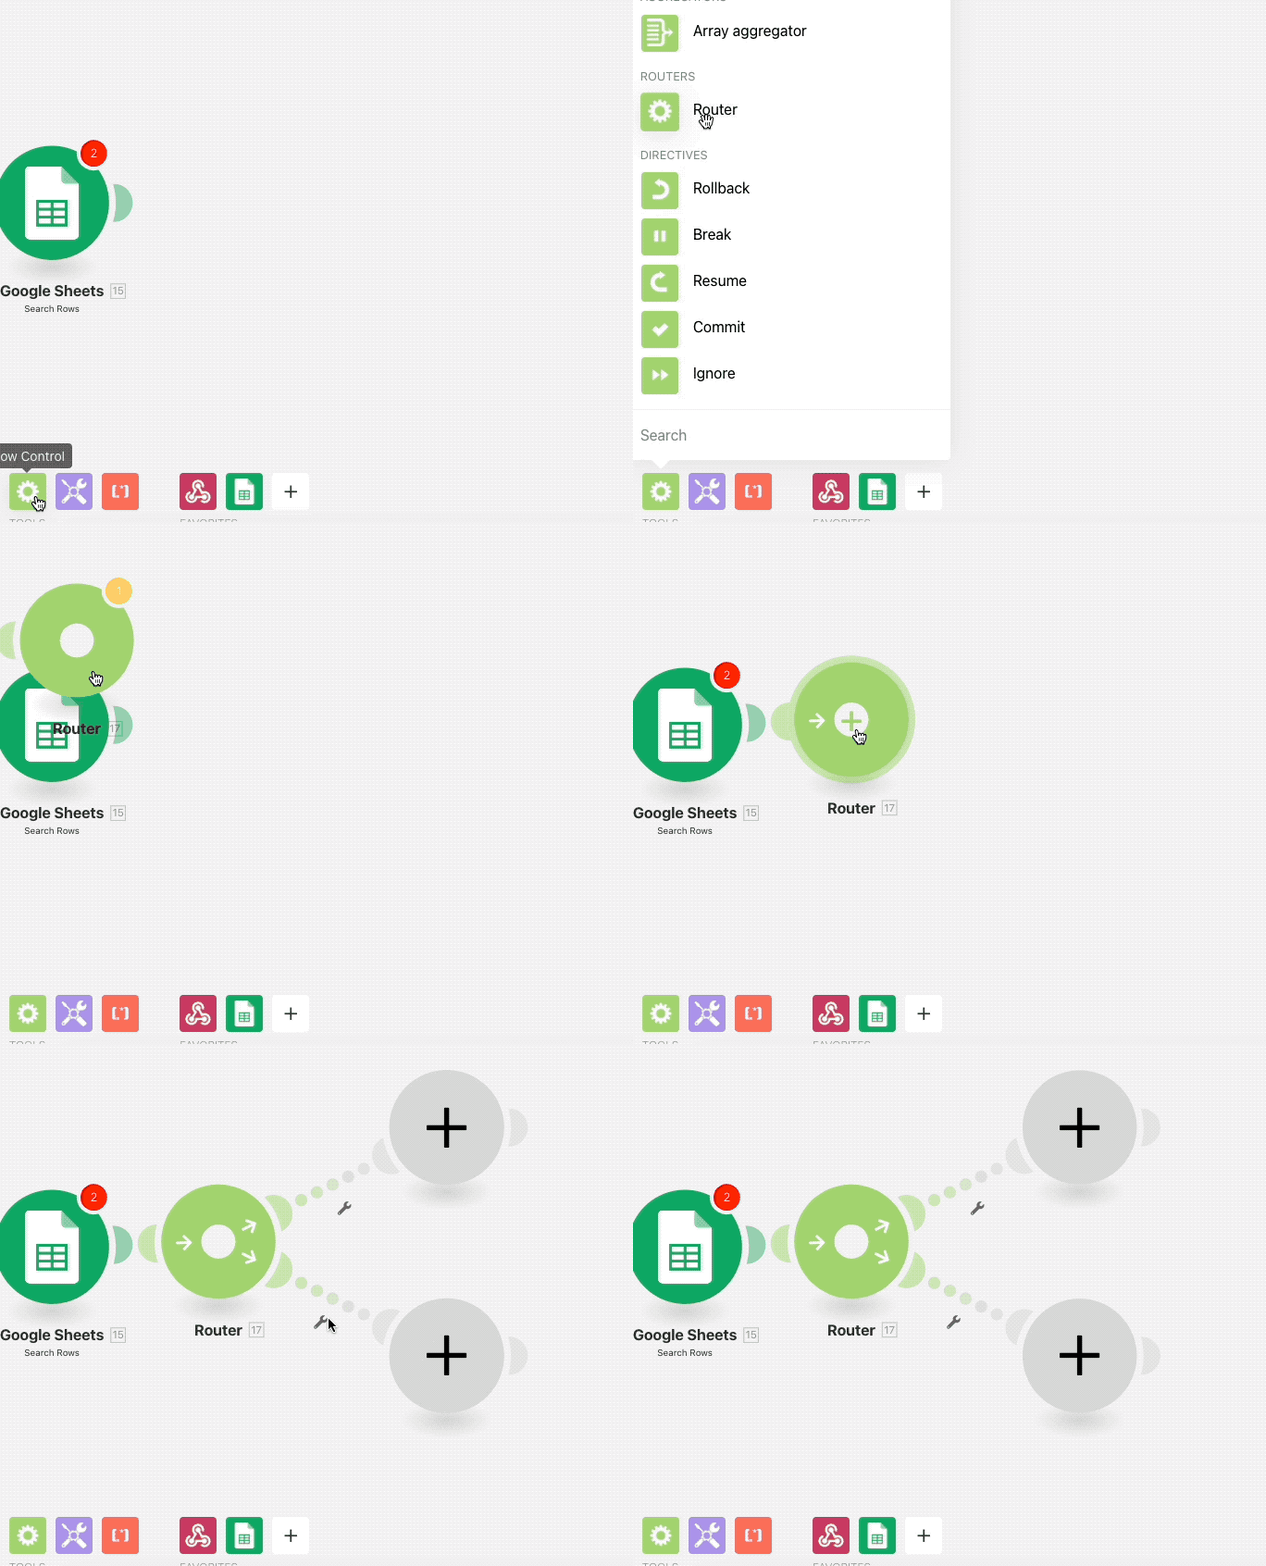
For those who don't exist in the list yet, we will pass on their information to a Google Sheets add a row module on one of our branches. Select your spreadsheet from the list and then the sheet you are storing your data in. Now we need to add our data to the right column in the spreadsheet.
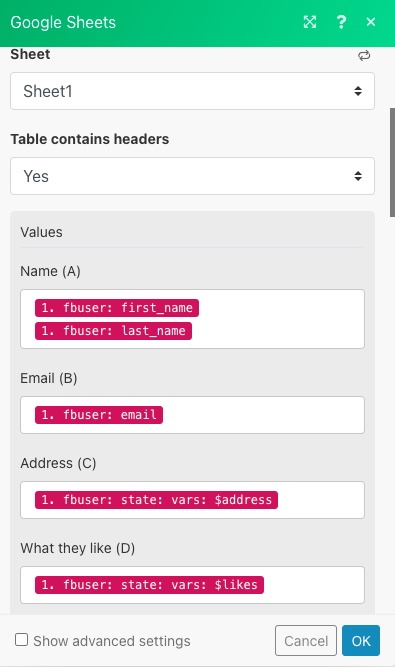
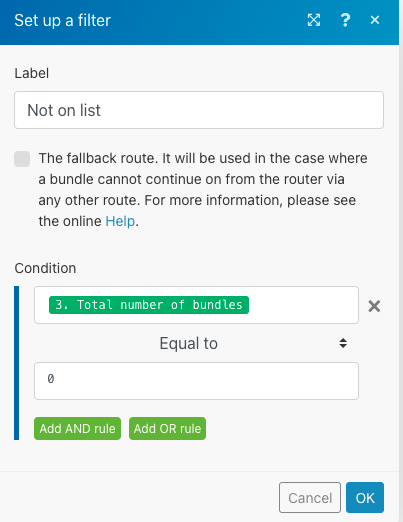
Click ok and then we need to add a filter on this branch so it only adds people it can't find in the first search rows module. So add a filter that ensures this route only runs when the total number of bundles found in the search rows step is equal to 0.
Now we need to add our branch that returns a message to the user that tells them they are already signed up. For this we need to add a webhook response module. In the body field, you want to add the following code.
{
  "recipient": {
    "id": "{{1.fbuser.fbid}}"
  },
  "message": {
    "text": "Cheeky, I see you trying to get on the list twice.  I should put you on the naughty list, but you're in luck and I'm feeling generous. Here are the rules as a re-cap"
  }
}
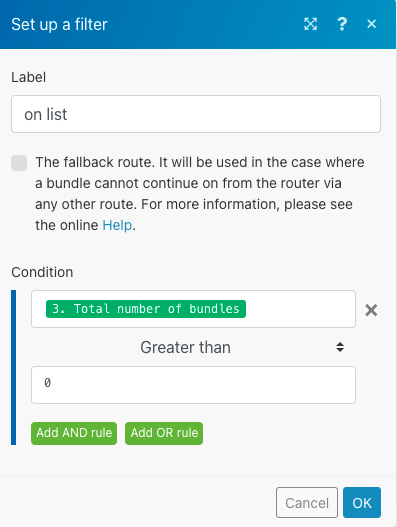
Swap out the fbid for the FBID pulled through from your webhook. Click ok and now we can add our filter on this step. We want to check that the total number of bundles is greater than 0. e.g. their name is already found on the spreadsheet.
This scenario is now complete so turn it on and set it to run immediately.
Now we need to set up the scenario that matches up users and tells each person who they have been assigned to.
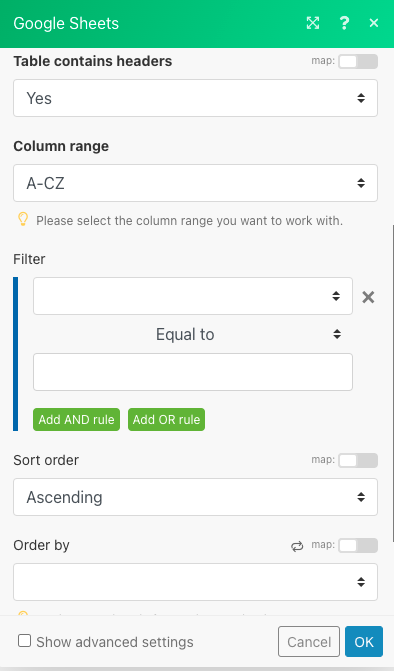
Add a few dummy names to your spreadsheet so we can build and test the next step. Create a new scenario in Make(formerly Integromat). Our first step is a Google sheets search rows. This tells us how many people have signed up for our secret Santa. You don't need to add any filter criteria as we want to get all the users signed up.
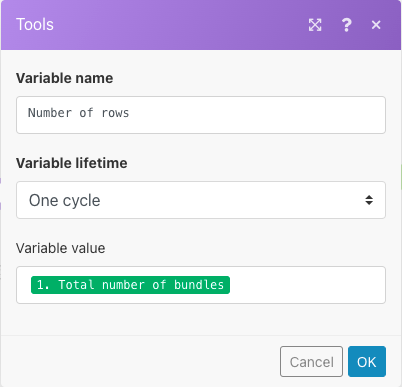
The next module we need to add is a Set Variable. We want to give this variable the name 'Number of rows' and in the variable value field, you want to use the number of bundles from the search rows step. This tells us how many people have signed up.
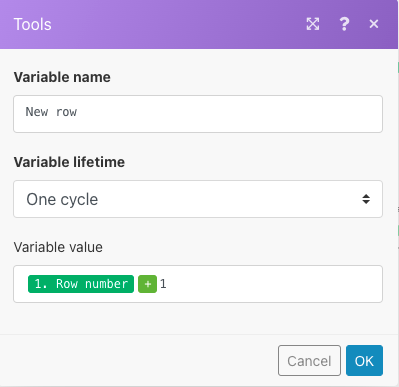
Next we want to add another Set variable module. This time we want to call it New row. We want to give it the value of Total number of bundles + 1 . Make sure that you use the mathematical function to add in the + symbol. If you type '+' it will not work.
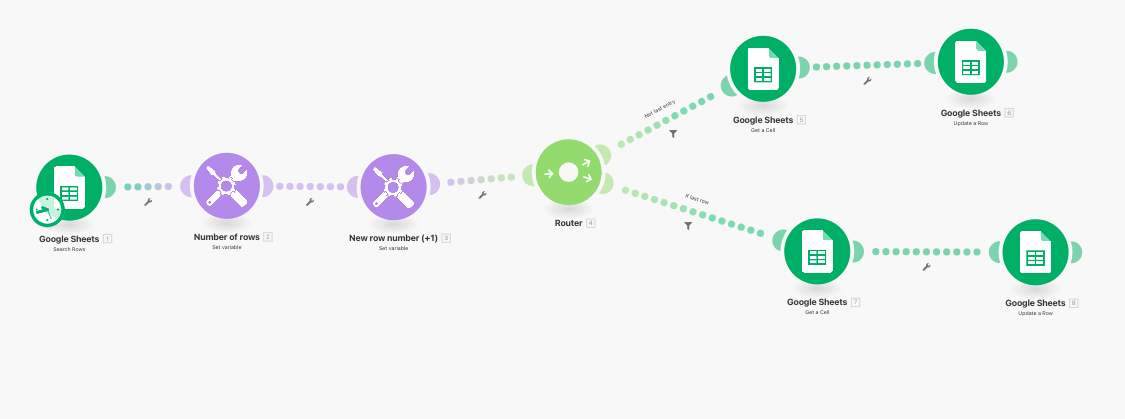
Next we need to add a router so we can process the bulk of the entries but have a special case for when they are the last user added to the spreadsheet. First we will do the top route, which will cover all of the entries into the spreadsheet except the first and the last. You want to add a Google Sheets, Get a Cell module. You want to use the column that the name of the person signed up appears in, which in my case is column A. Then you want to use the new row variable to get this new cell.
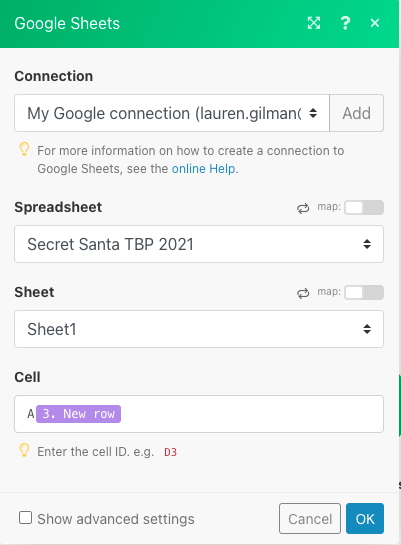
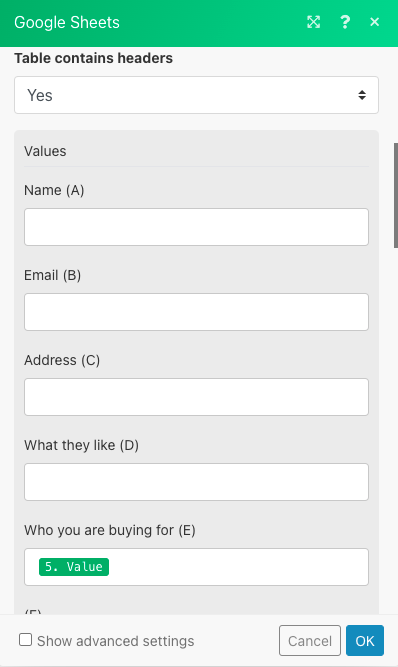
Now we want to add a Google Sheets Update a row module. You want to update the row number from the first google sheets search rows. You want to update the matched with column to contain the previous get a cell step.
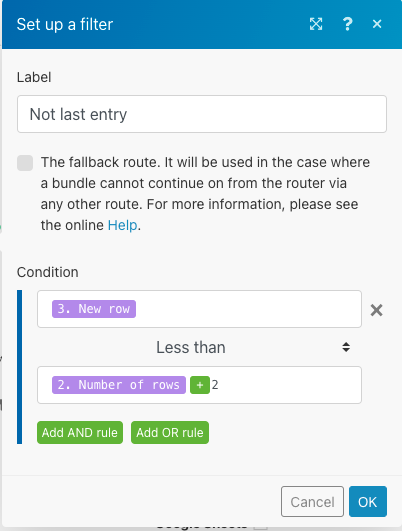
Now we need to add a filter to this step to ensure it only happens for all the rows except the first and last.
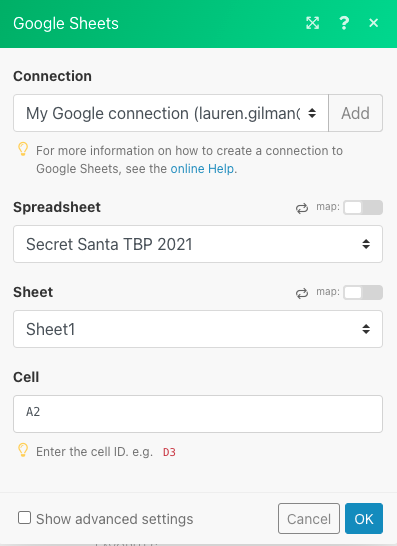
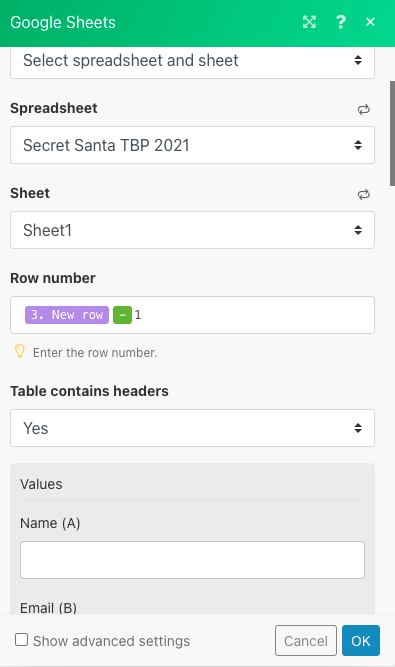
On the other branch of the flow, we need to add a Google Sheets Get a Row. This time we want to get cell A2, since we know that is the row of the very person added to our list.
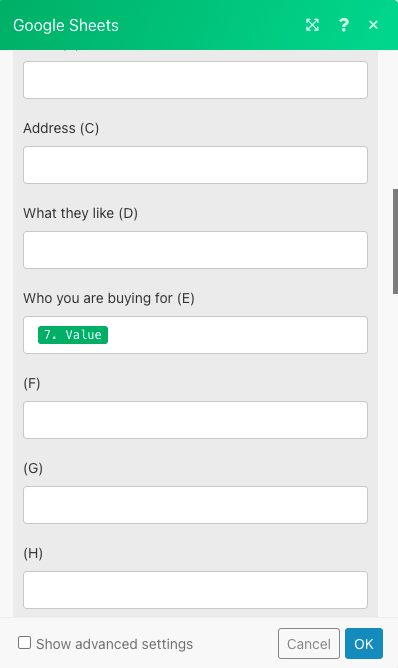
Next we need to add another Google Sheets update a row module. In our row number, we want to use New row -1 (again making sure you use the - symbol from the mathematical functions). You want to update the 'Who matched with' column to use the result from your previous get a cell module.
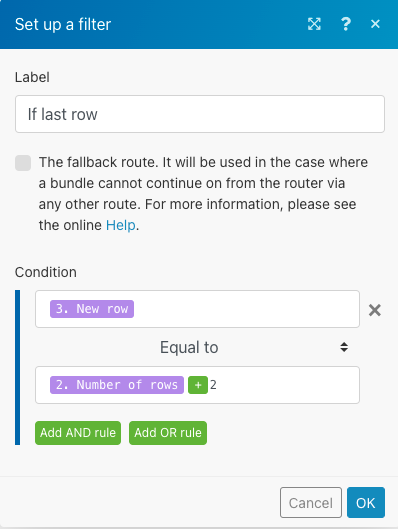
Finally we want to add a filter on the route so it only runs for the last entry in the list.
Our complete flow for this step looks as follows:
We need to ensure that this flow runs automatically on a certain date after the signups for our Secret Santa has closed. To do that, click on the Schedule setting button next to run and select 'specified dates' from the run scenario dropdown. Then you can select the exact date and time you want the match up to happen.
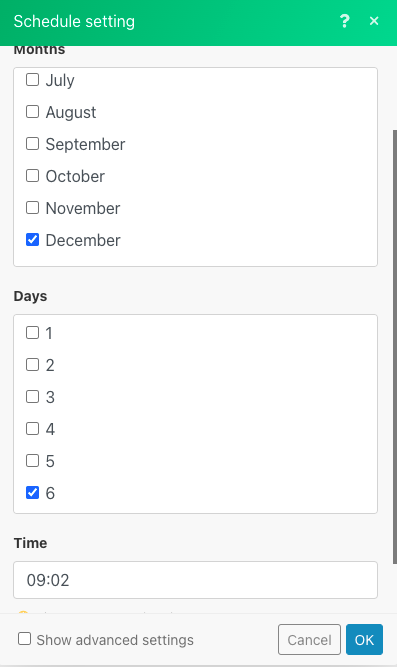
Now you can turn this scenario on.
Our final scenario triggers the message to the user to tell them who they have been matched with. First we need to head back to the Bot Platform to set up the API connection we need. Scroll down the left hand menu and find API access. Click on create app and click OAuth2. Then in the next menu, make sure you have Client Credentials selected. Give your app a name. Then click next. You will now be taken to a screen that has your client id and client secret. Make a note of these as they are only displayed once and you will need them later.

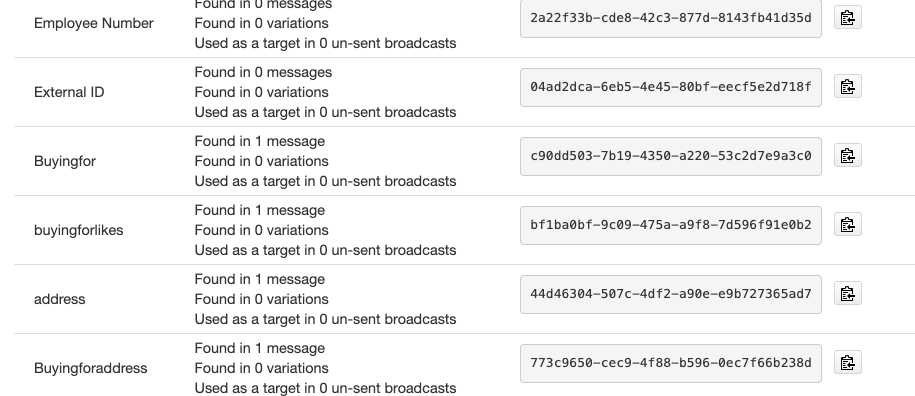
Next, on the left hand side, find the manage attributes menu. Click on create attribute and we need to create 3 new attributes to store the name of the person we are buying for, what they listed as their likes and preferences and their address. You can call these what you like, but in our bot they are called Buyingfor, Buyingforlikes, Buyingforaddress.
Now let's head back to Make(formerly Integromat) and create our scenario. The first module we need to add is a HTTP Make a Request module. This generates a bearer token which acts as a kind of password for our API connection. In the URL field, paste the following: https://api.thebotplatform.com/oauth2/token
Change the method to POST
Change the body type to Application/x-www-form-urlencoded
Now we need to add three fields as follows:
Key: client_id and in the value paste the client id you generated in the previous step
Key: client_secret and paste in your client secret
Key: grant_type and paste in client_credentials
Make sure the Parse response box is ticked. Now run your scenario.
Next we need to add a Google Sheets search rows, but you don't need to include any filter criteria as we want it to get all the entries in our spreadsheet.
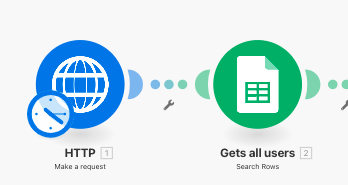
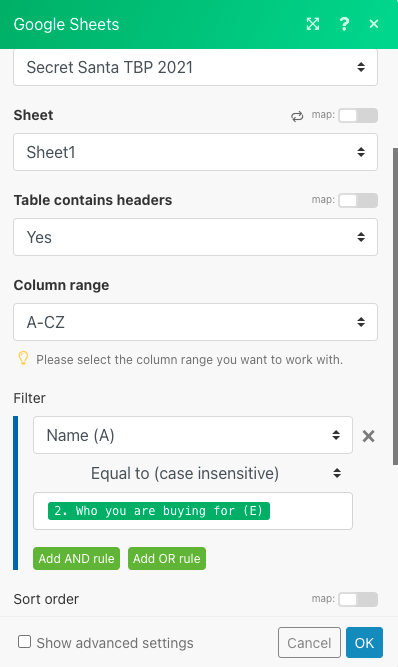
Now we want to get the likes and address for the person that we will be buying for. To do this, we need to add a Google Sheets search rows module. In our filter, we want to search for The name column is equal to the who we are buying for in the get all users step.
Now we want to encode the URL. To do that, we need to add a Set variable. Give it a name of user encoded. For the value, you want to find the encodeURL() function. In the brackets, use the email from our first google sheets search rows. Make sure it is the first google sheets module or else you will be messaging the wrong person.
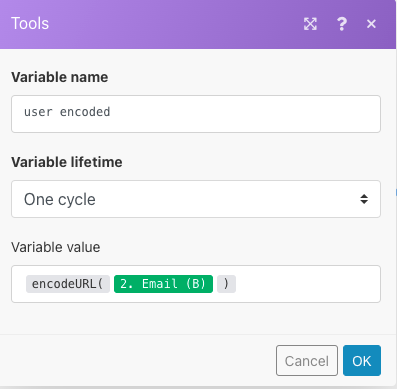
The next module is a create JSON module. Click add next to the data structures and copy in the following code:
{
     "data": {
          "type": "user",
          "attributes": {
               "state": [
                    {
                         "userattribute": {
                              "id": "497f6eca-6276-4993-bfeb-53cbbbba6f08"
                         },
                         "value": "hello1"
                    },
                    {
                         "userattribute": {
                              "id": "497f6eca-6276-4993-bfeb-53cbbbba6f08"
                         },
                         "value": "hello"
                    },
                    {
                         "userattribute": {
                              "id": "497f6eca-6276-4993-bfeb-53cbbbba6f08"
                         },
                         "value": "hello"
                    }
               ]
          }
     }
}
Click save and the JSON module will update and give you some new boxes to populate. In the data, type box, type 'user'. Now click the Add Item under state.
In the ID box, you need to go back to The Bot Platform and to the manage attributes page. First find the buying for attribute and copy out the long ID number. Paste that in the ID box in Make(formerly Integromat) and then in the value box, use the person you are buying for from the first google search rows module.
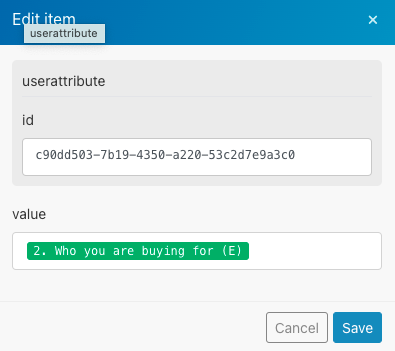
Click save and we now need to do the same for Buyingforlikes and Buyingforaddress, but this time you need to use the data pulled from the second google sheets search rows step:
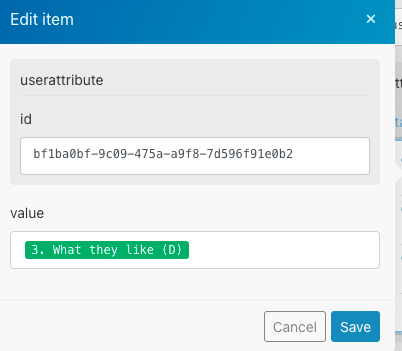
When complete, this module should look as follows:
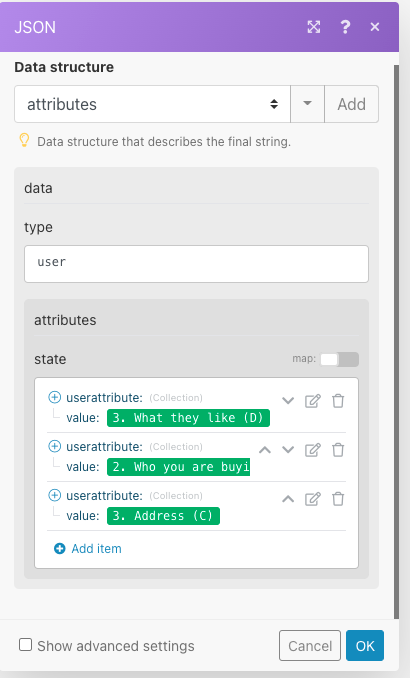
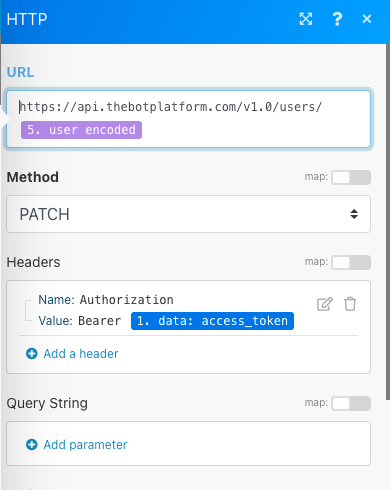
The next step is to send these variables into The Bot Platform using the API. Add a HTTP make a request module. In the URL field paste the following https://api.thebotplatform.com/v1.0/users/ and then add your user encoded variable onto the end of the URL.

Change the method to PATCH.
In the headers section, add a header. The name needs to be Authorization. In the value type the word Bearer and then use the Access Token generated by your very first HTTP module.
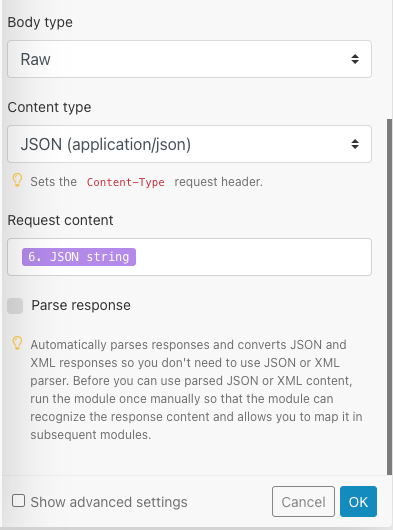
Change the body type to RAW. Change the content type to JSON.
In the body box, use the JSON you created in the previous create JSON step.
Now we need to head back to The Bot Platform and create a new message. This will be the message sent to the user to tell them who they are buying for, what they like and where the parcel needs to go.
Now we can add another HTTP Make a request step to our Make(formerly Integromat) flow.
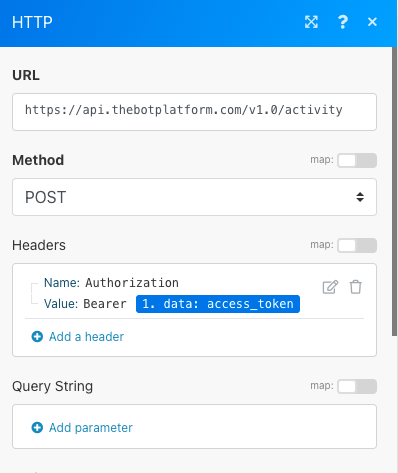
In the URL paste the following: https://api.thebotplatform.com/v1.0/activity
Change the method to POST. Add a header with the name Authorization and a value of Bearer and your access token generated in the very first module.
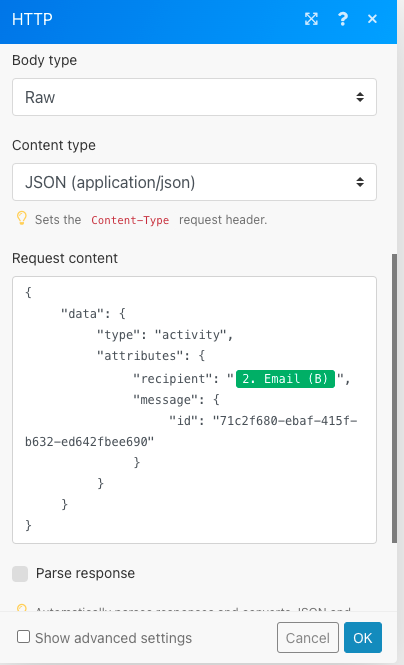
Change the body type to Raw and the content to application/JSON. In the request content, paste the following:
{
     "data": {
          "type": "activity",
          "attributes": {
               "recipient": "{{2.`1`}}",
               "message": {
                    "id": "71c2f680-ebaf-415f-b632-ed642fbee690"
               }
          }
     }
}
Change the recipient to the email found in the first google sheets search rows. In the ID field, you need to look up the ID of the message you want to send them which you created above. To get this ID, you need to go the messages list and find your message and click the options button to the right. It will then show you the long ID number you need.
Your completed scenario should look as follows:

The final step is to adjust the scheduling to ensure this flow runs on a certain date and time, AFTER the previous matching flow has happened. Then turn it on.
Updated 9 months ago
