Creating a Movember Bot
Using the Movember Bot template, we are going to set up your Movember Bot.
Using the Movember Bot template, we are going to set up your Movember Bot. You can customise your bot however you want, but we are going to cover the basics here.
We have produced a written and video tutorial for this bot.
Step 1 - Setting up the sign up process
For this step you are going to need The Bot Platform, a Google Sheet and access to Make(formerly Integromat).
First we want to create our sign up messages within the Bot Platform.
For our basic bot, we simply send the user a message asking them if they would like to sign up and to click yes or no. If they click yes, it takes them to a question on the style of moustache. If they click no, it thanks them anyway and lets them know how they can get involved through sponsoring.
If they click yes, we then ask them what style of moustache they are planning to grow.
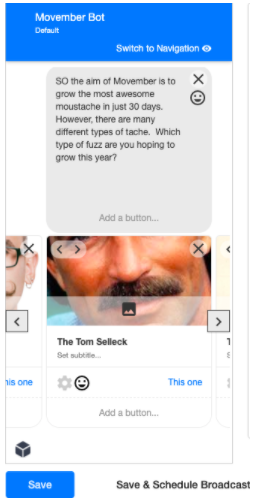
We save the type of moustache they choose against an attribute called $moustache_type.
We then send them to a final message in our sign up process. This message thanks them for signing up and lets them know that they will be receiving weekly moustache check in messages from the bot. We also add in a Set attribute message that sets the attribute Signed up to equal yes. This will allow us to send a broadcast out to all of the users that have signed up.
We also need to include a webhook message. This will allow us to push our list of subscribers out to a Google sheet, so we have a record of everyone taking part.
Another important part of your sign up message is to ask them to upload a picture of themselves before Movember so you can see how their moustache grows over the month.
When you have finished this message, you should have something as follows:
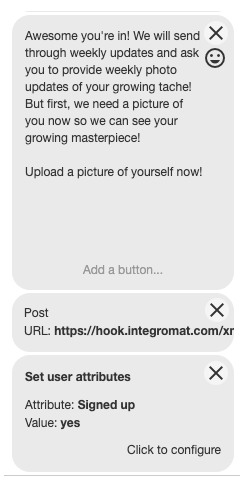
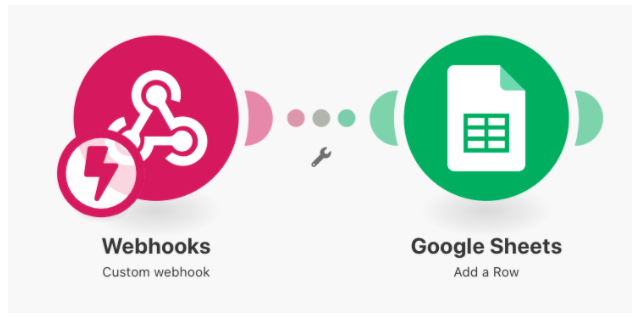
So now we need to set up our Make(formerly Integromat) scenario, this will push data from the bot into our google spreadsheet.
Open up a new scenario in Make(formerly Integromat) and on the white module, you want to add a custom webhook. Click add next to the webhook box and give your new webhook a name. Click ok and save and then you should see that you are now presented with a URL. Copy this URL and paste it into the webhook message in your final sign up message as shown above.
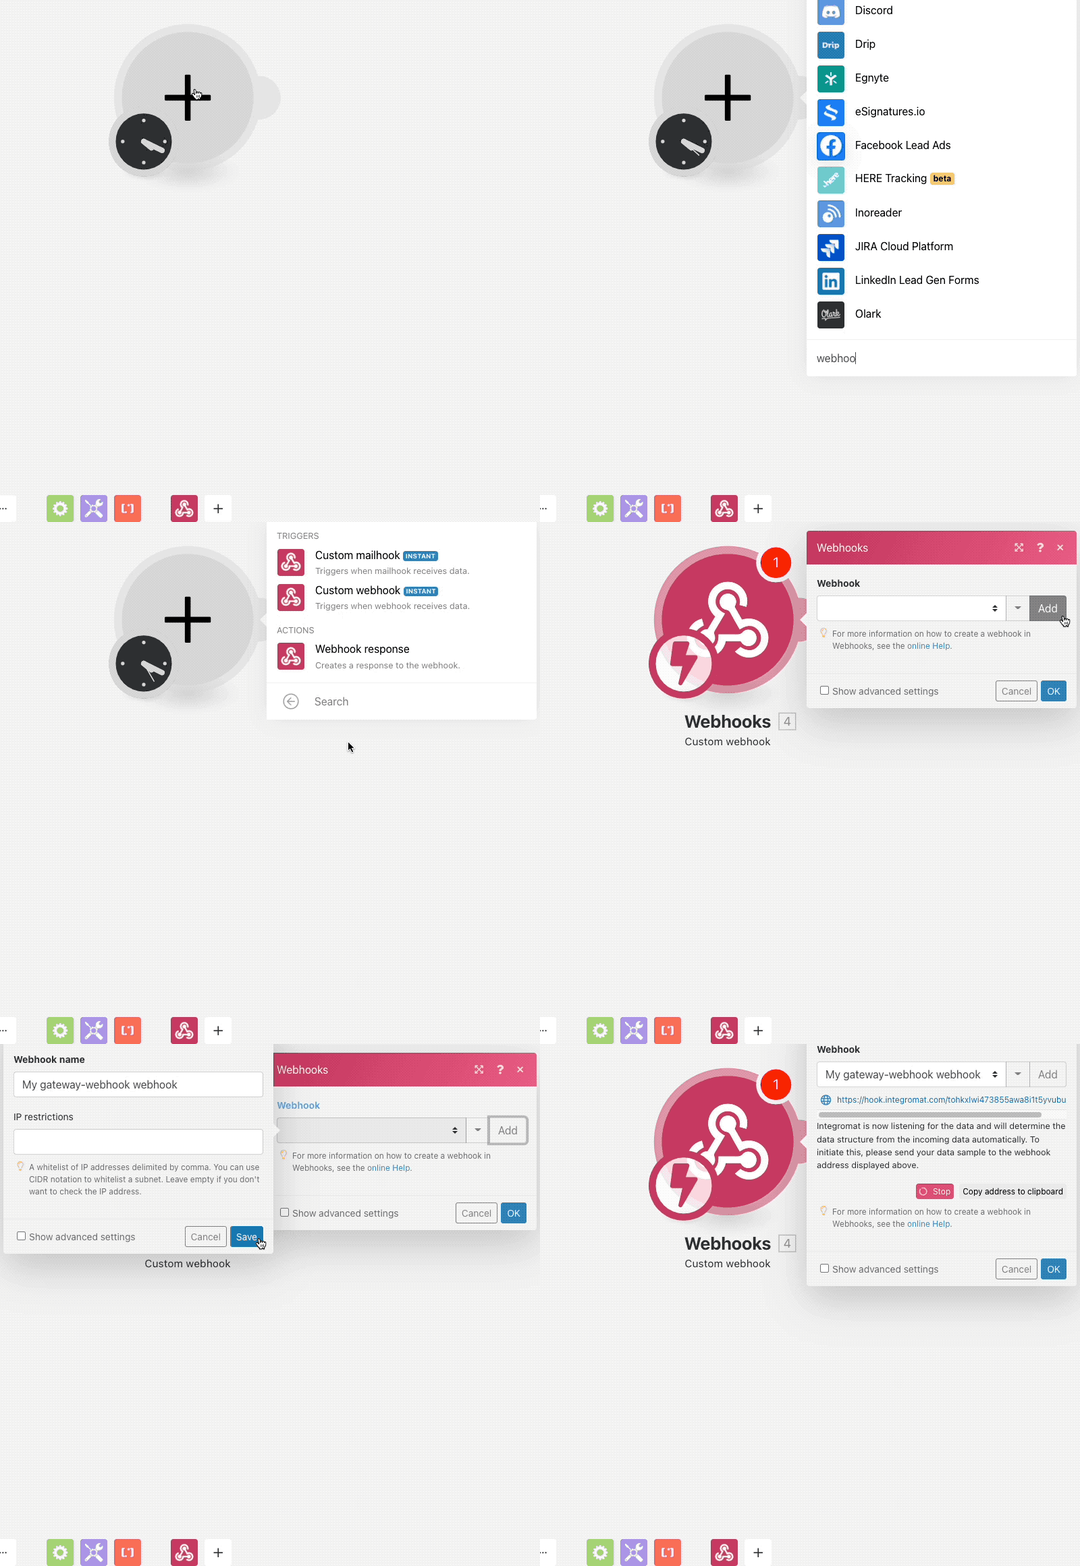
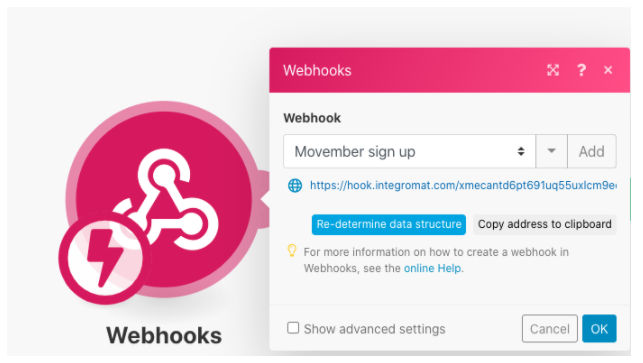
Click ok. Then we want to click run once on our scenario ( big blue button on the bottom left corner). We now need to trigger our webhook to pull data in. To do this, go back to the Bot Platform and click test on the first message in your sign up process. Run through the messages until you get to the last of your sign up messages, this will trigger the webhook.
You should now see that you have a small white circle with a 1 in it next to your webhook module in Make(formerly Integromat). This shows that it has worked and pulled the data in.
Now we need to pull the information from the bot into our google sheet. First, lets set up a Google sheet ready for our results.
In our sheet we have included the columns as follows:
Name of person
Type of moustache they are trying to grow
Their email address

Now head back to Make(formerly Integromat) and we want to add another module to our flow. Add a Google Sheets add a row module.
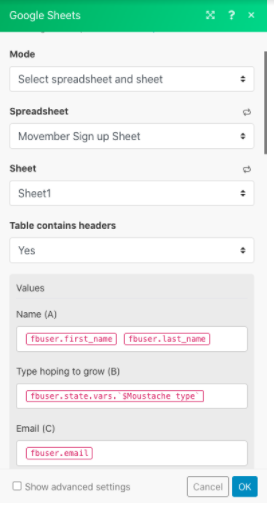
Select your spreadsheet from the drop down menu and then select the right sheet in your workbook.
You should see the columns pulled through. You want to populate the columns with the data pulled from your webhook. So we want to use Firstname and Lastname to populate our name field. We use email to populate the email field. Then we need to use our attribute Moustache_Type for the style field. You can find your variables by clicking the + symbol next to State and Vars in your webhook fields. Ultimately it should look as follows:
Click ok, save your scenario and move the slider to on and you have now completed the sign up step.
Step 2: Setting up our posting of images to a special Movember group
For the next step, we need to create a group, or decide which group we are going to post our Movember pictures into. For our bot, we created a Movember wall of fame group.
Once you have created your group, you need to create a publishing bot.
If you go to the integrations page of a group, and scroll to the bottom there is an option to “Create publishing bot”
Once you go through the steps you are presented, click on the newly created publishing bot.
You need to make sure that you copy the access token they give you. You cannot go back in and copy this token once you have created the bot, so it is vital that you copy this into another document you can refer back to while we are building this part of your bot.
We want this part of our bot to post any images that are posted by people taking part. So we want to create a message within the Bot Platform that we send to people whenever they upload an image. Our message just has a thank you message and it contains a webhook message.
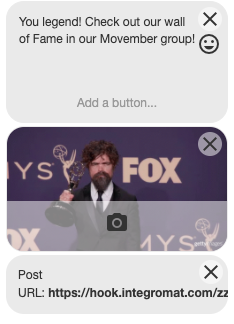
We now need to create another scenario in Make(formerly Integromat). Add a custom webhook module and create a new webhook to use in this part of our bot. Copy and paste the webhook URL generated into the webhook message as shown above.
Now we want to make sure this message is triggered whenever someone uploads an image, so in The Bot Platform, go down to the media responses section and then set this thank you message as the message to send anyone when they upload an image.

Now you want to save and push those changes live. Hit run once on your Make(formerly Integromat) scenario and then head over to your bot on workplace and upload an image. This will trigger this new scenario.
The next step is to add a create JSON module.

Click add next to the data structure, give it a name and then click on the generator button. Under content type, you want to change the drop down to query string. Then you want to paste in the following:
https://graph.workplace.com/v3.0/<GROUP_ID>/photos?url=http://placekitten.com/1200/601&message=Hello&access_token=<YOUR_ACCESS_TOKEN>This will then generate a screen as follows:
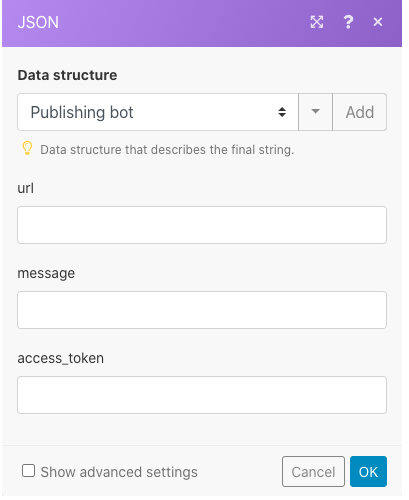
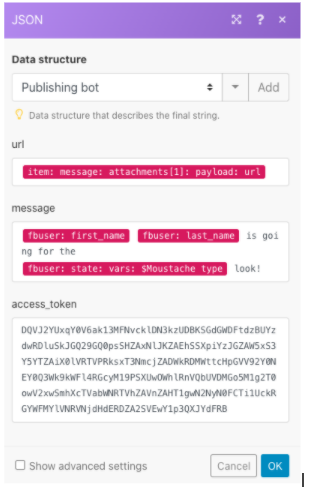
We now need to populate these fields. In the URL, you want to use the data pulled through from your webhook. You want to find the URL under payload and include that in your URL box as shown below:
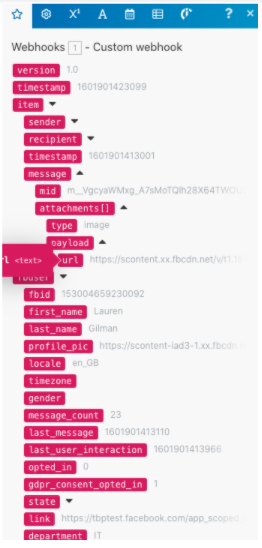
Message can be anything you want, but we have included Firstname Lastname is going for the $Moustache_Type!
Finally you need to copy and paste the access token for your publishing bot into the access token field.
When finished it should look as follows:
The final step is to push this image out into our group. So we want to add a HTTP Make a request module.
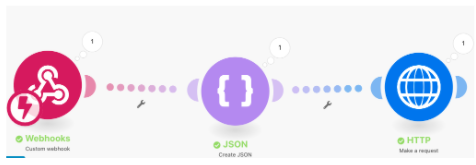
In the URL field, you want to include the URL https://graph.workplace.com/v3.0/<GROUP_ID>/photos?
But you need to swap the <GROUP_ID> with the ID of the group you want to post into.
The method needs to be set to POST. The body type needs to be RAW. Then you want to set the Content type to JSON. In your Request content, you then want to use the JSON you created in the previous step. When completed, this step should look as follows:
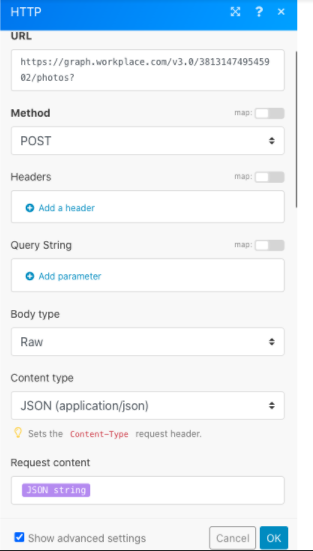
Now click OK and save. Then click the slider across to on. Now when you upload an image, your image will be posted in your group.
Updated 8 months ago
