Using the TBP API to send emails to a Bot
How to use the Bot Platform API to send any emails received to a Bot
In this tutorial, we show you how to use the TBP API to send a notification to a Bot user whenever an email is received in Gmail.
You will need to watch the tutorials on setting up an API connection and generating a bearer token prior to completing this tutorial.
These tutorials MUST be completed in order for this tutorial to work:
https://dev.thebotplatform.com/docs/how-to-set-up-an-api-connection-to-the-bot-platform-using-oauth-20
https://dev.thebotplatform.com/docs/how-to-generate-a-bearer-token-in-integromat

Step One
First we need to create a new scenario in Make(formerly Integromat). Our first step is to set up a trigger action that watches for any new emails received in Gmail.
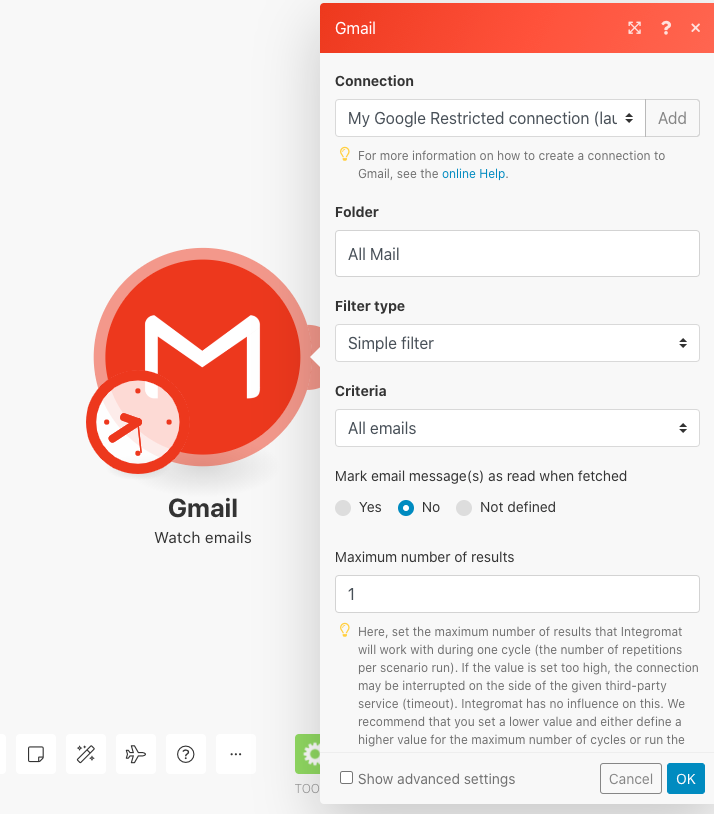
Select the Gmail, Watch emails module. Add a connection to your Gmail account.
You can then select which email folder you would like to watch if you have a specific folder you want to watch. In this tutorial, we are watching all of our email folders so we leave this as ‘All mail’. Our criteria is ‘All emails’ and we set our maximum number of results as 1 to ensure we get a message for every email we receive. It is up to you if you want to set your emails to ‘read’ once you have a message from your Bot. Once set up, this module should look as follows:

Step 2:
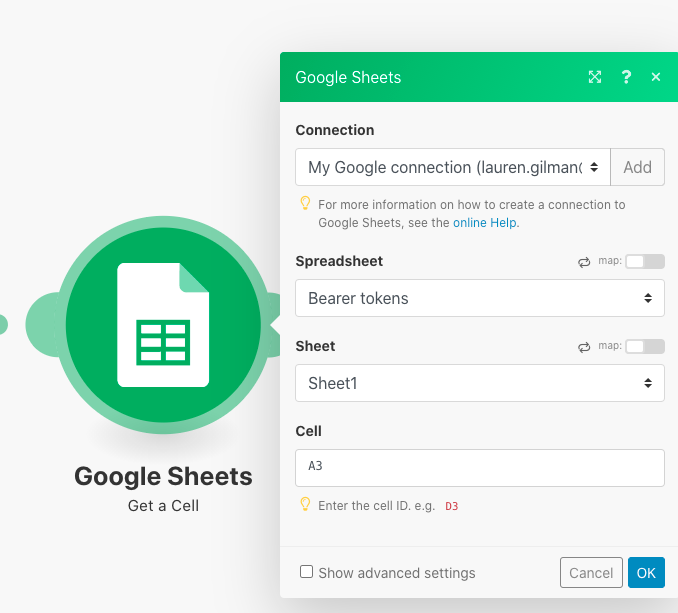
The next step is to grab the bearer token from the spreadsheet we created in the previous tutorial. This will allow you to send your emails to the Bot Platform.
Add in a Google sheets, get a cell module. You want it to find the bearer token you have stored in your spreadsheet, so add in the cell number where it is stored.

Step 3:
We now want to add in a Create JSON module. This is how we will build the response we send to The Bot Platform.
Select the Create JSON module and under Data Structure, select Add. Give your data structure a name and then click on the generator option.
You then want to copy in the following code:
{
	"data": {
		"attributes": {
			"messages": [{
				"text": "Hello"
			}, {
				"text": "World"
			}],
			"recipient": "[email protected]"
		},
		"type": "external - activity "
	}
}
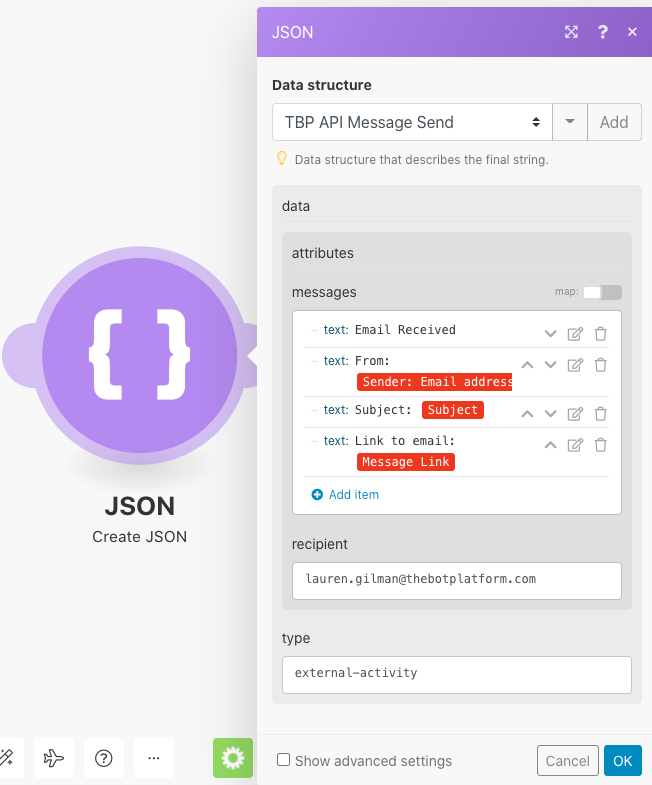
Click on save and you will be presented with the following screen, although it will not have anything under messages yet.

In the recipient field, you want to add your email address. In the type field, add in external-activity
Now we want to add in our messages. So click on the edit button and in here you can create as many messages as you want to pull through your data. You can use the fields pulled in from your Gmail ‘Watch emails’ step. Here is how the above option looks when sent to a bot:

Once you are happy with how your email notifications come through, we need to add a final step.
Step 4:
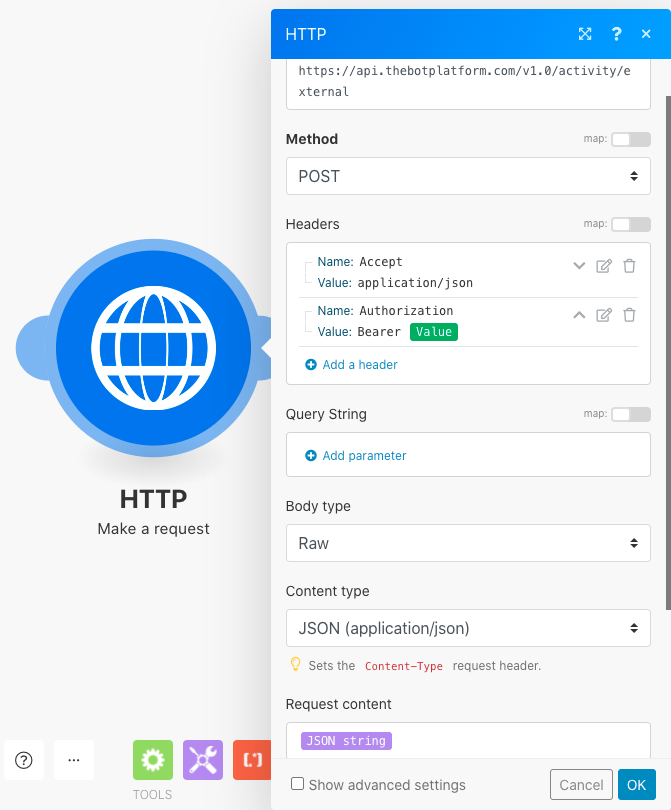
Now we want to add in a HTTP ‘Make a request module’. This is how we pass the information through to The Bot Platform.

In the URL field, you want to add the URL https://api.thebotplatform.com/v1.0/activity/external
Our method needs to be POST.
Now we need to add some headers. Click on the edit and add two headers as follows:
Accept with a value of application/json
Authorization with a value of Bearer “value” For the value, you should use the find a cell from the second step.
You then want to change the body type to Raw and the content type to JSON (application/JSON)
In your request field, you want to use the JSON you created in the previous step.
Click save and you now have your email to Bot set up. The final step is to set up how frequently we check for new email. So click on the clock icon next to the scheduling slider and set how often you want your scenario to check for new emails. Personally, I like my notifications to be instantaneous, so I have it running every minute. But if you want to save on your Make(formerly Integromat) spend, you can reduce this to every ten minutes or so.
Now turn your scenario on and you are good to go.
Updated 9 months ago
Prerequisites for this tutorial:
