Step 2 - Creating Your Nomination Image
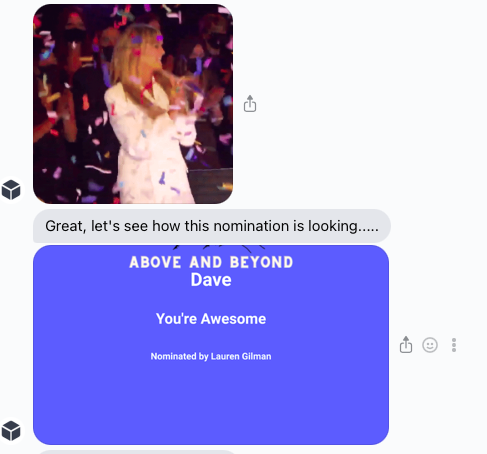
In this tutorial, we will show you how to create a personalised image to represent the nomination.
First you need to create some background images that can be used for your nomination images. For example:

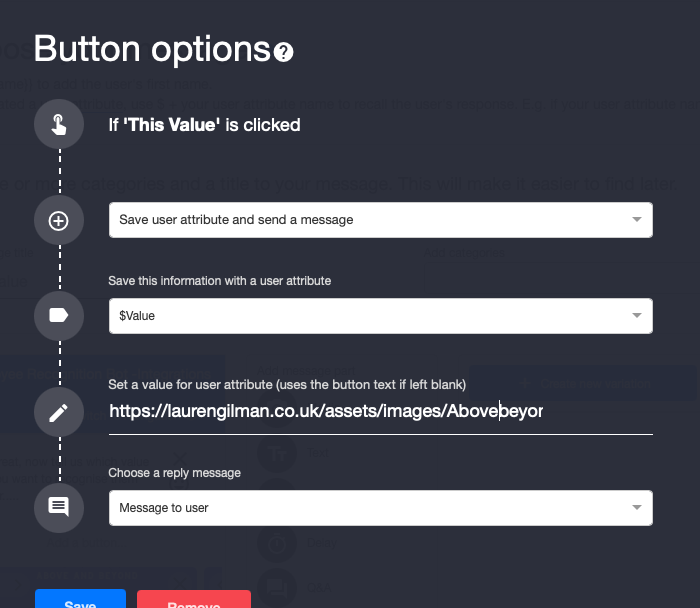
They need to be hosted somewhere publicly accessible e.g. this could be on Flickr or your own website. You will need the direct link to your image e.g. https://laurengilman.co.uk/assets/images/Abovebeyond.png
Once you have your image URLs, we need to change the message within The Bot Platform. On your carousel, make sure that when someone selects that value, the URL is set against the value attribute.
In our bot flow, we ask the user for the value and then ask them for a nomination message, which we will include on our image. Once they have entered the message, we take them to a message called image proof, which contains our webhook in it. Head over to Make(formerly Integromat) and set up a new scenario. Our first step needs to be a custom webhook. Create a new webhook and paste it into your bot.
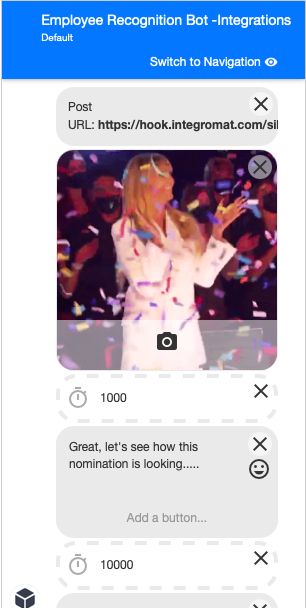
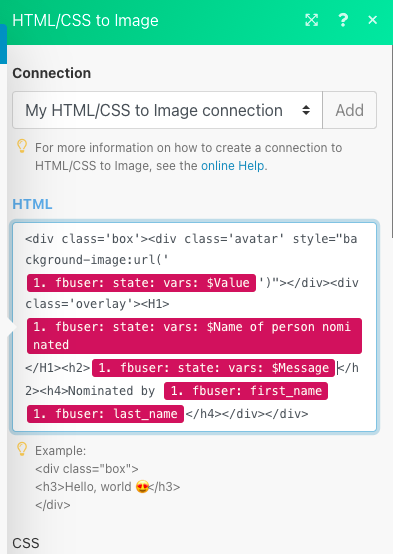
Now click run once and go through and test your bot from the start until you trigger this webhook. The next module we need to add is the HTTP/CSS to Image Create a new image module. You will need to create an account and connect it up to Make(formerly Integromat). In the HTML box, you want to paste the following code:
<div class='box'><div class='avatar' style="background-image:url('{{1.fbuser.state.vars.`$photo-URL`}}')"></div><div class='overlay'><H1>{{1.fbuser.state.vars.`$colleague-nominated`}}</H1><h2>{{1.fbuser.state.vars.`$reason-nominated`}}</h2><h4>Nominated by {{1.fbuser.first_name}} {{1.fbuser.last_name}}</h4></div></div>Swap the URL out for the value pulled through from your webhook. The URL should be saved against the Value attribute. Use the name of person nominated and the message attributes in your HTML as shown below:
In the CSS box paste the following code.
.box,.avatar, .overlay {width:1920px;height:1080px;position:relative;}
.avatar, .overlay {
	position:absolute;
	background-size:cover;
	background-position:50% 50%;
}
.overlay {
	font-family: 'Roboto';
	color:#ffffff;
}
h1 {  font-size: 100px;
text-align:center;
padding:20px;
padding-top:60px;
}
h2 {
font-size:80px;
text-align:center;
padding:20px;
}
h4 {
font-size:50px;
text-align:center;
padding:20px;
padding-top:40px;
}
You can customise this by changing any of the CSS styling.
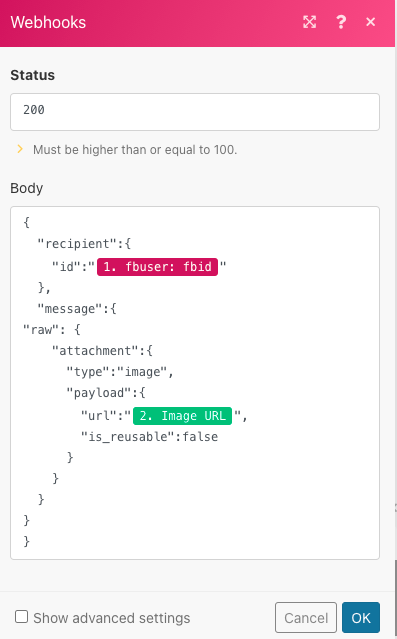
Now you need to add in a webhook response module. In the body, you want to paste the following code:
{
  "recipient":{
    "id":"{{1.fbuser.fbid}}"
  },

  "message":{
"raw": {
    "attachment":{
      "type":"image",
      "payload":{
        "url":"{{2.url}}",
        "is_reusable":false
      }
    }
  }

},
"set": {
    "$nominationurl": "{{2.url}}"
  }
}
Change the imageURL to be the URL of the image created in the previous step. Then in the set section, replace the {{2.url}} with the URL of the image created in the previous step too. You will also need to create a new attribute within the platform called nominationurl for this to work. Once you have done that, your module should look as follows:
Updated 8 months ago
