Step 1 - Looking Up Employees
In this tutorial, we will take the name entered by the user and look up the possible employees with that name from a Google sheet. The bot then returns that list to the user allowing them to identify the right person based on their email address.
Our bot flow for this step is shown below. We ask the user for the name of the person they wish to nominate and store that in an attribute called 'Name of person nominated'
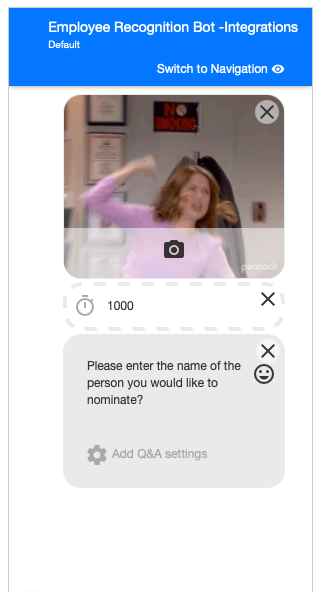
They are then taken to a message that looks up the possible results by triggering an Make(formerly Integromat) webhook.
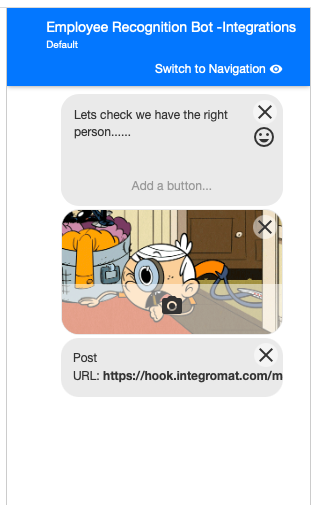
Now let's set up our Make(formerly Integromat) scenario. Head over to www.make.com and create a new scenario.
The first step in our scenario is a custom webhook. Add a new webhook and copy the URL shown in the module. In your lookup message in your bot, add a webhook and paste this URL.
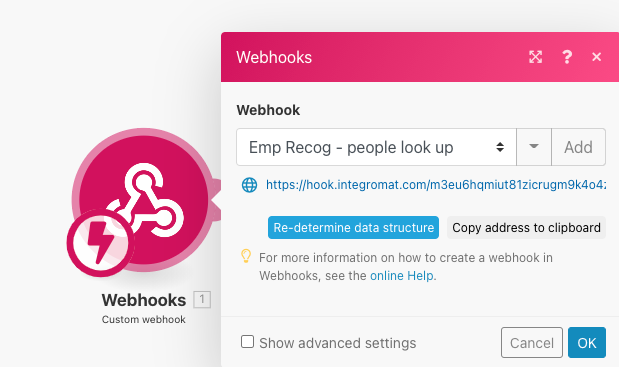
Now click run once on the Make(formerly Integromat) scenario and run through your bot to trigger your new webhook link. This will pull through the Name of the person nominated so we can use it in subsequent Make(formerly Integromat) modules.
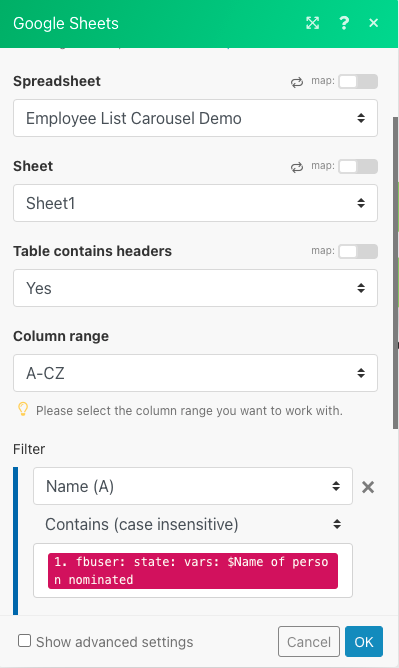
Now we need to add a Google Sheets, Search Rows module. Make sure that you have a Google Sheet set up which contains the name, FB_ID and email address of all your staff. Select your spreadsheet from the list in Make(formerly Integromat) and in the filter section, you want to use the Name column in your spreadsheet CONTAINS (Case insensitive) the attribute 'Name of the person nominated'.
We may have more than one result returned if you have several people with the same first name or even full name. So we now need to collect those results in an array. Add an array aggregator module as the next step and select the source module as your Google Sheets search rows. We will come back to set this module up further later. For now, we just need it in place.
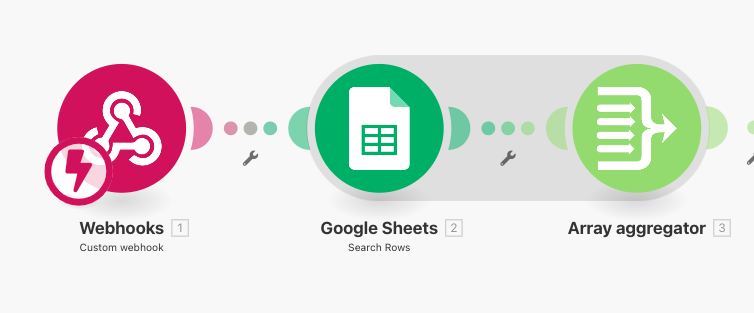
Next we need to add a router module. This allows us to check that the name is found and if no employees are found, it returns an error message.

First let's set up our results found branch. We need to add a 'Create JSON' module. Add a new data structure and give it a suitable name e.g. Employee look up carousel. Now we will use the generator next to add schema to paste the data structure we need. Paste in the following code to your generator box.
{
  "message":{
    "raw":{
      "attachment":{
        "type":"template",
        "payload":{
          "elements":[
            {
              "title":"A ticket to the theatre",
              "buttons":[
                {
                  "type":"postback",
                  "title":"View this lot",
                  "payload":"@BP:MESSAGE:83510"
                },
                {
                  "type":"postback",
                  "title":"Place a bid",
                  "payload":"@BP:MESSAGE:83510"
                }
              ],
              "subtitle":"Did you want to bid?"
            },
            {
              "title":"A £100 voucher",
              "buttons":[
                {
                  "type":"postback",
                  "title":"View this lot",
                  "payload":"@BP:MESSAGE:83510"
                },
                {
                  "type":"postback",
                  "title":"Place a Bid",
                  "payload":"@BP:MESSAGE:83510"
                }
              ],
              "subtitle":"Did you want to bid?"
            }
          ],
          "template_type":"generic"
        }
      }
    }
  },
  "recipient":{
    "id":"{{1.fbuser.fbid}}"
  }
}
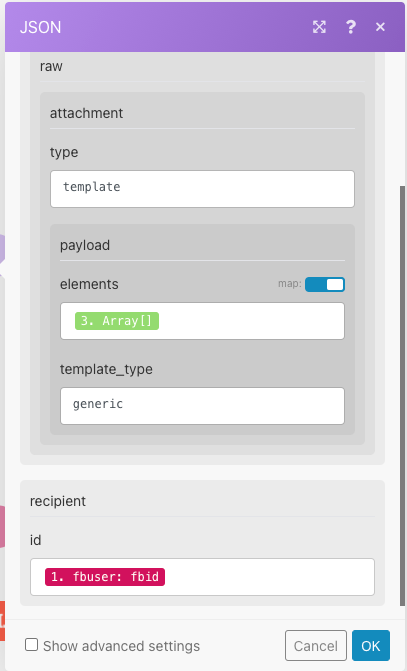
Click save and save again and your create JSON module will now change to give you the boxes you need to complete this step. In the first type box, you want to write template. In the elements box, you want to push the map slider to on and then use the array aggregator step. In the template_type box, you want to write generic. Finally in the ID box, you want to use the FB_ID pulled through from the webhook step.
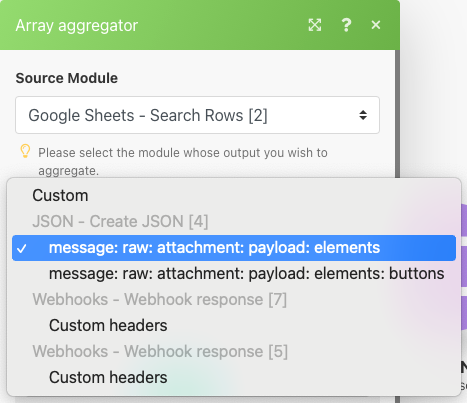
Now we need to go back to our array aggregator step and finish setting up that module. In the target structure type dropdown, select 'message:raw:attachment:payload:elements option.
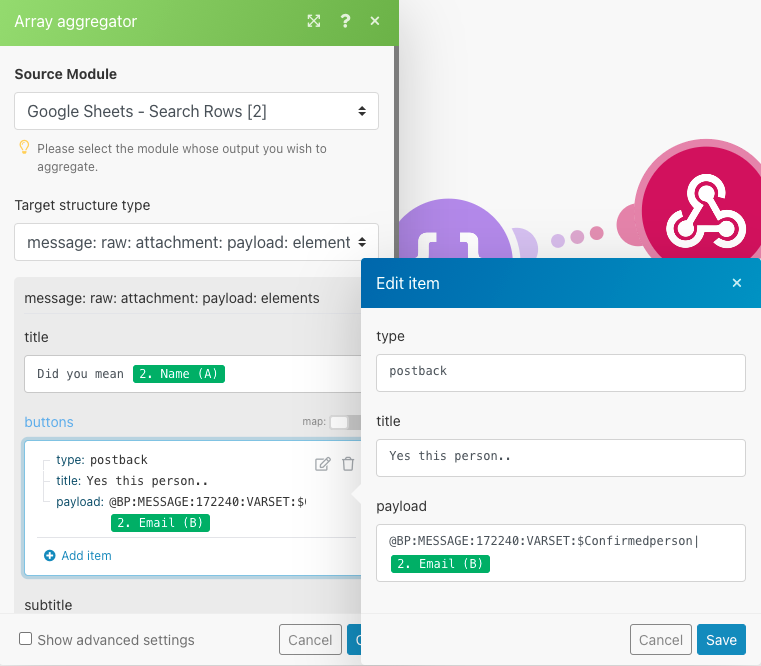
Once you have done that, it will change the boxes you have available. In the title field, we change the text to read "Did you mean Name? Using the name pulled through from the Google Sheets search rows.
In the subtitle box, we include the email address pulled through from Google Sheets so they can identify the person they meant.
In the buttons box, we add a new button. In the type button, we type postback. Give the button a title like 'Yes this person' and then in the payload we need to paste a data structure like the following.
@BP:MESSAGE:172240:VARSET:$Confirmedperson|{{2.`1`}}The @BP:MESSAGE:172240 part tells them what the next message in our bot flow should be. So find the message you want to send them to after they have selected the person within The Bot Platform. For our bot, this is the message that asks them to pick which value they are nominating against. If you click options next to that message within The Bot Platform, you can see the ID of that message. You will need to add that into Make(formerly Integromat).
The VARSET then sets the email address of the person we wish to nominate and saves that in an attribute within The Bot Platform called Confirmedperson. You will need to go into Manage attributes within The Bot Platform and create this variable manually before the scenario will work.
Once completed, this box should look as follows:
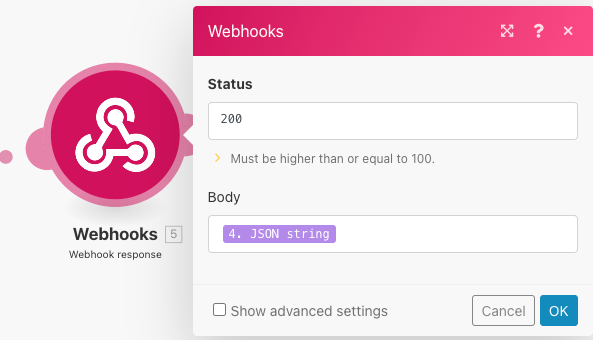
Now let's go back and finish our results step. After our 'Create JSON' module, we need to add a 'Webhook Response' module. In the body field, we just need to use the JSON created in the last step.
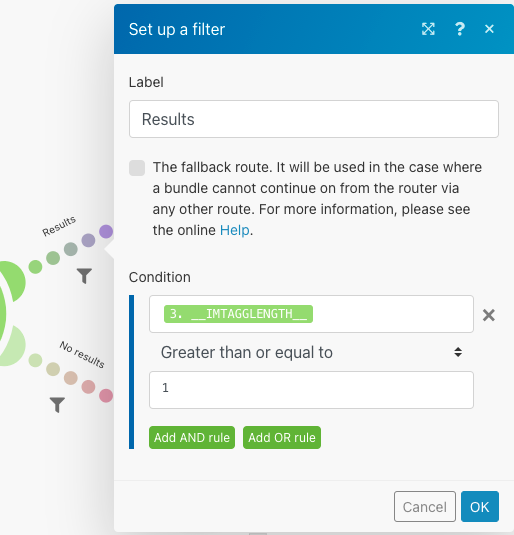
The final part of this branch is to add a filter at the start. You want to add a filter that checks to see that your array of results is greater than or equal to 1.
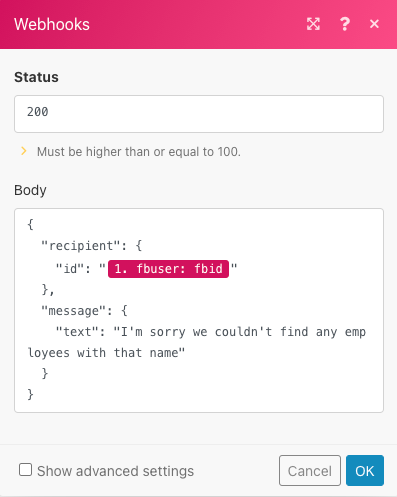
Now on our no results found branch, we just need to add a webhook response. In the body use the code following code and swap out the text for something like 'I'm sorry we couldn't find any results for that name'
{
  "recipient": {
    "id": "USER_ID"
  },
  "message": {
    "text": "Hello world"
  }
}
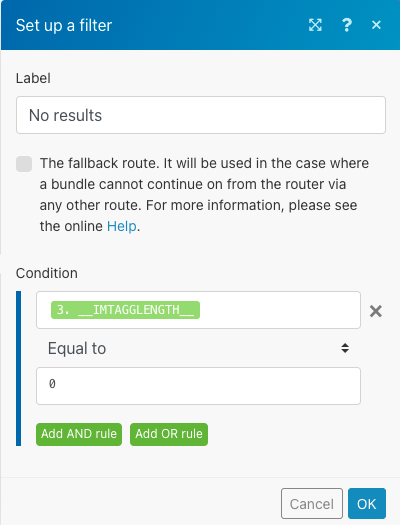
The final part of this flow is to add a filter that ensures this branch is only triggered when the array length is 0.
This scenario is now complete and should look as follows.
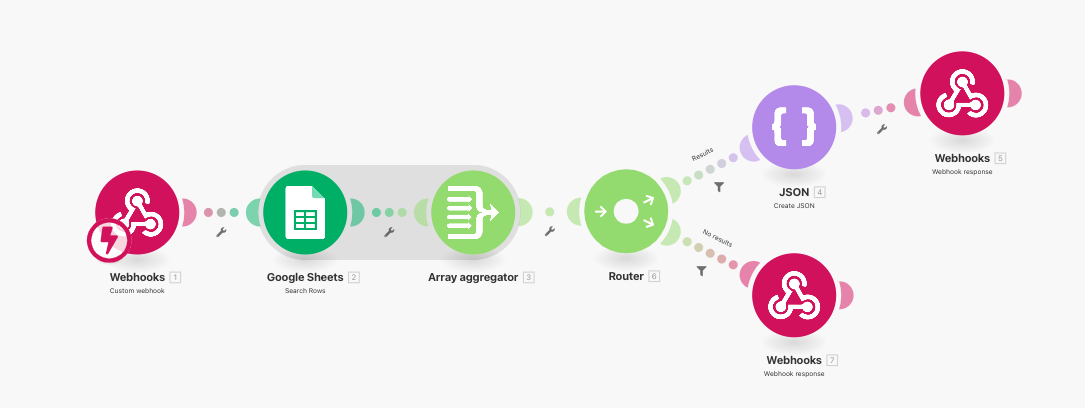
When run, it will look as follows.
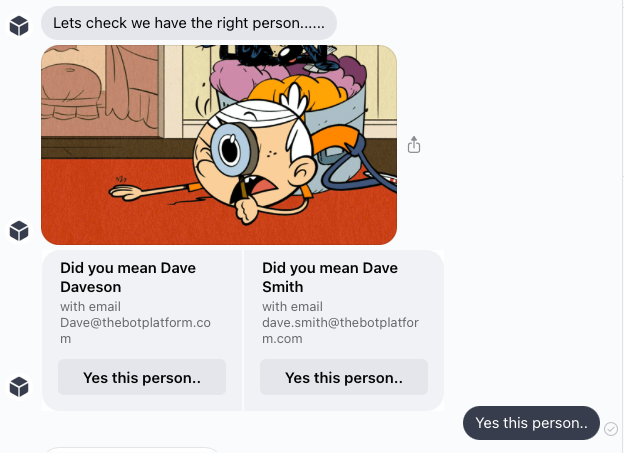
Updated 9 months ago
