Setup a ticket system bot
In this tutorial we will setup a bot that operates as a ticket management system. The bot will let us:
- Create a new ticket
- Check ticket status
- Update a ticket
To setup this bot, we will need:
- A bot, setup at https://app.thebotplatform.com
- A Make account
- A cup of coffee (or two if you fancy!)
Setting up your bot
First we need to setup our bot to accept ticket information. Once all the messages are setup, we can then use attributes to parse ticket information to a Google Sheet for further processing.
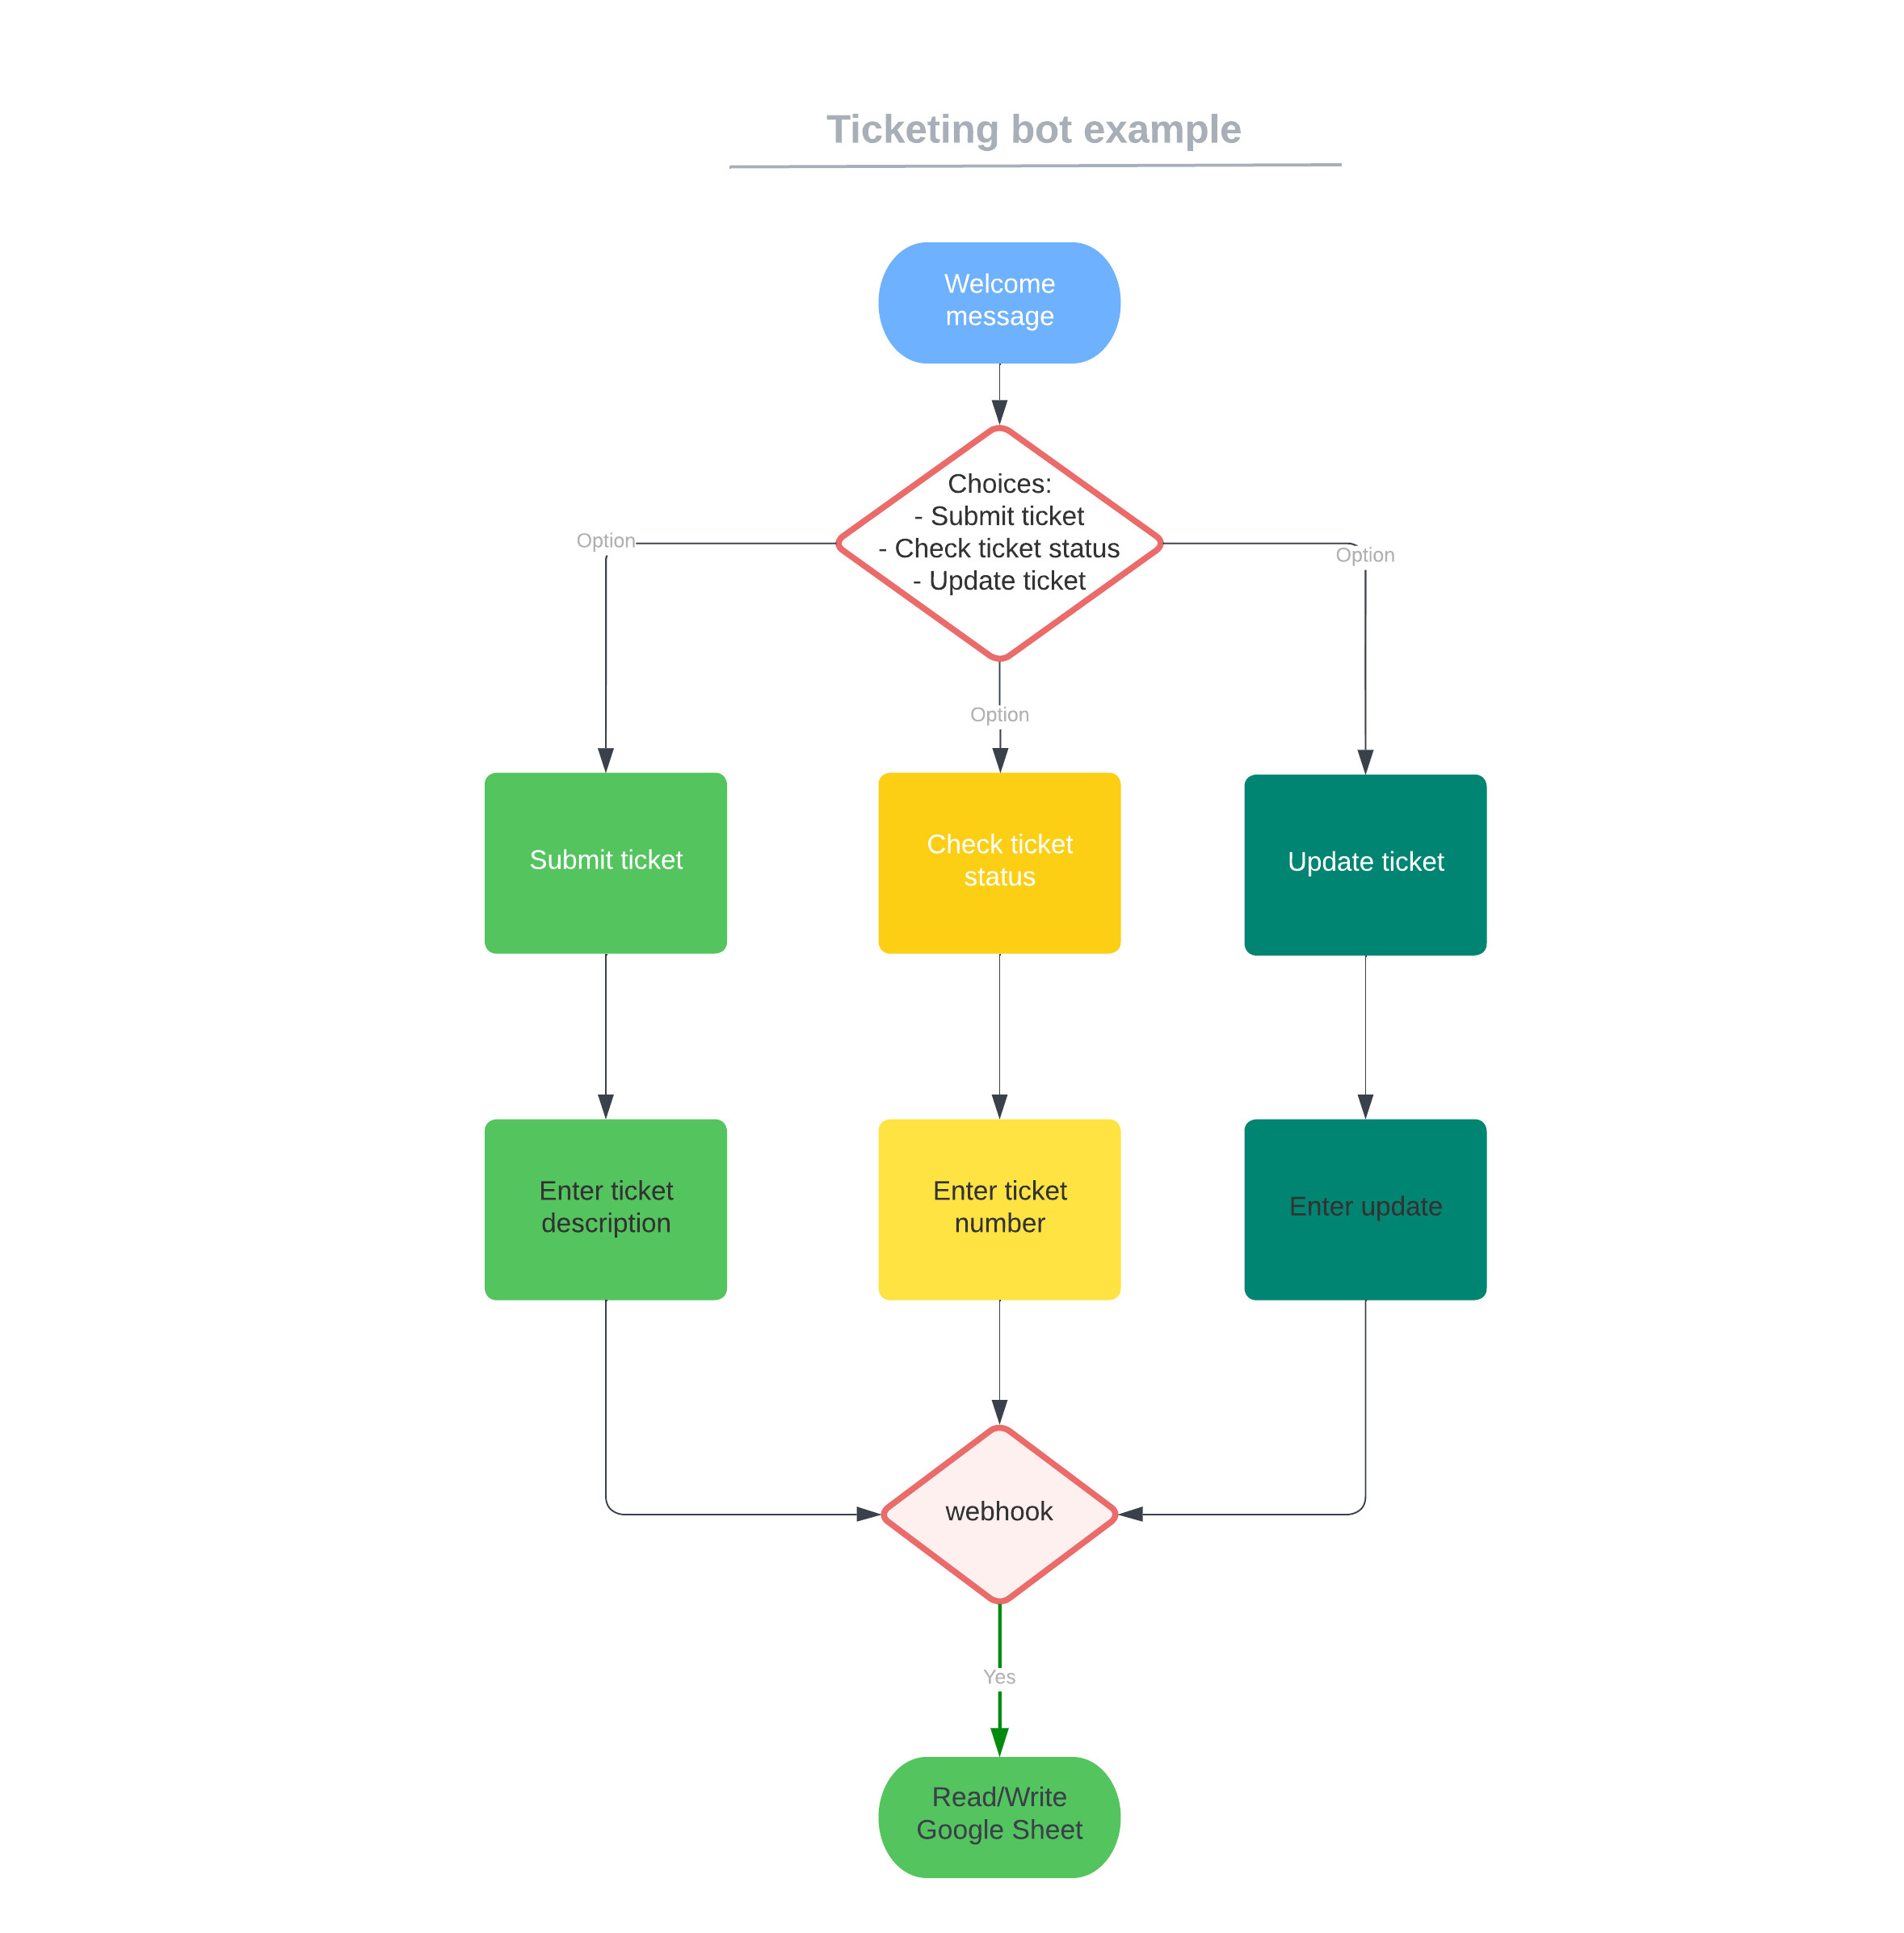
You can use the below bot flow for guidance to setup your bot. Ideally, you would take necessary information about the ticket and pass it through a webhook into Make(formerly Integromat) to perform inquiries on a Google sheet where ticket information is stored.
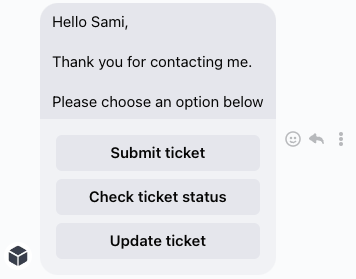
Welcome message of the bot can provide user with different options to choose from:
Sending ticket information to Google Sheet
To send information of a new ticket to a spreadsheet, we need a Q&A message which takes the input from a user in text format. We also need to ensure this text information is being recorded in an attribute which will be passed through to a webhook.
Once a user submits their ticket description, we will trigger the webhook to send the ticket information to our spreadsheet. We also need to ensure the webhook response provides the user with a unique ticket id to query ticket status in the future.
Our final Integroamt flow will look like this:

Here's what each module is doing in this flow:
- Webhooks: To receive the ticket information from the bot
- Tools (Set variable): We are using the timestamp information from the webhook to generate a unique ticket id
- Google Sheets (Add a row): The flow to add the ticket information in our Google Sheet
- Webhooks (Webhook Response): This is our response message to the user after the ticket has been created.
Set variable module:
This flow takes the timestamp from the webhook and generates a unique ticket id using the last four digits of the timestamp as our unique ID. This is just an example, you can use your own preferred naming convention for generating a unique ID.
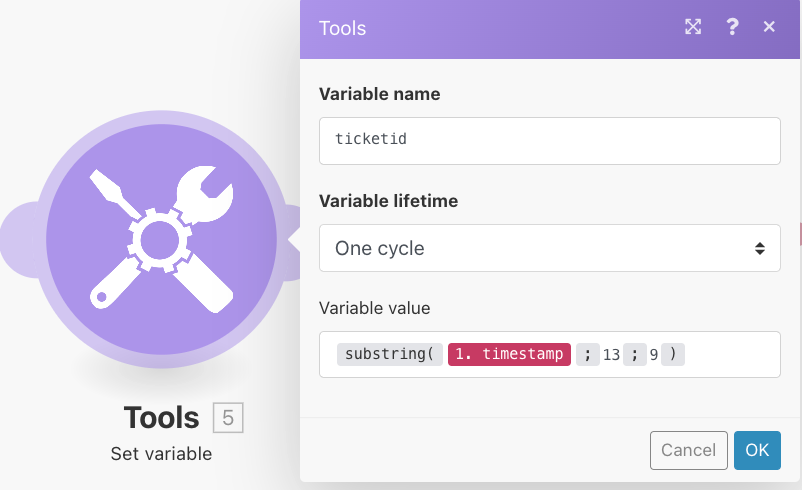
In the above example, we took the 'timestamp' information from the webhook. A time stamp has 13 digits, we are using the 'substring' feature within Make(formerly Integromat) to extract last 4 digits.
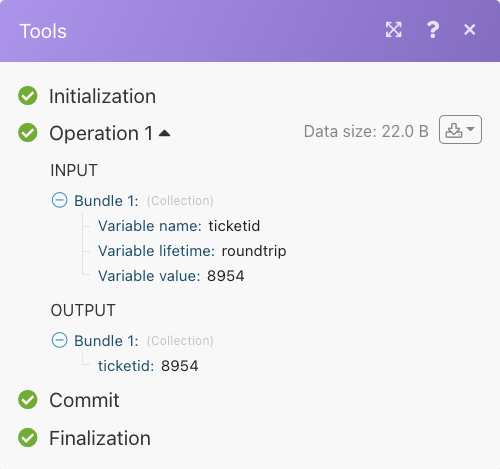
After setting the ticket ID, add a new module and chose 'Add a row' from Google Sheets.
Here we will configure the ticket information we are pushing to our webhook. In our use case, we used the following headers for our Google Sheet:
- Ticket ID
- Description
- Status
- Logged by user
- FBID
- Feedback
- Date Submitted
These can be different for your use case, feel free to add or delete anything that you might not need. You can see the configuration below:
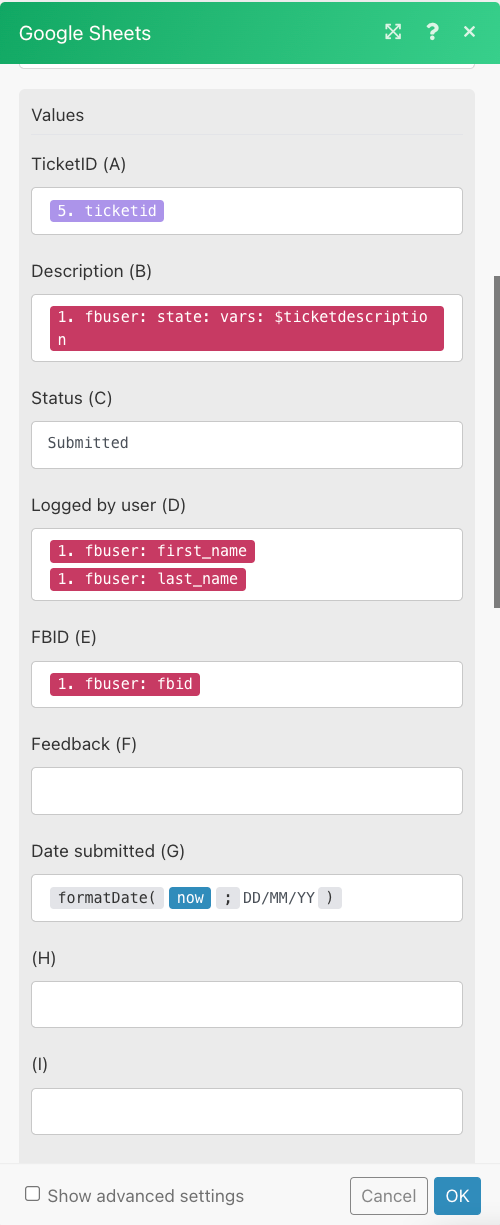
In the last step, we will add another module and look for 'Webhook Response':
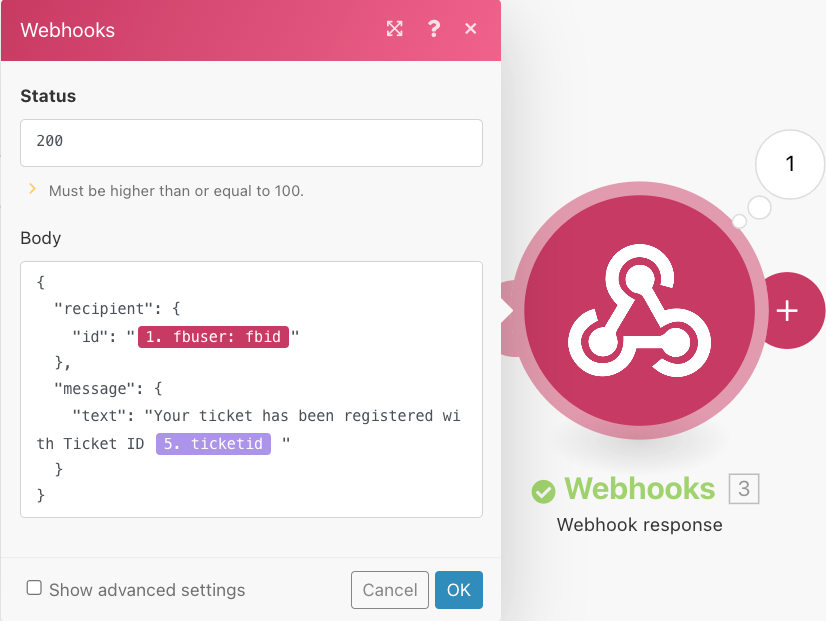
Use the following code for your webhook response:
{
  "recipient": {
    "id": "{{1.fbuser.fbid}}"
  },
  "message": {
    "text": "Your ticket has been registered with Ticket ID {{5.ticketid}} "
  }
}
Replace the 'ID' and 'ticketid' parts if you are using different variables for this purpose. If not, you can copy and paste this in your Make(formerly Integromat) webhook response module.
Please ensure you save your scenario at each step to avoid losing any progress. At the end, turn on the scenario and it's time to test the bot.
If everything works as expected, you should see an update on your Google Sheet with the ticket information you submitted:

The bot should respond with a ticket ID as seen below:

Happy ticketing!
Updated 9 months ago
After setting up the above flow. You can explore adding further functionality to your bot. See examples linked below:
