Return an image as a response
Purpose: This tutorial will teach you to send an image through a bot, using power automate and an html image service, we will add a frame on top of the image that has been sent to the bot.
For this tutorial, you will require:
- A bot
- A power automate account (paid)
- An HTML/CSS account (free version is fine for upto 50 images) check out https://htmlcsstoimage.com
- Your frame image (JPEG/PNG format preferred) saved on your local machine.
First step: Create your bot
Setup your bot with the following message parts:
- Welcome message asking users permission to use their profile picture to add a frame
- Thanks for providing permission (add power automate webhook here).
After creating the messages, we now need to create the Power Automate flow that lets us pull in the profile image and add a frame to it, before returning it to the user via a webhook response.
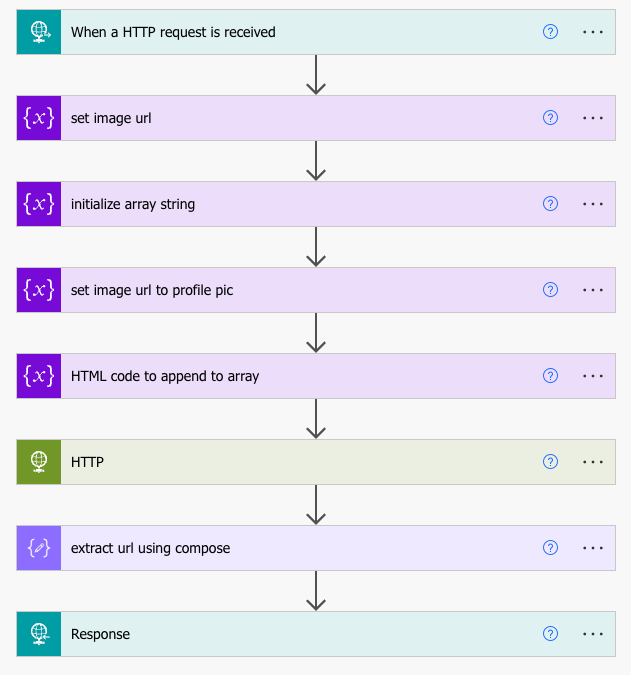
When the scenario is completed, it will look as follows:

Second Step: Setup Power Automate flows
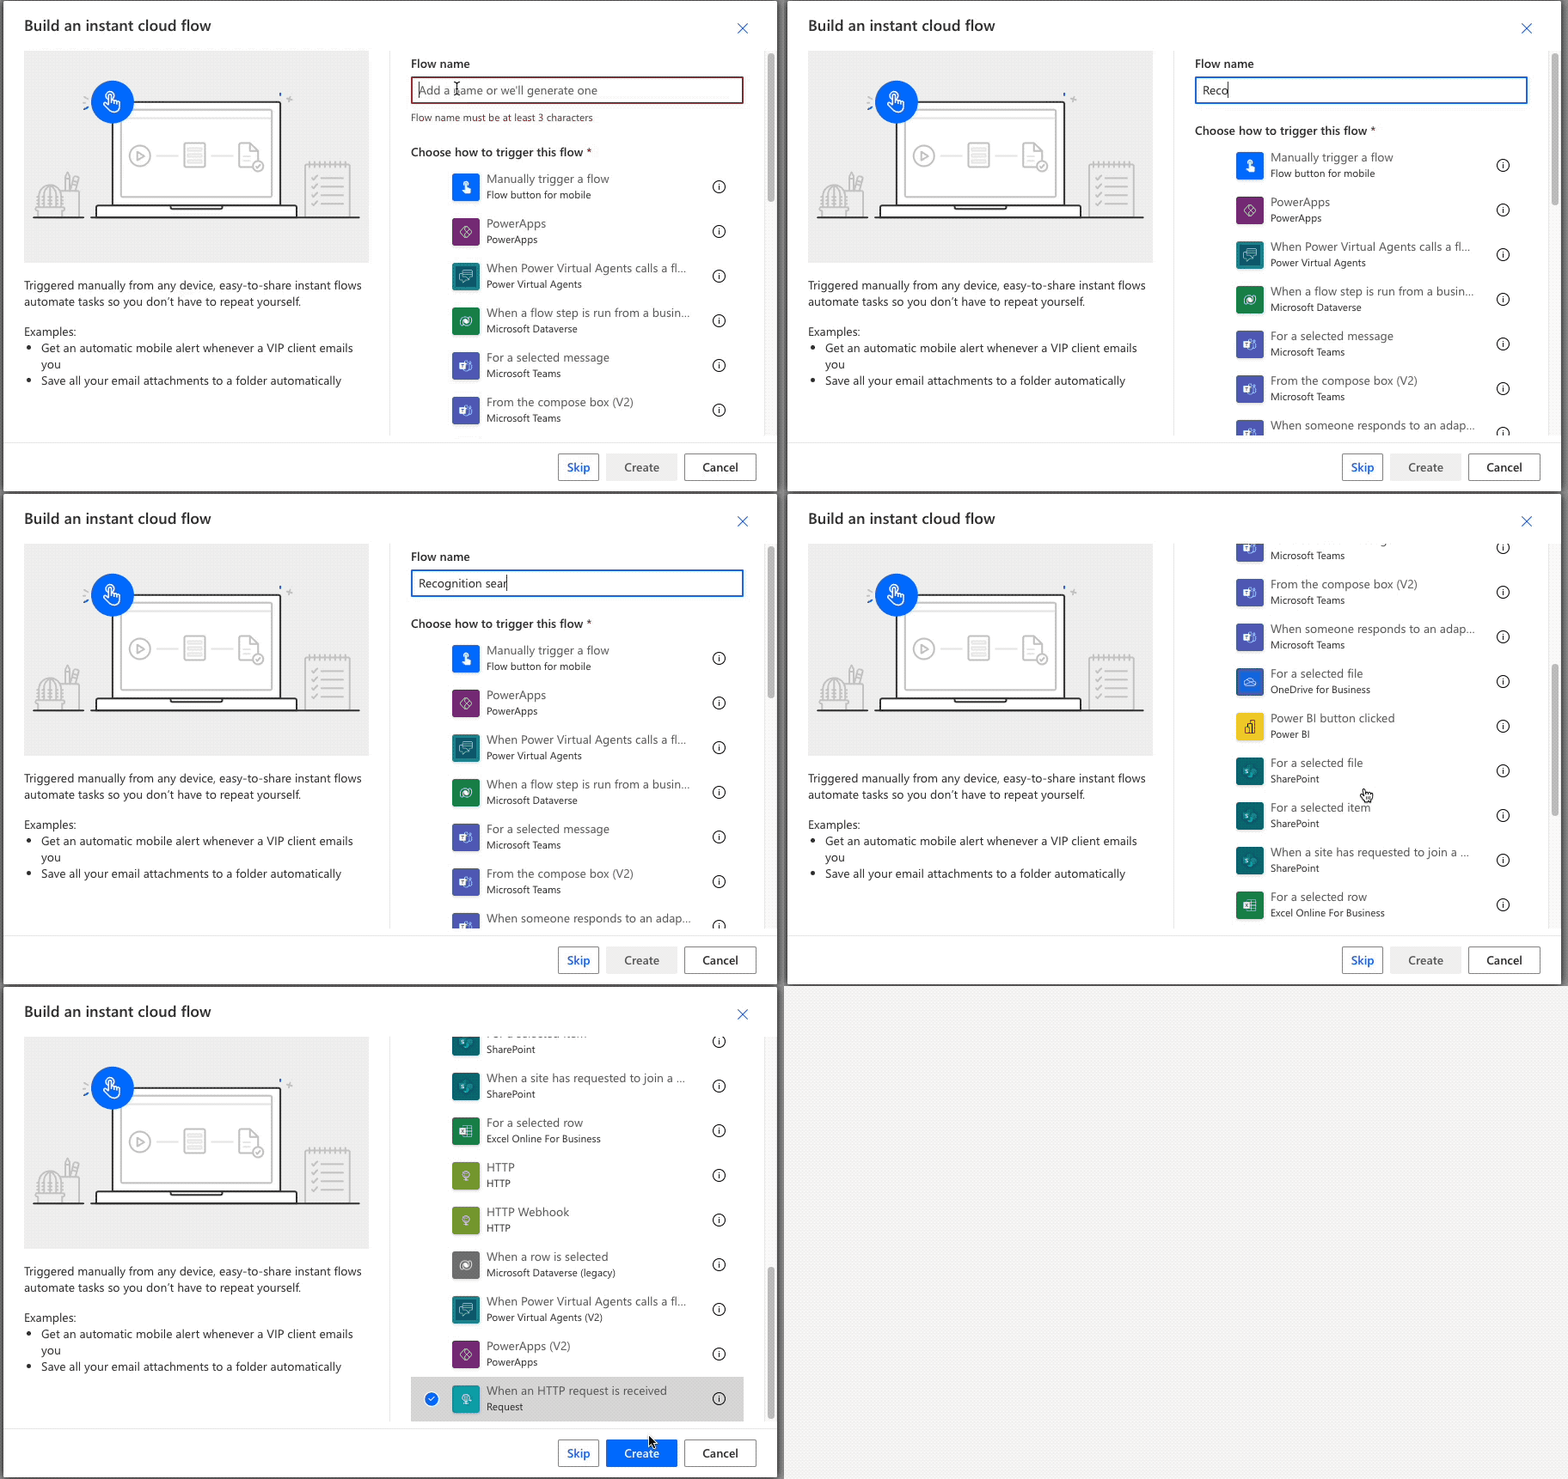
First we need to create an ‘Instant cloud flow’ and use ‘When an HTTP request is received” as our initial module in the flow.

You won’t readily obtain the webhook url, temporarily we will click on ‘Next Step’ and add a ‘Response (Premium)’ model. It will look as following:

If you are setting up a webhook using Power Automate for the first time, please visit this guide for details on how to obtain the Webhook URL as well as the JSON schema coming through the platform -> https://dev.thebotplatform.com/docs/how-to-set-up-and-use-webhooks-in-power-automate-microsoft-flow
In the next step, click on the ‘+’ button between the Webhook & response module. Search for ‘initialize variable’ and name the module as shown in screenshot below:

Similarly, add another flow after the above, search for ‘Initialize variable’ and label it as ‘array’

In the next step, add a new module and search for ‘append to string variable’’. Choose the ‘imageurl’ variable we setup earlier. In the value section, look for ‘profile_pic’ which is coming from the webhook. This is the variable that carries the Workplace profile picture url.

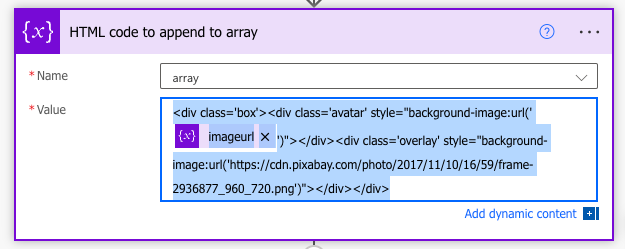
Now, add a new module and search for ‘append to string variable’. Here we will choose ‘array’ from the dropdown that wa setup earliner. In the Value box, paste the following code:
<div class='box'><div class='avatar' style="background-image:url('@{variables('imageurl')}')"></div><div class='overlay' style="background-image:url('https://cdn.pixabay.com/photo/2017/11/10/16/59/frame-2936877_960_720.png')"></div></div>Note that the url starting with cdn.pixabay is the frame we are using to add on top of the image. If you wish to use a different frame, please replace the cdn.pixabay image with a public url of the image frame you are using.

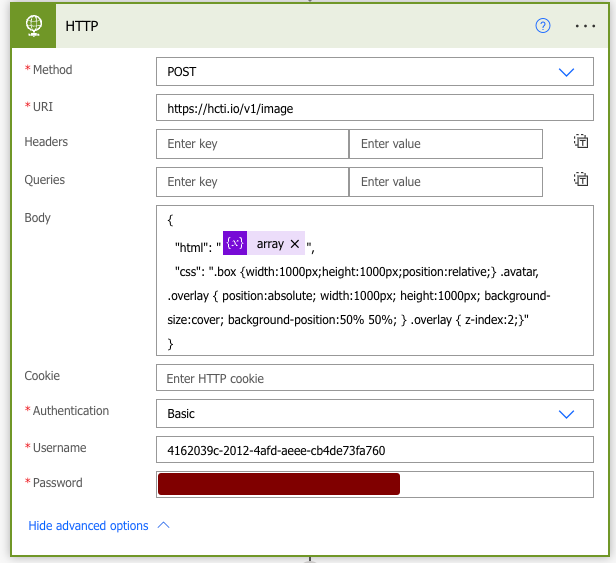
Once the above variables are set and appended, it’s time to send the image for processing. For this, add a new module and look for ‘HTTP (Premium)’. Set it up as shown in the screenshot below:

Use the following code in the ‘body’ section:
{
  "html": "@{variables('array')}",
  "css": ".box {width:1000px;height:1000px;position:relative;} .avatar, .overlay { position:absolute; width:1000px; height:1000px; background-size:cover; background-position:50% 50%; } .overlay { z-index:2;}"
}
For the username and password, you will need to refer to the account we created at https://htmlcsstoimage.com/. You can find your username and password on this link - https://htmlcsstoimage.com/dashboard/api-keys
Use username as it is and for password use the API key.
In the second last step, we need to extract the URL of the image from the outcome of the HTTP module. For this, add a new module ‘Compose’ and in the ‘Input’ section, enter the following code:
@{outputs('HTTP')?['BODY']?['url']}In the last step, which is the ‘Response’ module, input the following code:
{
  "recipient": {
    "id": "@{triggerBody()?['fbuser']?['fbid']}"
  },
  "message": {
    "raw": {
      "attachment": {
        "type": "image",
        "payload": {
          "url": "@{outputs('extract_url_using_compose')}",
          "is_reusable": false
        }
      }
    }
  }
}
This will take the extracted url and the FBID of the bot user and send the framed image to them in a message.
Make sure to save all changes and turn on the flow before testing.
Happy framing
Note:
If you would like to store the URL of the returned image in an attribute, you can do so by returning the image as a carousel with a payload button.
For more information about the code to be used for this case, please refer to this example: https://dev.thebotplatform.com/docs/sending-a-carousel-with-an-image-assigning-attribute-value-and-message
Updated 9 months ago
After completing this setup and testing it, follow the below guide to setup a flow that automatically updates your profile picture with the framed image
