Bootcamp 2 - How to Build a Phone Directory Look Up Bot
In this tutorial, we explain how to build a bot that looks up a staff member’s phone number held in a Google Sheet.
Knowledge Required: Intermediate
You need a good working knowledge of how to create a bot and basic Google Suite knowledge.
What you will need:
A computer
A Workplace instance and page with admin access
An Integromat account
A Google spreadsheet
Step 1: Before you do anything you need to create an account on https://app.thebotplatform.com/
Then you’ll need to create a bot by following the instructions on our blog on how to set up your bot on Workplace.
You can pick a template, but for this example, we are starting with a blank bot so click skip template.
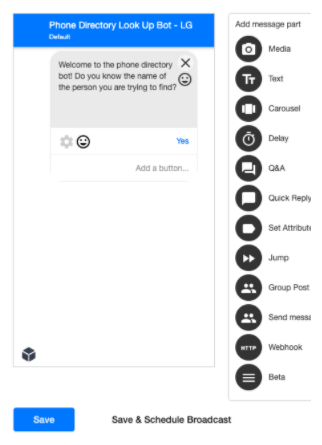
Step 2: Now you have created your bot, it is time to start building. The next screen will take you to the welcome message section. Click the text icon under the add message option. In this box, you explain the purpose of the bot and make sure that they know the full name of the person they are trying to find. Click the settings symbol next to the yes button and chose ‘Send Message’ on the drop down options. Create a new message called name.
Step 3: Now we need to collect the name of the person we are looking for. Select Q&A from the add message part menu. Ask for the full name of the person you are looking for.
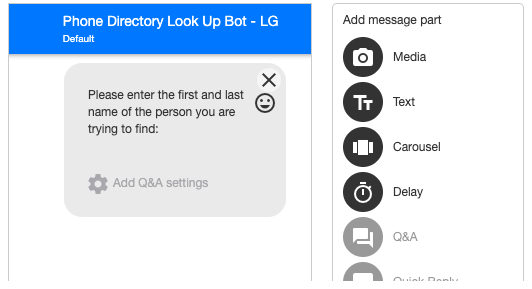
Step 4: We now need to set a user attribute containing the name. Click on the cog icon next to Add Q&A settings. In the first drop down, select the option, Save user attribute and send a message.
In the next box that appears, you need to create a new user attribute called name. In the final box, you then tell the bot which message it needs to display, once the user has voted. In this case, we are going to create a new message called number. Once you have done this, hit save.
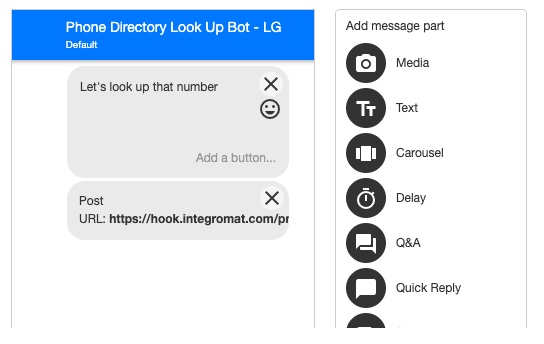
Step 5: You will now be taken to the messages page, where you can see number has been created. Click edit next to this message. You can now put in a message that your end user can see while they are waiting for the phone number to load.
Now for the google sheets integration. Click to add a webhook to your bot. Then click on Click to configure. You will see that a URL field comes up. Now we need to switch over to Integromat to set up our integration.
Step 6: Login to Integromat and click on create a scenario. Under choose a trigger app, select webhook.
Under Select webhook trigger, select Catch hook. Now click add and create a new webhook called phone directory web hook. Click save, and you will now see a URL has appeared. Copy and paste that URL into the URL field on your bot page.
Step 7: Save your bot and select the push changes live button at the very top of the dashboard page. This pushes all changes to Facebook. Now we need to test our bot to push some data through and test our integration is set up. Click the run once button on your scenario on Make(formerly Integromat). Click the test button next to your welcome message item and test out your bot. Once you have tested it, switch back to Make(formerly Integromat).
Step 8: You will need to create a phone directory spreadsheet on your Google Drive account. Make sure it has two columns; Name and Phone number.
Step 9: Now we need to set up the remaining part of our process. Add a google sheets integration to your flow by clicking the Select google sheets from the action app list. In the select google sheets action, select Search rows. You will need to link your google sheets account by clicking the Add button. Once you have done this, you need to populate the rest of the google sheets integration. You need to complete the form as shown below:
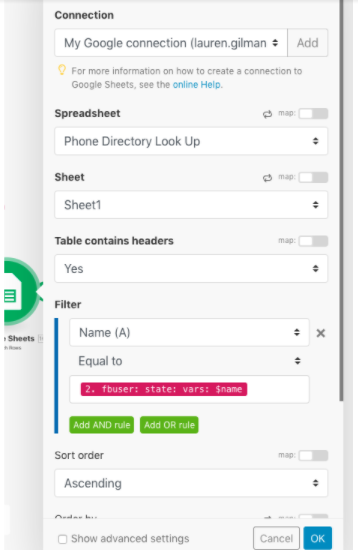
Use name from the Google sheets search and make sure it is compared to the variable $name that is pulled through from your webhook. Hit save.
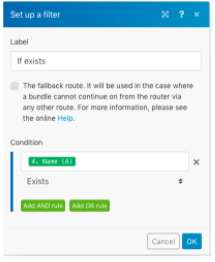
Step 9: Now we want to add a router to our flow to make sure we cover both the look up and what happens if the name is not found. Add a webhook response to one branch of your route. On this branch you want to add a filter, as shown below.
Now set up the webhook response. In the body field, you want to return the name and phone number that has been looked up in the search step. You need to ensure you use the fb ID pulled through from the webhook to ensure it is sent back to the person looking up the number. Your response should look like the below screen. The webhook response you need is also below.
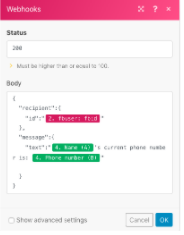
{
  "recipient": {
    "id": "USER_ID"
  },
  "message": {
    "text": "Hello world"
  }
}
Step 10: Now we need to add another option in, should the name not be found in the directory. Add another route to the router and add a webhook response.
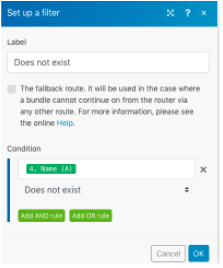
You need to add a filter to ensure this branch only triggers when the name is not found, as shown below.
Now we want to create a message that appears in Workplace should the name not be found. Go back to The Bot Platform and we want to create a new message. This message needs to say that the name wasn’t found and offer them the chance to enter another name via a button. For example, see the screen shot below.
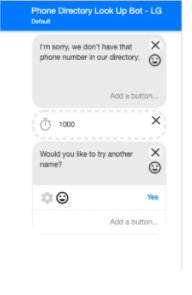
Make sure that if the Yes button is clicked, it sends them back to the message called name that allows them to re-enter the name again.
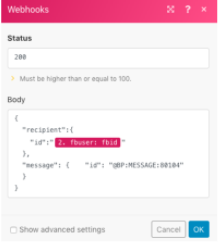
Step 11: Now return to Make(formerly Integromat) and you want to update the webhook response for the name not found route. You need to edit the body of the response to the below example.
{
  "recipient": {
    "id": "USER_ID"
  },
  "message": {
    "id": "@BP:MESSAGE:4182"
  }
}
However, you will need to change the message ID number. Hover over the not found message you created in the bot platform and at the bottom left of the screen, you will see a URL that looks like this: https://app.thebotplatform.com/2486/content/message/80104
The number you need is the 5 digit number at the end of this link. Update that in the body and hit save.
Now turn your integromat scenario on and you are all set.
Updated 8 months ago
