
How to configure a webhook response on Slack bots
In this tutorial, we will on how to configure a simple text message as a response to a user when they trigger a webhook from The Bot Platform
Knowledge Level: Advanced
Purpose
In this tutorial, we will on how to configure a simple text response to a user when they trigger webhook from The Bot Platform. We will need a bot and a simple Make scenario to achieve this.
Prerequisite
- A bot
- A Make account
- Your favorite beverage (I went with a berries smoothie for this one!)
Setting up the bot
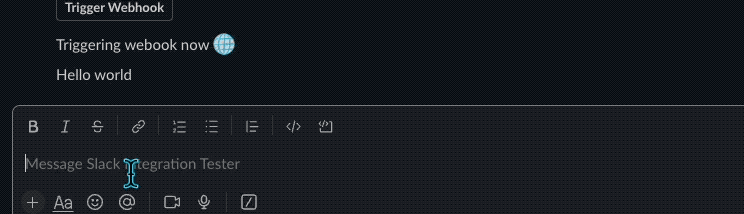
You can utilize any existing bots that fit this use case. In the demo below, you will see a simple bot in action with a welcome message and a button to enable the user to trigger the webhook:
Setting up the Make scenario
For our Make scenario, we will be using the following modules:
- Custom webhook
This will be our trigger when a user completes an action via the bot which warrants a trigger. - Webhook response (Option)
We will use this module to send a text response to the user after the webhook is triggered.
Setting up Custom webhook module
In this step we will setup the webhook which will trigger the awarding of the badge the ticket information from the bot.
Login to www.make.com
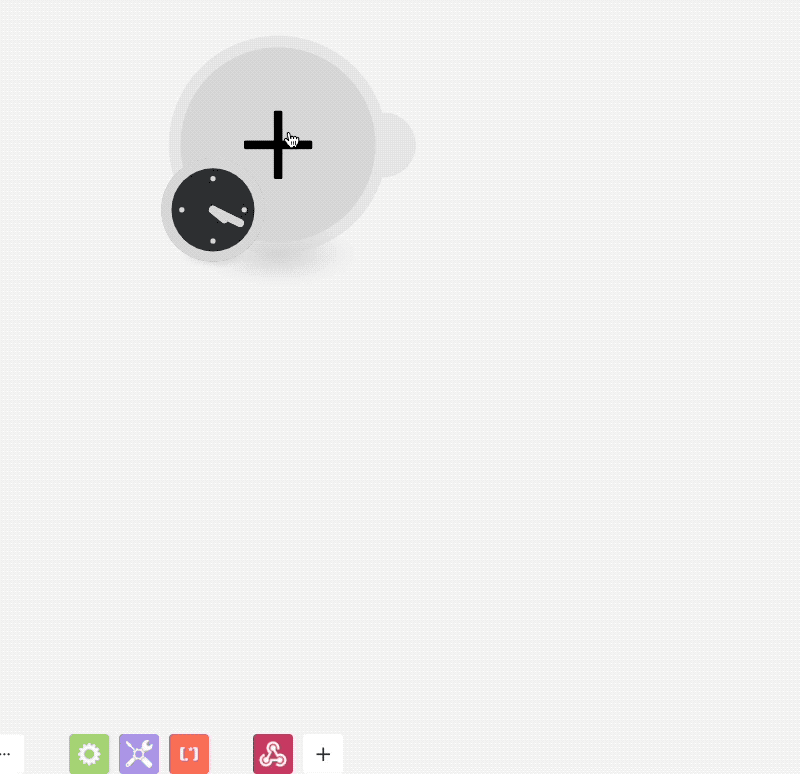
Create a new scenario and click the + sign to add a new connection. From the list, search for ‘Webhook’ and choose ‘Custom Webhook'
Paste webhook url to your botAfter creating the webhook module. Please make sure to copy and paste the url into your bot as a 'Webhook' message part.
Setting up webhook response module
In your Make scenario, click on the + sign to add a new module. Search for Webhook response.

Once we have added that module, it's time to configure it. Copy the code below that enables us to send a text response to our bot user who has triggered the webhook.
{
  "recipient": {
    "id": "USER ID"
  },
  "message": {
    "text": "Hello world"
  }
}
Once you have pasted the code in the 'body' of the module, we can start composing our response message. In the above example, under text, I have used 'Hello world' but you can customize the text response to your liking or based on your use case.
The 'ID' is where we tell the module which bot user is going to receive this response. Use the sample data from the earlier Webhook module to include the user id.
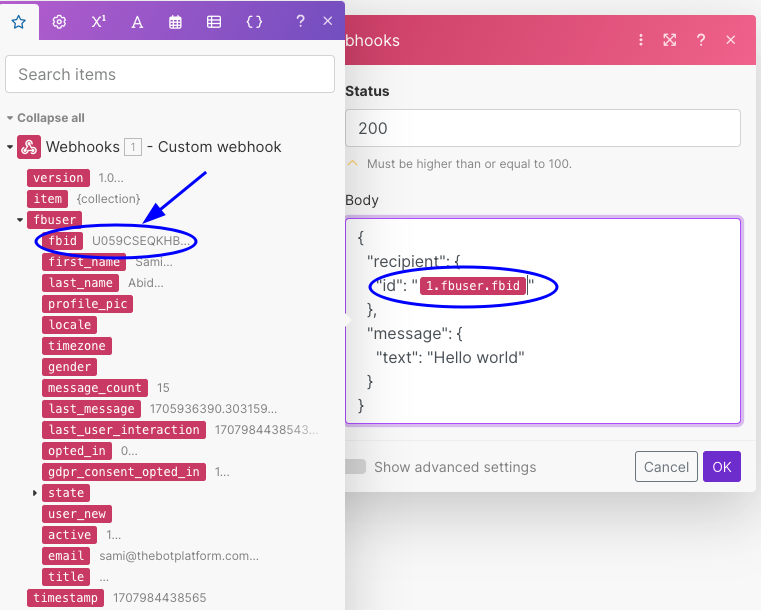
The final configuration should look similar to the above screenshot. We have used the data from our webhook module to identify the user, and input that dynamic value in our webhook response code.
Press 'Ok' to save the settings in the module. Finally, hit save on your scenario to save all the changes. Once you turn on the scenario, if everything was configured correctly, your bot user in Slack should receive a response from the bot if they trigger the webhook.

Updated about 1 year ago