How To Build an Acronym Bot on Teams and Power Automate
Acronym bot
In this tutorial, we show you how to build an acronym bot using Microsoft Teams and Power Automate. Please note, you will need to upgrade to a Premium Power Automate account in order to use the Response function.
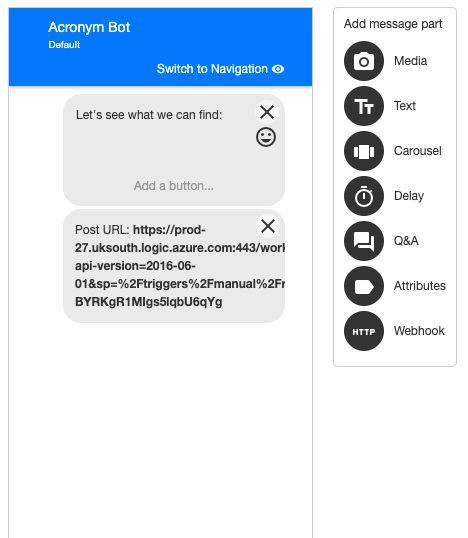
First you need to create a simple bot that has a question and answer message. For our example, we are collecting the acronym the user would like to look up in an attribute called ‘acronym’.
Once they enter a value, we then direct them to a message called ‘Searching’, which contains a holding message and eventually it will contain our webhook too.
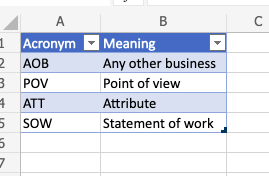
Now we need to head over to our One Drive and set up a spreadsheet with all our acronyms in. Set up a sheet with two columns, one for acronym and one for the meaning. Once you have your content, make sure you convert it into a table with headers.
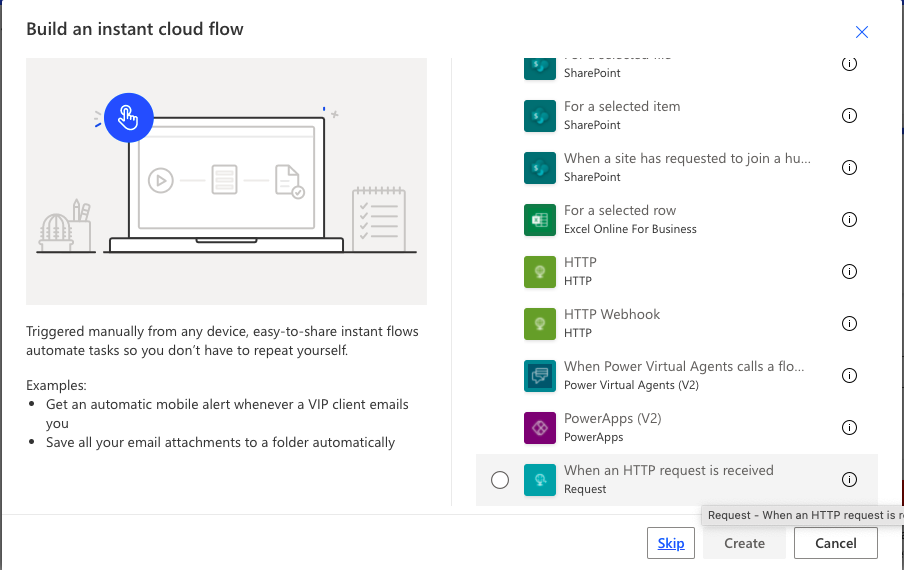
Now we are ready to build our Power Automate flow. Click on create and select ‘Instant Flow’. Scroll down to the bottom and make sure you choose When an HTTP request is received.
When complete our flow will look as follows, but we will walk you through all the steps now.
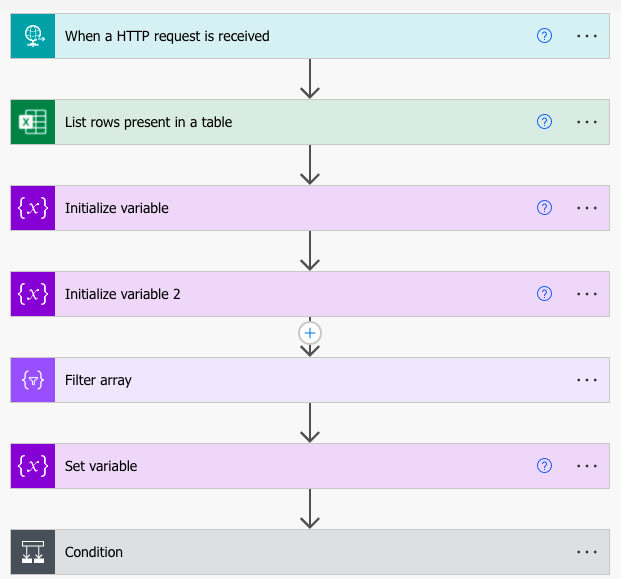
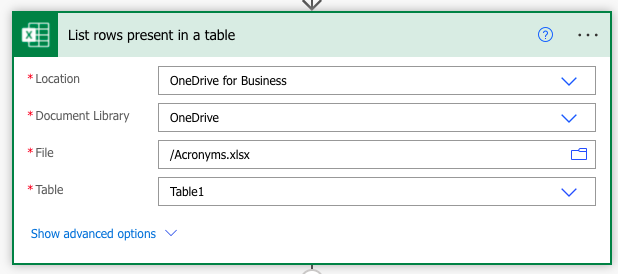
The ‘When a HTTP request is received’ module will have been automatically added, and for now, we don’t need to do anything with this module. Click on the ‘New Step’ button and add a ‘List rows present in a table’ module. In the location box, select your One Drive account. In the document library, you want to select OneDrive. Browse for your file within your One Drive and then select the table you have just created in the table box. When done, this module should look as follows.
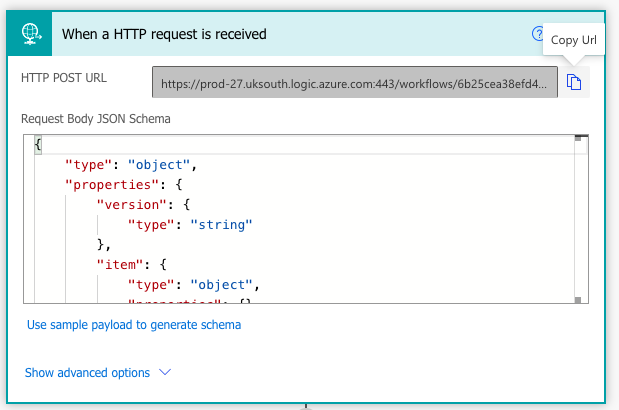
Click save at the top right corner. Now that we have saved our scenario, it will have generated a webhook we can use within our bot. Open up the ‘When a HTTP request is received’ module and you should see there is now a URL there for us to copy out. Copy that URL.
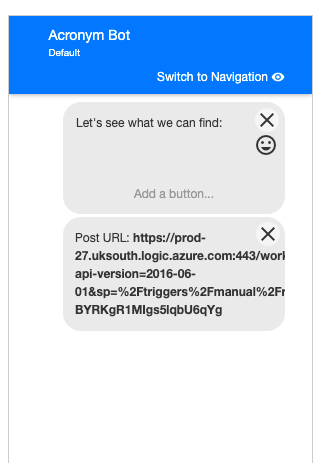
Go back into your bot and on the searching message, add in a webhook message. Paste in this URL and click save and push the changes live.
In Power Automate, click the Test button at the top right of the screen and choose a manual trigger. Now head back to the bot and test it all the way through. It won't return any results yet, we just want it to trigger our Power Automate flow. You should receive a message to say your test was successful.

Click on the 'When a HTTP request is received' module and copy all of the code in the schema box.
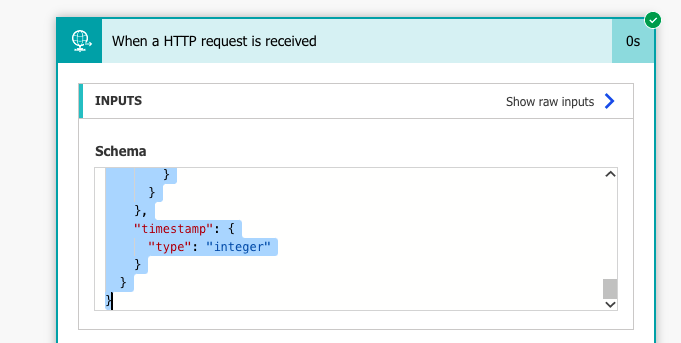
Now click the edit button and open up this module again. Click on the link that says 'Use sample payload to generate schema. In the box that pops up, paste the code you just copied and click done. This allows us to grab the data that the bot sends over and use it in later steps.
Our next step is to set up a couple of variables that we will need later in the flow. Click add a new step after your list rows step. Choose the 'Initialize Variable' module. Give it a name of Acronym Result, make sure that the type is set to a String and leave the initial value blank.

After this module, click the add a new step button and add another initialize variable module. This time we are going to give it a name of 'Number of Results' and make sure it is an Integer. Again, we can leave the initial value blank.

Now we need to filter the results returned from our spreadsheet to find the acronym the user entered. For this, we need to add another new step and use a 'Filter array' module. In the From box, we want to enter the values found in our list rows step. We want to search for the acronym column from our spreadsheet contains the attribute $acronym pulled through from our webhook step. When set up, it should look as follows.

Now we want to add in a 'Set Variable' step. This will allow us to see if any acronyms are found for the term the user entered. Select your 'Number of results' variable that you initialised in a previous step. In the value box, look for the length expression.
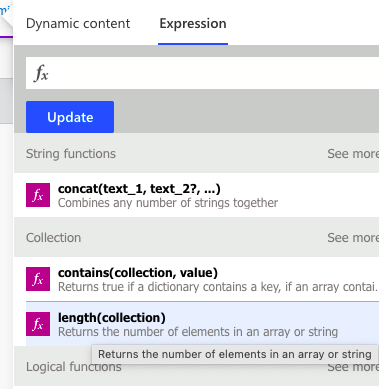
In between the brackets of this function, select the body from the filter array step in your dynamic content.
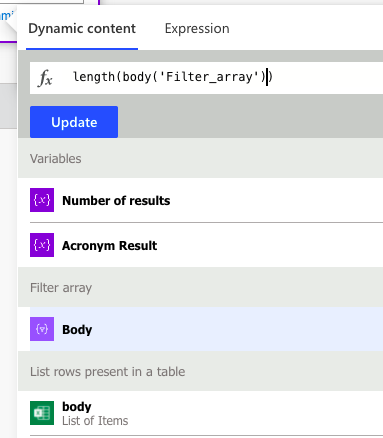
When completed, this module will look as follows.

Now we need to add a step that returns a result based on the number of results from the last step. Add a new step and add a 'Condition' module. In the filter criteria, add the 'Number of Results' is greater than or equal to 1

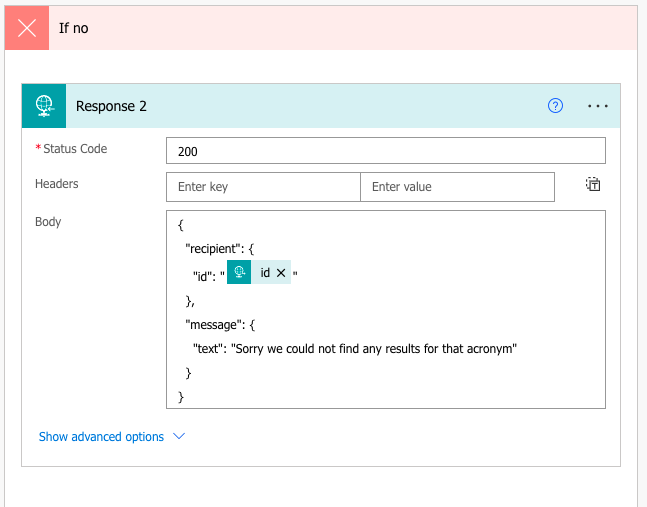
This means that if results are found for the acronym the user entered, then the yes branch will be triggered and if there are no results then the no branch will be triggered. We will set up the no results branch first. In the No side, add an action step and select the 'Response' module from the list. In the body box, you will want to paste the following code:
{
  "recipient": {
    "id": "USER_ID"
  },
  "message": {
    "text": "Hello world"
  }
}
Change the ID to the ID pulled through in the first step. Change the Hello world text to say something like 'Sorry we could not find any results for that acronym'
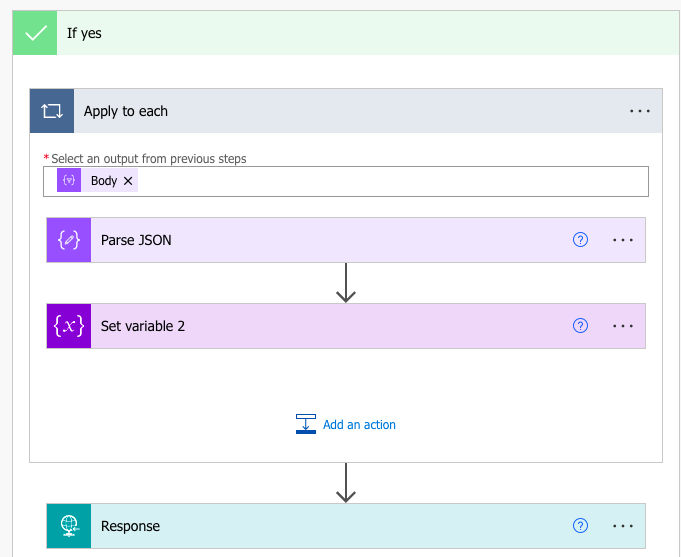
Now we need to set up our yes branch. Add an apply to each module and select the Body from your filter array step. Now add a parse JSON module. In here you want to use the current item as the input. Then click the generate from sample and paste in the following code:
{"@odata.etag":"","ItemInternalId":"029b9dcf-af6a-492b-8a3f-3d22bb71d407","Acronym":"AOB","Meaning":"Any other business"}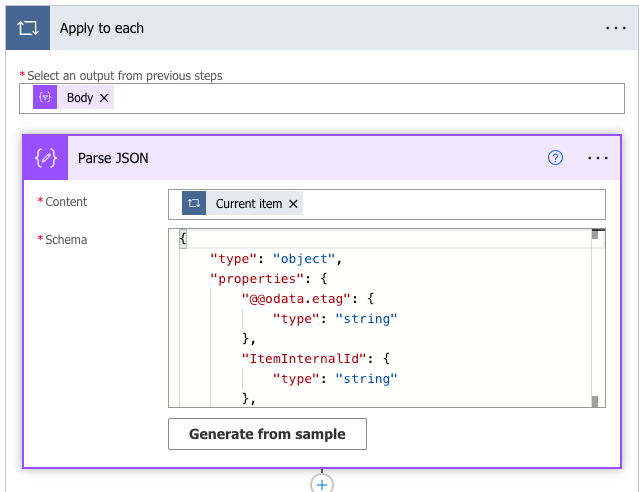
Now we want to add a Set Variable step and set the Acronym meaning to be the Meaning pulled through from the above parse JSON step.

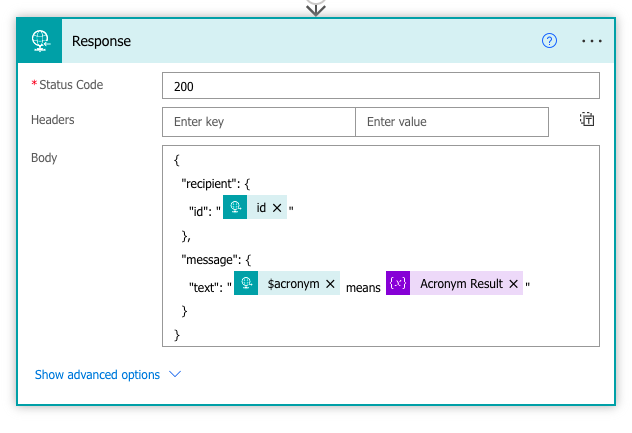
The final step is to add another 'Response' module, but make sure it is outside your for each loop, but still inside your yes branch. You want to use the same code as the no branch, but this time you change the text to use your acronym values and the acronym meaning you just created.
When completed the yes branch should look as follows.
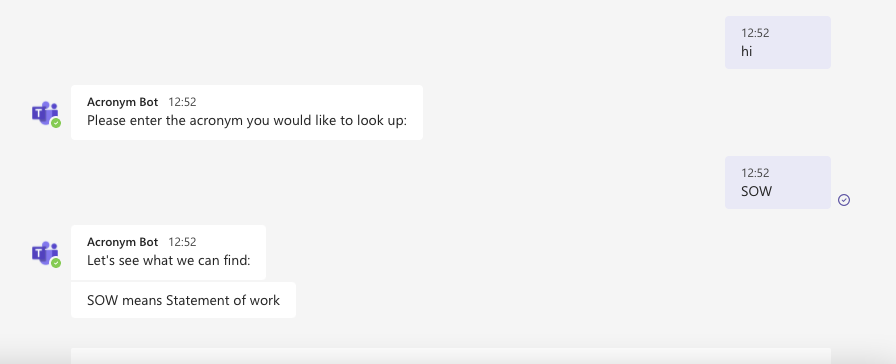
Save your flow and test your bot. You should now receive an answer through your bot that looks something like the following image.
Updated 8 months ago
