Get notified when a ticket is closed in Jira
Knowledge Level: Advanced
Purpose
In this tutorial, we will connect Jira to The Bot Platform and send notifications to the reporter of the issue via the bot when a ticket has been closed in Jira. We will achieve this integration using Make as our middleware of choice.
For this use case, we are only triggering notifications when a ticket status is set to 'Close'. However, this use case can be expanded to any status updates made to a Jira tickets.
Prerequisite
- A bot
- A Make account
- A Jira account (you can sign up for a free account)
- Your favorite beverage (I went with a classic Americano for this one)
Setting up the bot
For this use case, you can use an existing bot or setup a new one. As we are receiving information back from Jira and sending it to the bot, we won't need a pre-defined messaged. Instead, we will use a simple text response to send our message.
Setting up Make scenario
We will use the following modules in our scenario
Jira - Watch Issues
The Bot Platform - Send a Free Text Message
Setup Watch Issues Module
In this step, we will configure our first module which is related to Jira. This module will let us pull information about a Jira issues whose status has been updated.
To connect your Jira instance to Make, follow the guide by clicking here
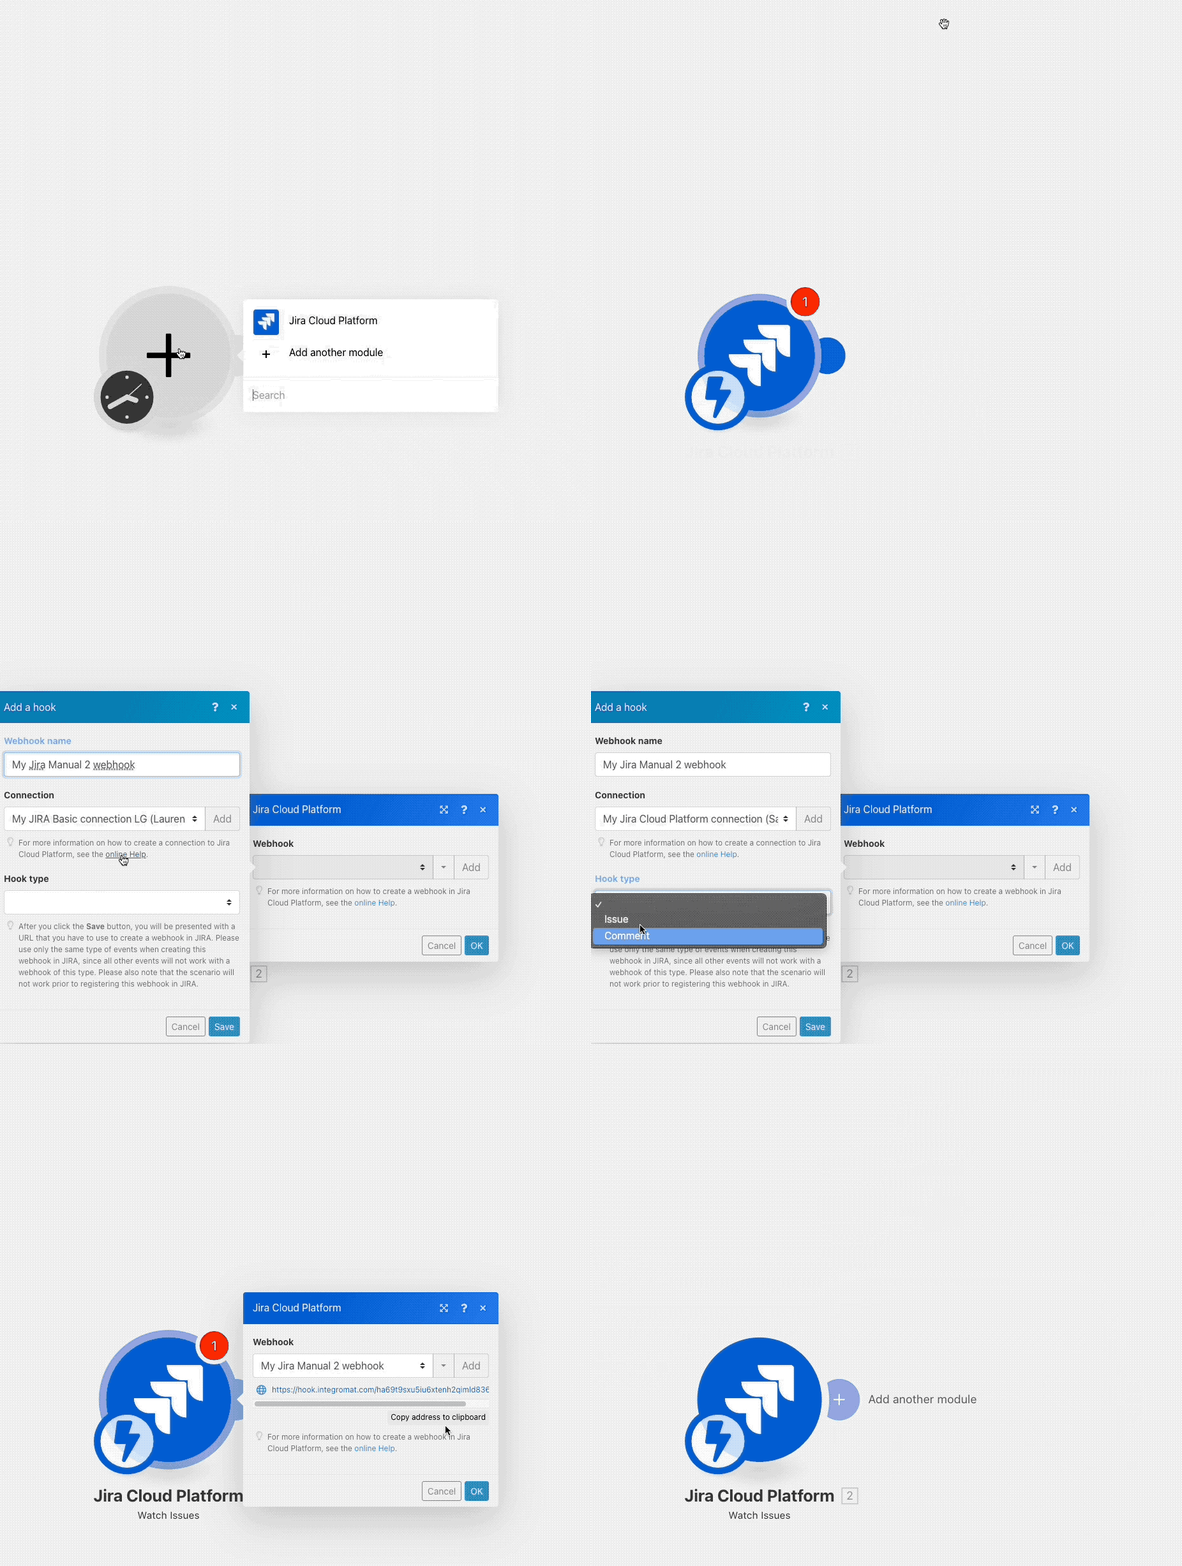
Once the connection has been established, add the Watch issue module from Jira and configure your webhook:

In the webhook configuration, make sure to chose the hook type as 'Issue' as we are triggering our notifications based on the updates to our tickets.
Once the webhook is configured, let's continue the configuration of the module. The final settings will look as follows:

Jira uses 'JQL Query' to search for information. As we are filtering our notifications based on status updates to tickets, we have chose the JQL query to look for 'Closed' statuses.
status=doneYou can modify the above status code to suit your particular use case.
In the fields section, we have chosen 'All Fields' to receive all the issue information, you can customise this too to suit your use case needs.
Once you are done, press 'OK' to save the configuration of the module and save changes to the scenario.
Setup The Bot Platform module
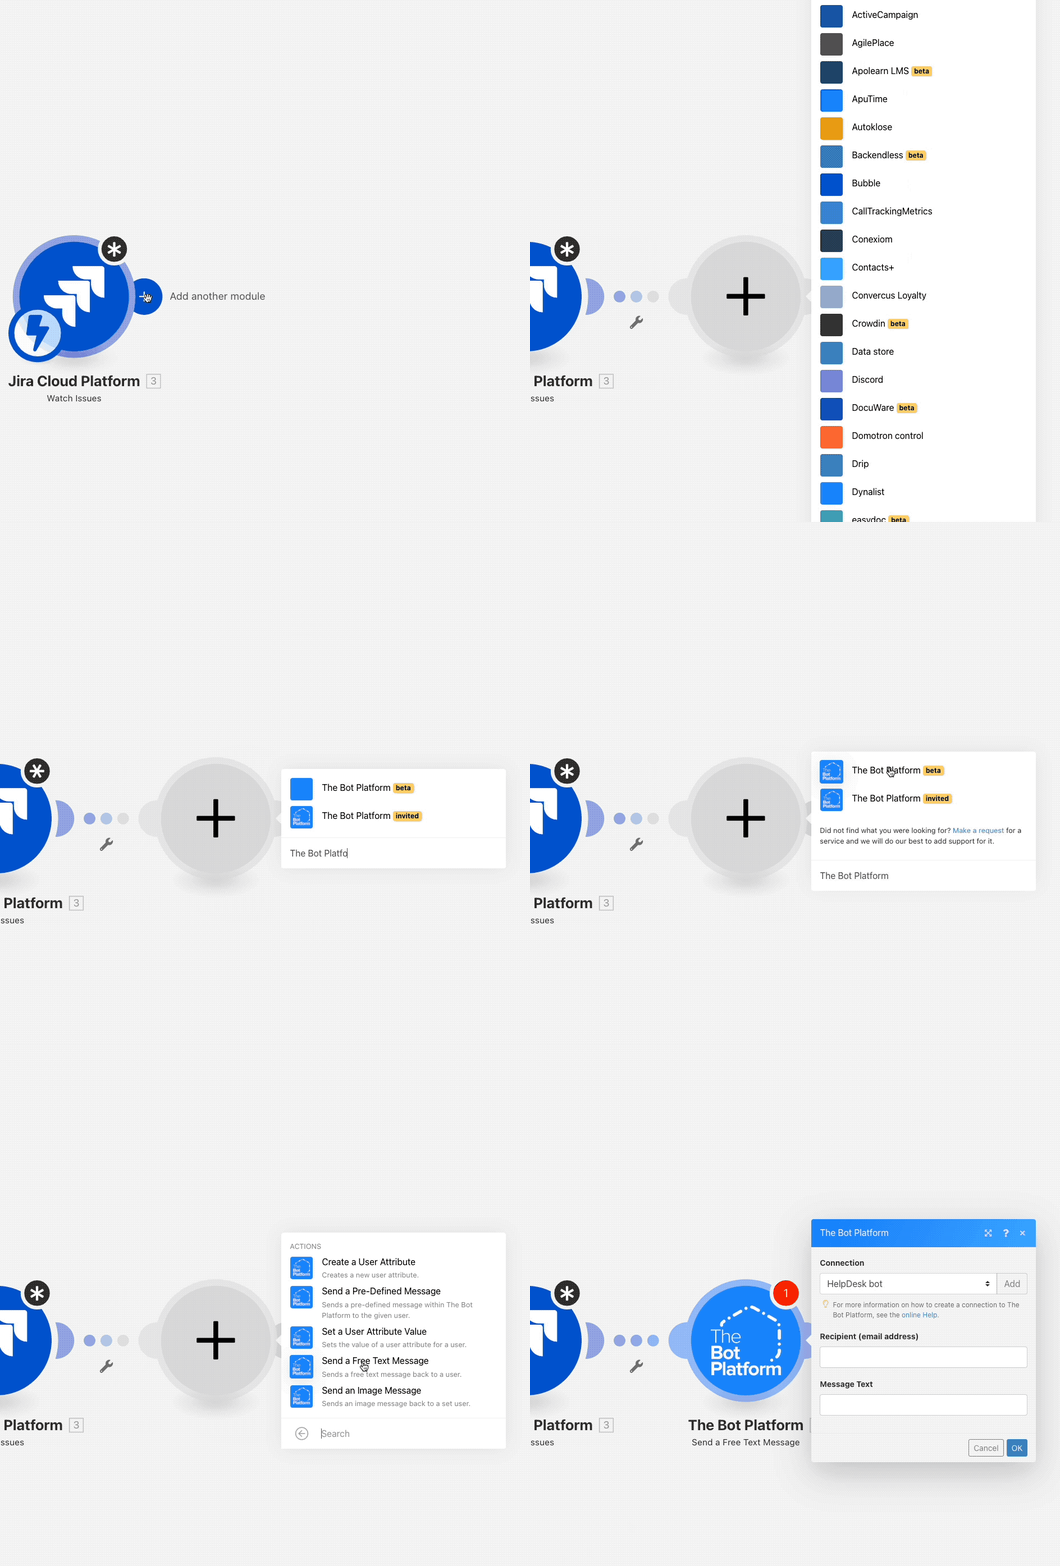
We will use our official connector to send our text message to the bot user. This message will include the reporters name, the issue ID and a summary of the issue. To get started, add another module and look for 'The Bot Platform (beta)'.

From the connections list, chose the bot from where you would like to send a message.
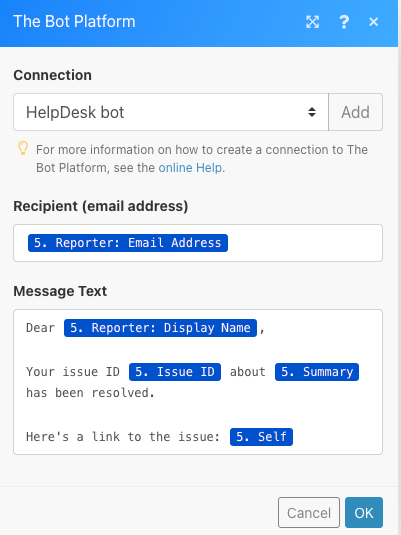
In the Recipient field, chose the email address of the user who needs to be notified. In this case we are sending the notification to the 'Reporter email address' which can be found from the output of the previous module.
For the message configuration, you can include output from the previous module as well as static text of your choice. Below is an example we have used in our use case:

In the above example, we have input some static text along with tthe name of the reporter, the issue ID, a summary of the issue as well as a direct hyperlink to the ticket.
Make sure to save your scenario and turn it on after you have completed the configuration. Go to your Jira instance and create a new issue or move an existing one to the status 'Closed'. If everything was setup correctly, you should receive a message from your bot notifying you about a closed ticket.

Happy ticketing! We hope those issues get resolved in a timely manner.
Updated 9 months ago
