Submitting a ticket to Jira using bots
Knowledge Level: Intermediate
Purpose
In this tutorial, we will use a bot to submit a ticket to Jira. A bot will capture the ticket information in attributes. At the end of the submission, we will post this information to a webhook in Make, which will eventually post this information to Jira.
Prerequisite
- A bot
- A Make account
- A Jira account
- Your favorite snack (A pack of Cheetos for me!)
Setting up the bot
For this use case, you need two message parts:
- A message to capture details of the ticket
- A second message to set the priority of the ticket
Setting up the Make scenario
We will use the following modules in our scenario:
- Webhook - To receive the request from your bot
- Router - To differentiate the ticket creation by priority level
- Jira - To create an issue in Jira
Step 1 - Setup Webhook in Make
In this step we will setup the webhook which will receive the ticket information from the bot.
Login to www.make.com
Create a new scenario and click the + sign to add a new connection. From the list, search for ‘Webhook’ and choose ‘Custom Webhook:
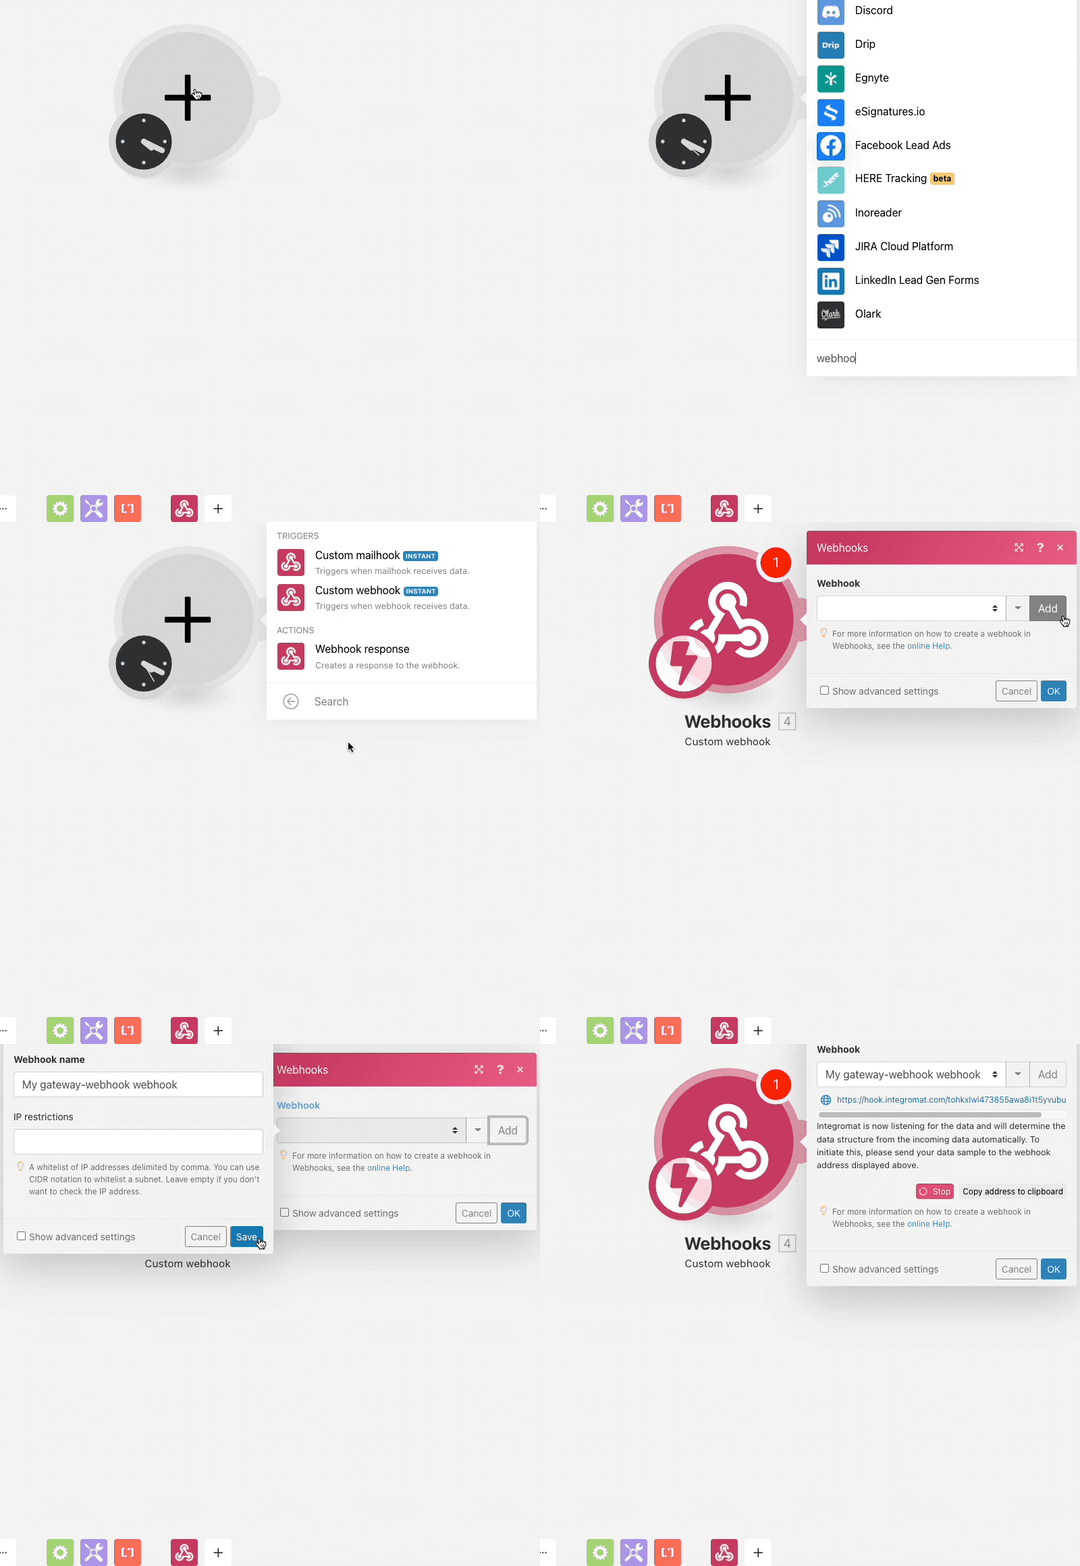
Copy the webhook URL from the module and paste it into the bot's last message part.
Step 2 - Add a router module in Make
In our use case, we are letting the user choose the priority of the ticket and assigning the priority value to an attribute in The Bot Platform:
- Low
- Medium
- High
Hence, we need to route our Make scenario accordingly to create the respective ticket with our desired priority level. To achieve this, we are using the 'Router' module in Make to direct our flow based on priority level received in the webhook.
Start by adding a new module in Make and search for 'router'
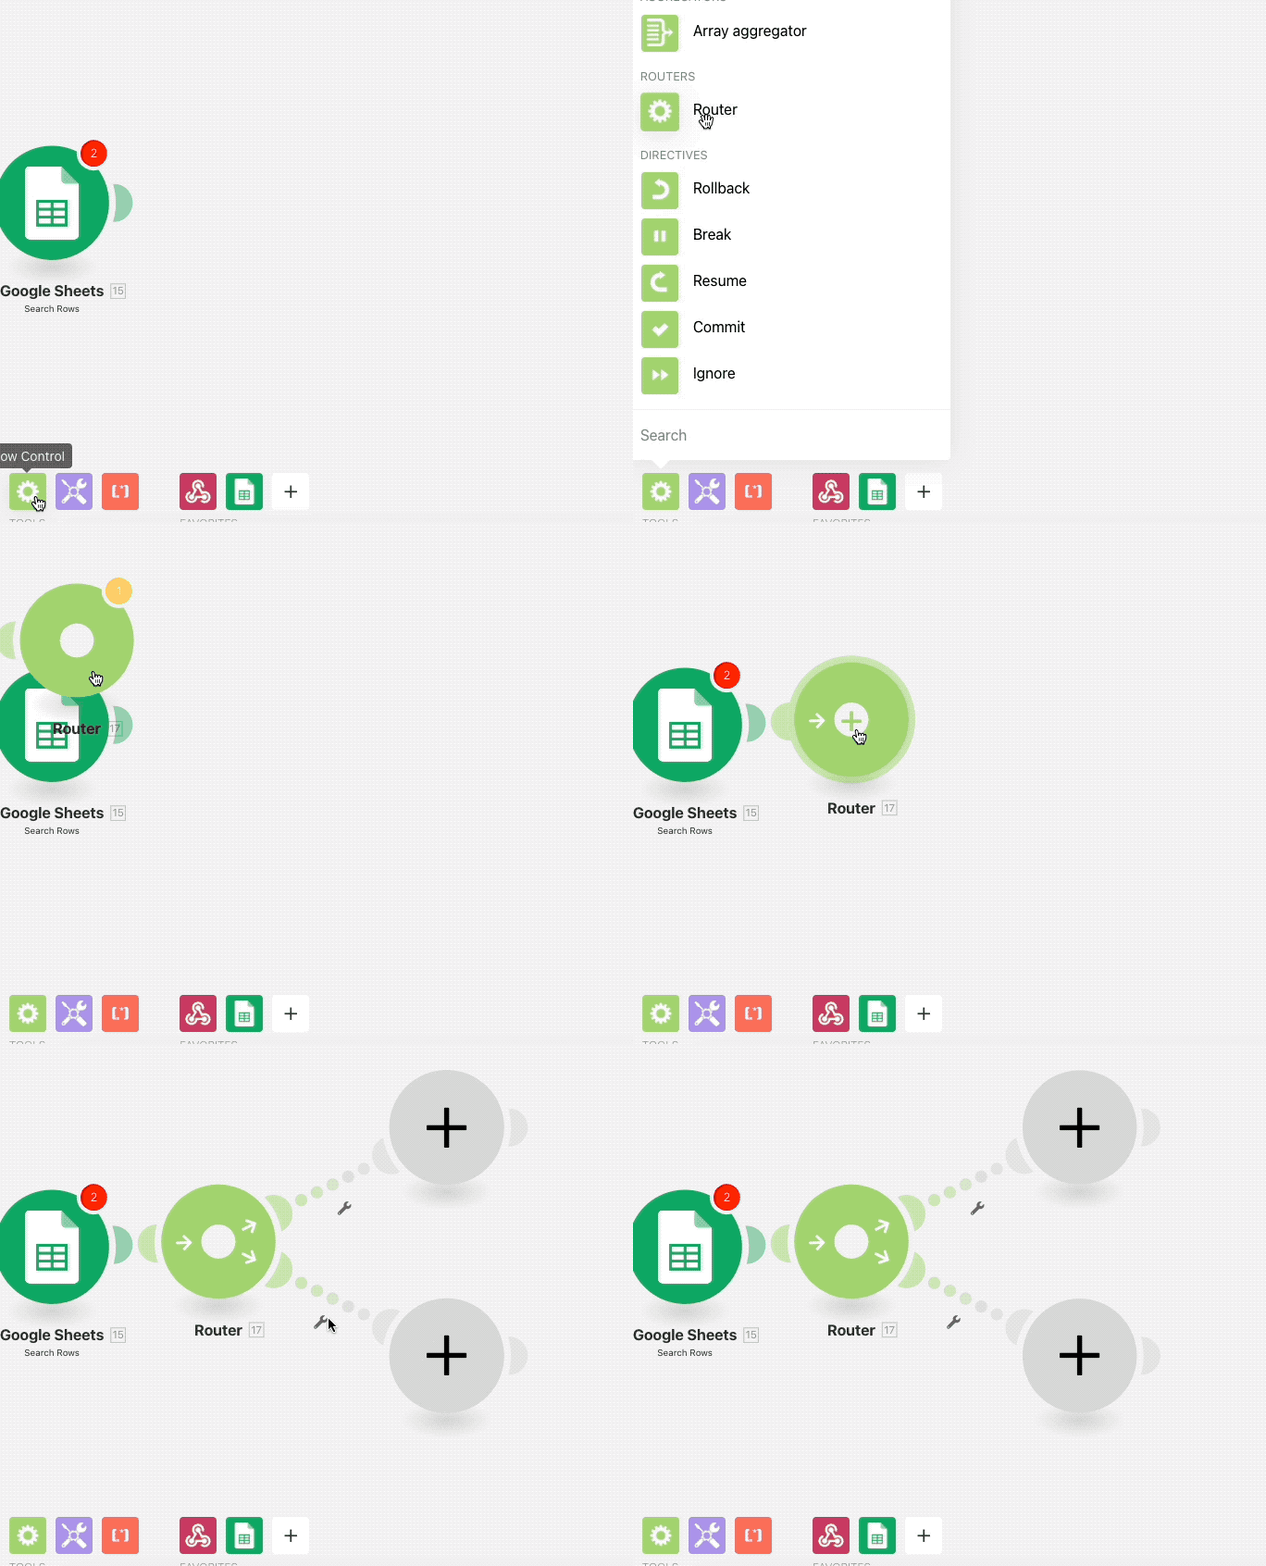
We will create 3 routes for our use case, one for each priority level. To configure the filter rules to direct your flow, click on the 'tool wrench' icon in your flow. See example below:
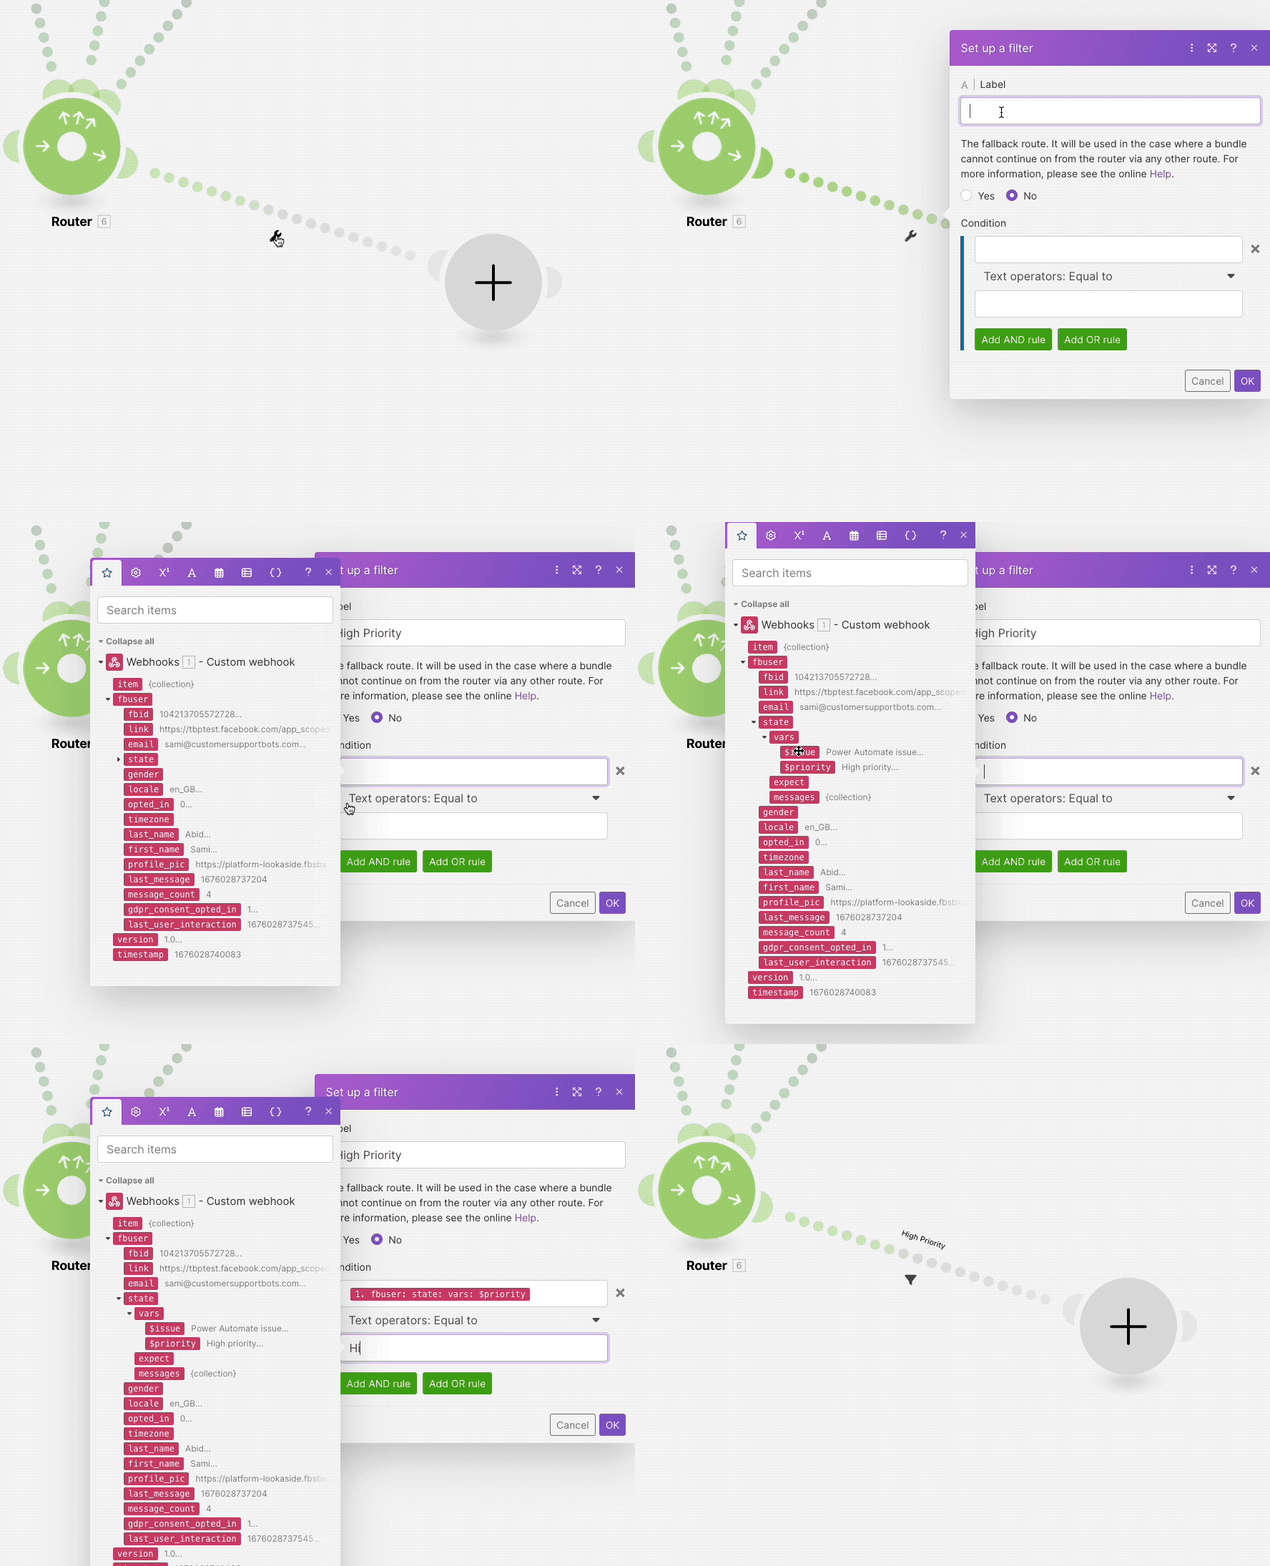
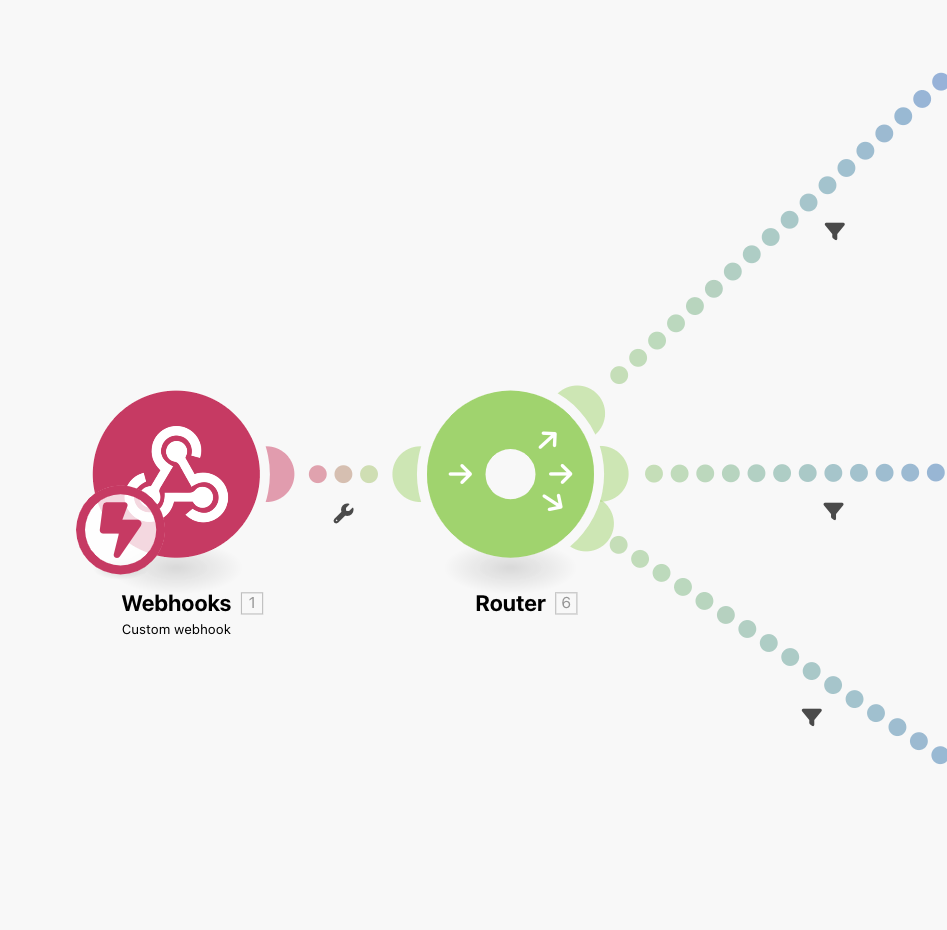
We will repeat the above step for each category. Eventually, your flow will have 3 routes, one for each priority level.
Step 3 - Configure Jira module in Make
This is our last step in the tutorial. Here, we will use the attributes incoming from the webhook and create our ticket in Jira.
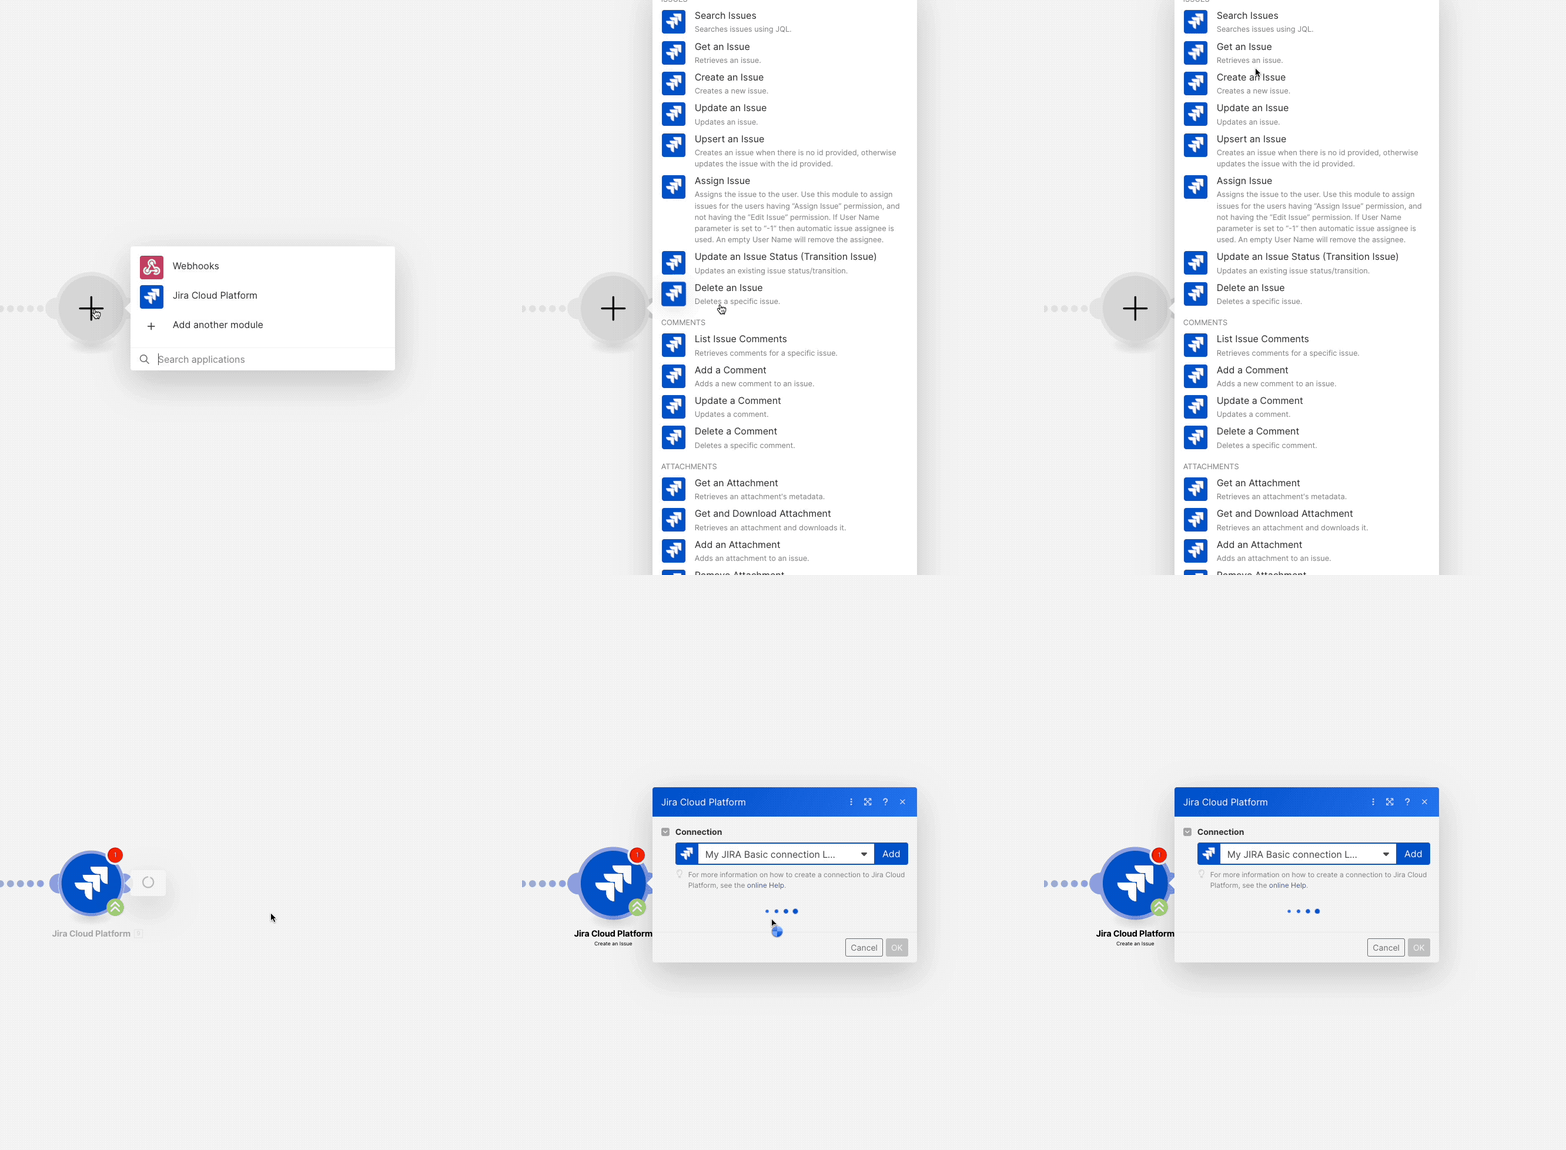
We will use the ticket description received from our webhook as the summary of the issue. For the priority level, pick it from the dropdown based on the router settings we configured in Step 2.
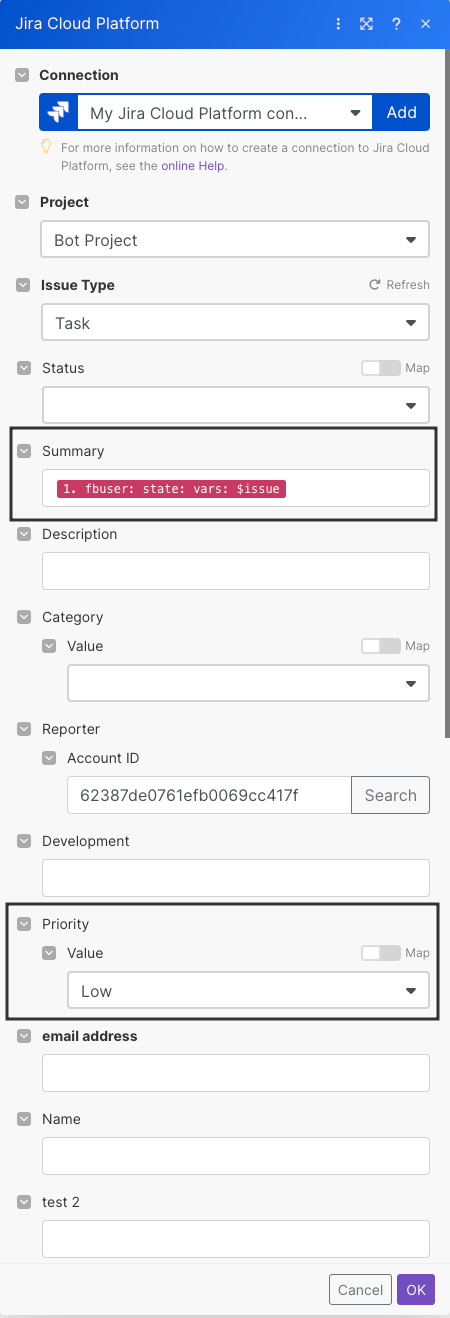
Save the module settings, then save the scenario. Make sure you turn it on.
If everything was setup correctly, once you submit your ticket information to the bot, the Make scenario should execute and input the ticket information in Jira.
Happy ticketing!
Updated 8 months ago
