Creating an FAQ Bot - Workplace and Make(formerly Integromat)
In this tutorial, we will show you how to create an FAQ bot that searches a Google sheet and returns the questions and answers.
In this tutorial, we will show you how to create an FAQ bot that takes the question from the user, looks that question up in a Google sheet and returns a carousel of up to 10 questions that could possibly answer the question the user has asked.
This tutorial uses The Bot Platform, Workplace, Make(formerly Integromat) and Google Sheets.
Step 1 - Creating our Bot
For this tutorial, we will create a simple bot that asks the user what they would like to know and stores their question in an attribute called question.
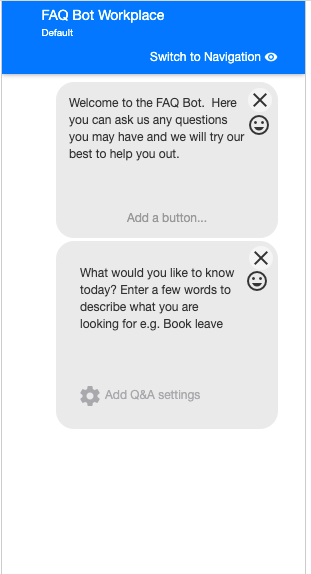
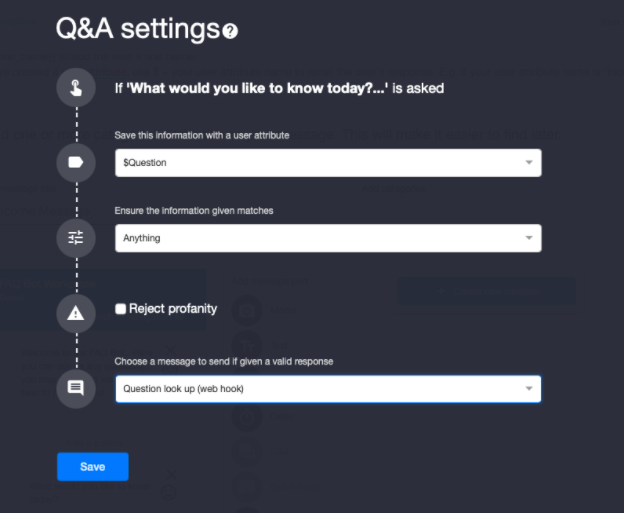
Once they enter a question, they are then taken to a message called ‘Question look up’. Once you have created your basic bot, connect it up to Workplace.
Step 2 - Setting up Make(formerly Integromat)
Head over to make.com and create a new scenario.
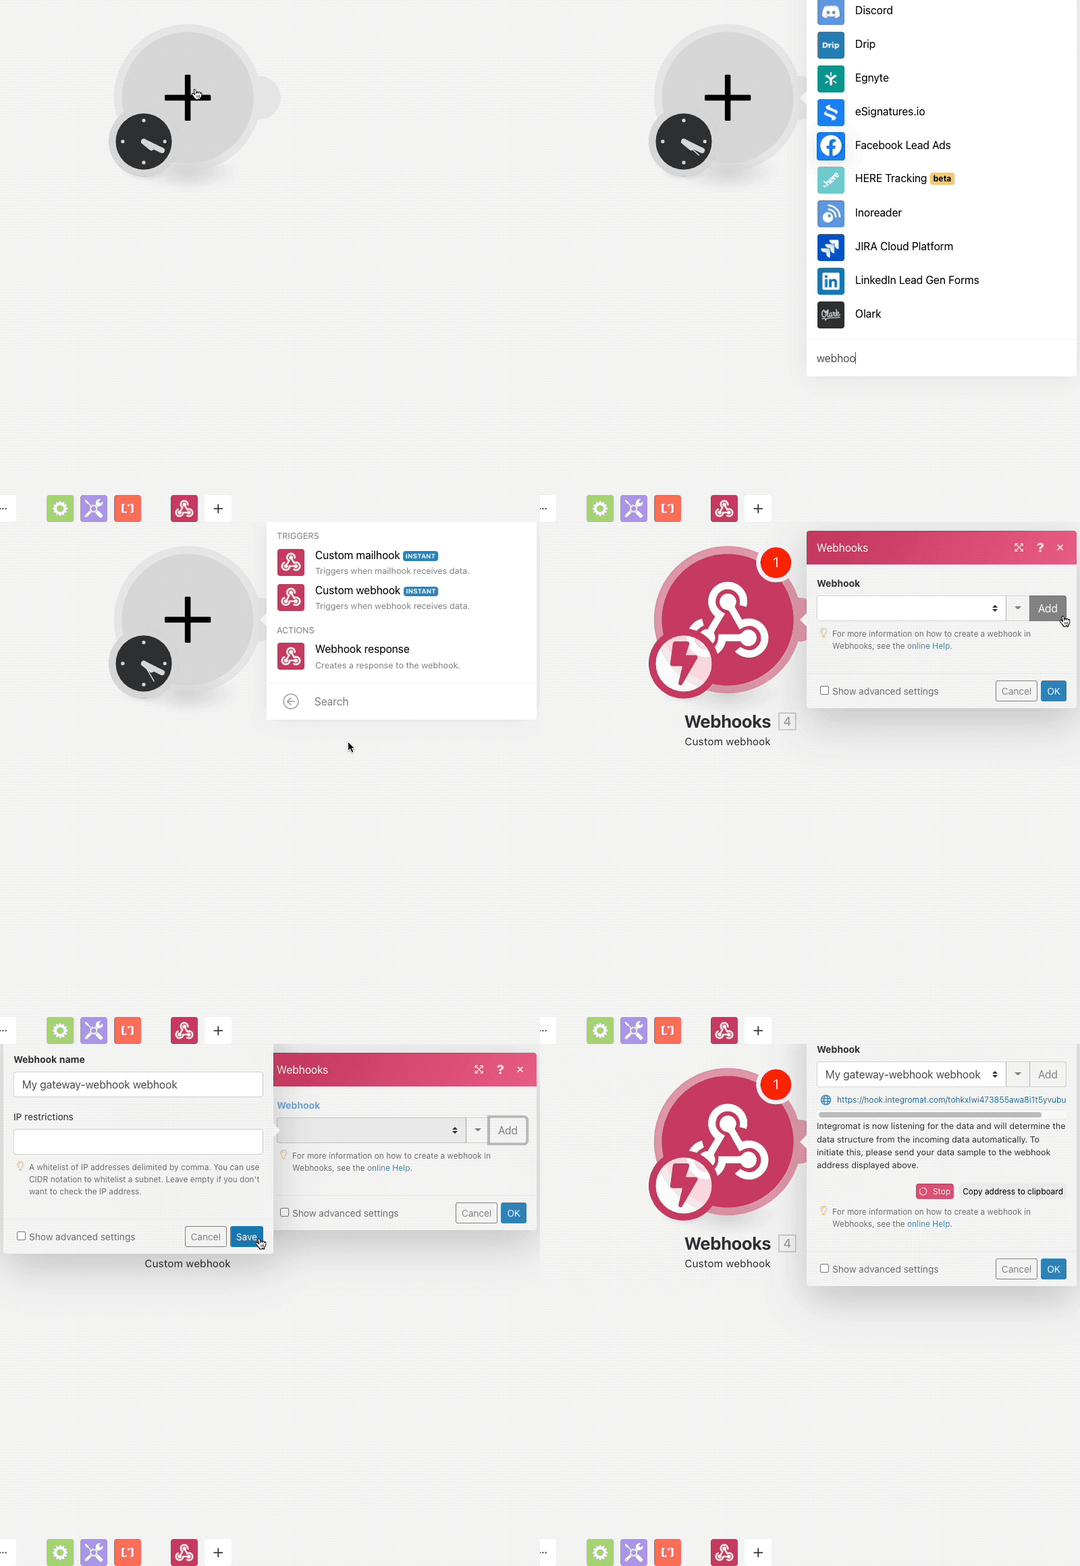
For the first step in our scenario, we need to add a webhooks module and you want to make sure you add a custom webhook.
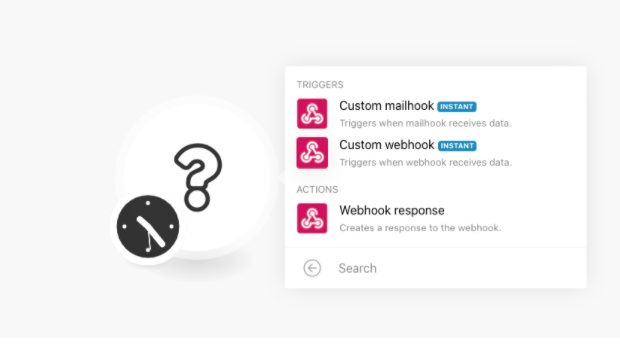
Add a new webhook and give it a name you will recognise. Once you have added your new webhook, you want to copy the new URL address it generates.
Step 3 - Setting up our webhook
Now we want to head back to our bot. In the ‘Question look up’ message, we want to add a little holding message to explain the slight wait while our bot looks up the questions. Then we want to add a webhook message. Paste in the URL you just generated in Make(formerly Integromat).
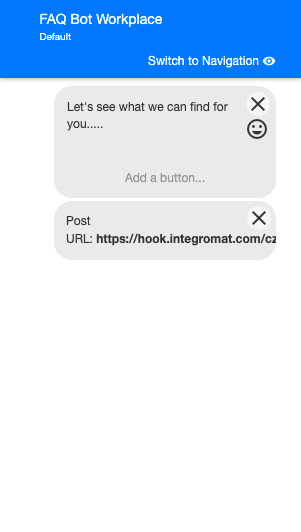
Save your bot and push the changes live.
Step 4 - Generate your spreadsheet of FAQs
The next step is to create your list of FAQs within a Google sheet. When creating your sheet, we suggest at the minimum you need three columns. Column one will contain your FAQ question in full. Column two will contain keywords that cover the main points of your question. Column three will contain the answer to your question. For example, please see our spreadsheet below.

This helps you provide the best possible FAQ answer to any of your users’ questions.
Step 5 - Finishing our Make(formerly Integromat) scenario
Now we need to finish our Make(formerly Integromat) scenario to get it to look up the questions in our spreadsheet and return the best answers to the users.
Head back over to Make(formerly Integromat) and click the ‘Run Once’ button. Now go back to your bot and test the current journey. Once you have completed your test, you should have a small 1 appear in your scenario as shown below:
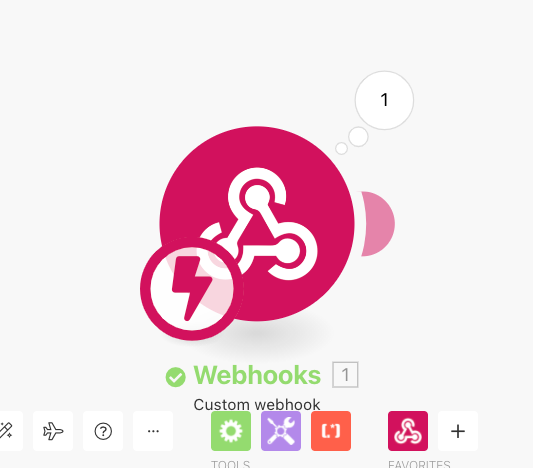
This shows us that your bot has pushed out information to Make(formerly Integromat).
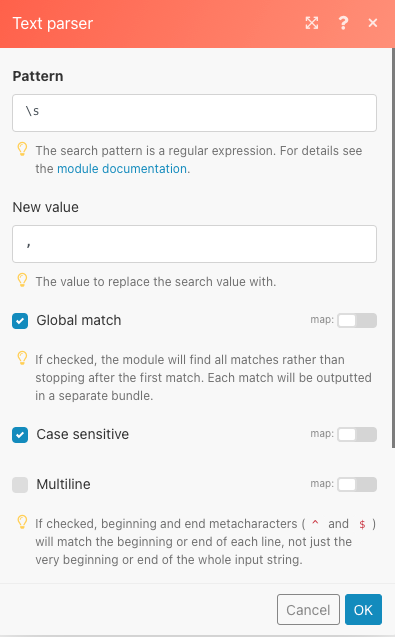
The next step is to split up the question typed in by the user to ensure we find all the relevant questions. So click the small semi circle next to the webhook module and we want to add a Text Parser module. This module uses regular expression to cut our user input up into separate words by looking for the spaces between words. In the pattern field, we want to add \s which checks for any spaces. In our new value, we want to add a comma ‘ , ‘. This will then turn all the words our user enters into a list as such.
Book leave becomes book,leave
Make sure you check the Global match box so it does it for our complete sentence. Then in our text field, you want to add the value entered by the user. You can find this under the information pulled through from our webhook, under state and then under vars. (See our Bootcamp section for help finding these variables).
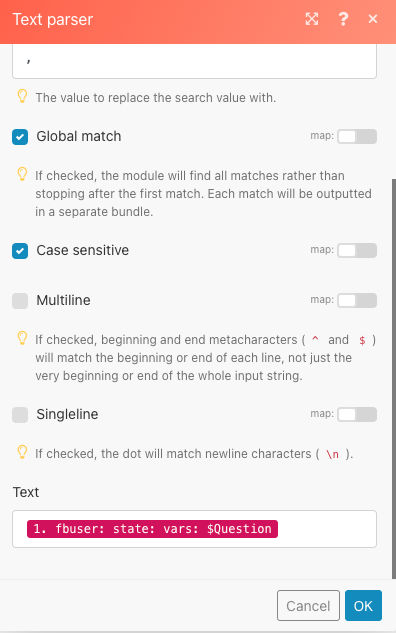
Next we need to add another text parser which will remove any question marks added by the user.
Our pattern this time is ?
Our new value is a comma ,
But the text this time is the field created by our previous text parser.
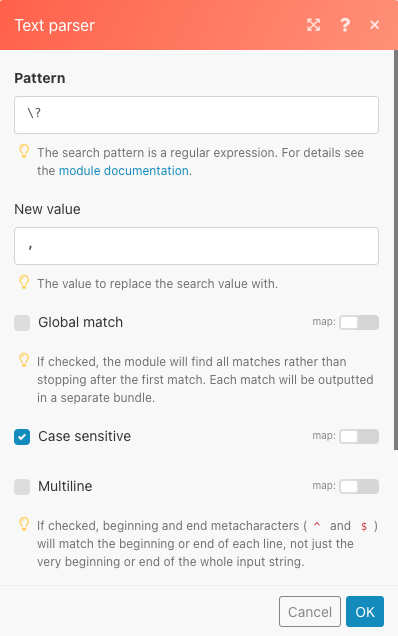
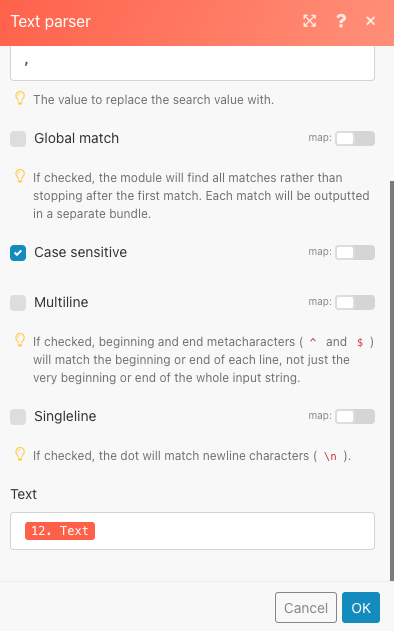
Now we have created a string of words we are looking for. We need to split these up and put them into a form we can use.
The next module we need is a ‘Set multiple variables’.
Under variables, click add item. Give the variable a name of ‘Split string’. In our variable value field, we want to split our long list into separate variables, so we use the Split function. In this field you want to add the split function. Then you want to use the text from the last text parser and our separator is our comma ,
When finished it should look as follows:
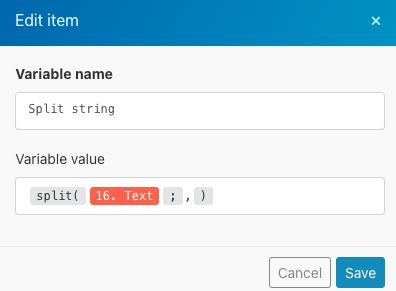
Click save and then click ok.
The final step in this text manipulation is to see how many words the user has entered as their question. So the next module we need to add is another ‘Set Variable’. We want to count how many words added to our array by the previous set multiple variables step. So we use the length function.
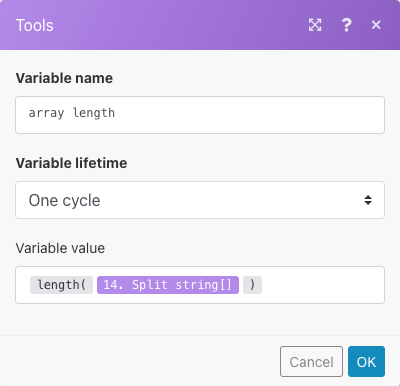
Our scenario now looks as below.

Step 6 - Setting up our search in Make(formerly Integromat)
The next stage of our scenario needs to search through all the FAQs within our spreadsheet for the words the user entered into our bot.
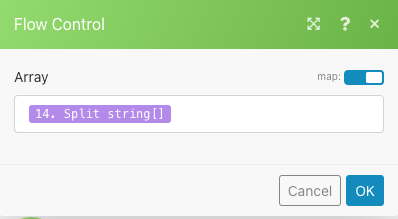
We need to add an ‘Iterator’ module to our scenario. This means our scenario will go through each word the user entered and search for possible FAQs. In the aggregator make sure the slider is set to map. Then you want to use the array of variables created in the set multiple variables step. This looks as follows:
We now need to search our spreadsheet. Add a ‘Google Sheets search rows’ module. Click the add at the top and hook Make(formerly Integromat) up to your Google drive. Once you have done this, select your FAQs spreadsheet from the drop down menu under Spreadsheet. Select the sheet you have stored your data. Now scroll down to your filter.
You want to search your keywords column. Then you want to change the middle option to Contains (case insensitive) and in the next box, you want to use the value from your iterator step.
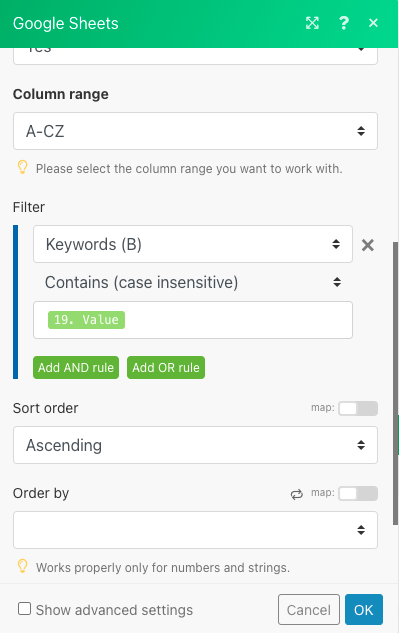
You also want to set the maximum number of returned rows to be 10.
Now we want to aggregate all the possible FAQs and answers into an array, so add an array aggregator module. For now, leave the set up of this module as it will require the next module to function correctly.
Add a Create JSON module to your scenario. Next to data structure, we want to click add and then give it a name to describe it. Then click on the Generator button and paste in the following code:
{
  "recipient": {
    "id": "USER_ID"
  },
  "message": {
    "raw": {
      "multipart": [{
        "text": "one"
      }, {
        "text": "two"
      }, {
        "text": "three"
      }]
    }
  }
}
When finished, click save and then additional fields should appear. In the FBID field, use the FBID pulled through from the webhook step. In the multipart step, make sure the map slider is active and in this field, use the data from the previous array aggregator step.
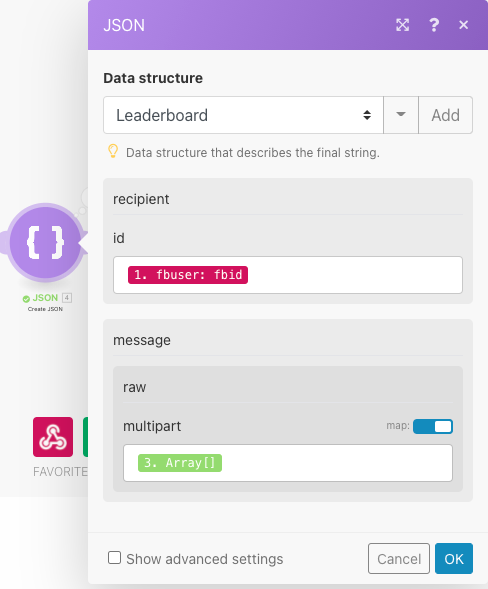
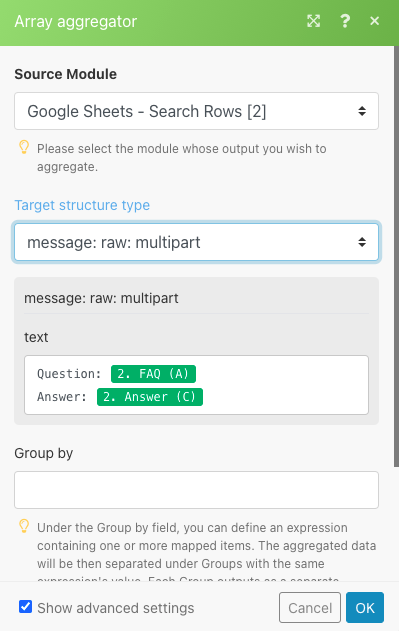
Now we want to go back to our array aggregator step and finish setting this up. Change your Source Module to the Google sheets search rows module. In your target structure type field, change it to message: raw: multipart.
Then in your text field, you can structure your messages how you want. In our example, we have added the question and the answer pulled through from our Google Sheets module.
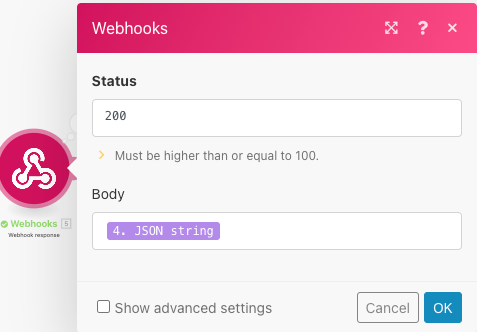
The final step in our scenario is a webhook response. Add the webhook response module and in the body, use the data from the Create JSON module.
When finished, your scenario should look as follows:

You can extend this tutorial further by adding in a router with a filter to return a different message if no results are found. You can also add in an option to submit a question to a team member if no suitable FAQ is found.
Updated 8 months ago
