How To Build a Bot That Shows Certain Messages at Certain Times
In this tutorial, we build a bot that displays certain messages during working hours and switches to an alternative message flow out of hours.
In this tutorial, we build a bot that displays certain messages during working hours and switches to an alternative message flow out of hours. This could be used to set up an out of hours bot for when your customer service department have gone home, or it could be used to display a different set of messages at different times of the day.
What you will need:
A Facebook account
A Facebook page (we suggest setting up a Facebook page purely for bot building so you can test before you put them live)
An Make(formerly Integromat) account -https://www.make.com
Step 1: Before you do anything you need an account on https://app.thebotplatform.com/
Once you have done this, click the create a new bot button and you are then given the option to link it to your Facebook account. You will need to make sure that you are logged in to Facebook with the admin account for your Facebook page. Please note, it is better to build your bot on a test page before you go live on your real page, so you may want to set up a new Facebook page purely for bot building.
Step 2: You can pick a template, but for this example, we are starting with a blank bot so click skip template.
Load up your new bot and put in your get started message. This message is displayed to users when they start up your messenger bot and appears above the get started button.
Step 3: Now you have created your bot, it is time to start building. The next screen will take you to the welcome message section. Click the text icon under the add message option. In our example, we are going to build a support bot, that gives call centre information when we are open and takes a written message if we are closed. In our example, we have used two text messages to introduce the bot and added two quick replies; Support and Product information to capture which type of information they are looking for.
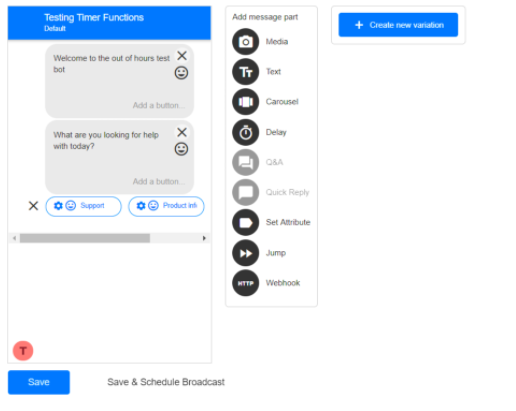
Click on the cog icon next to Support and you will want to set the action as ‘send message’ and then create a new message, called Support general.
Click on the cog icon next to Product information and again you need to set the action as ‘send message’ and create a new message called Product.
Click Save at the bottom of the screen.
Step 4: You will now see that you have two new messages appearing in your message list; Support general and Product.
Go into Support general and add a generic introduction using a text message. For example, in our solution we added the text “We are sorry to hear you have a problem with your device, let's see how we can help you.
You then need to add a webhook message. Open the webhook message and you will be asked to add in a URL. This is where we need to go over to Make(formerly Integromat).
In Make(formerly Integromat), you need to create a new scenario. Click on the question mark circle and you are looking for a Webhook trigger. Add a custom webhook and then click add next to the large box. You can call your webhook anything you like, but we suggest giving it a name you will recognise later like ‘Out of hours bot trigger’. Once you click save, you will see that a URL appears in the box. This is the one you need for your message on the bot platform. Copy the URL address to your clipboard and paste it into the URL field on your bot.
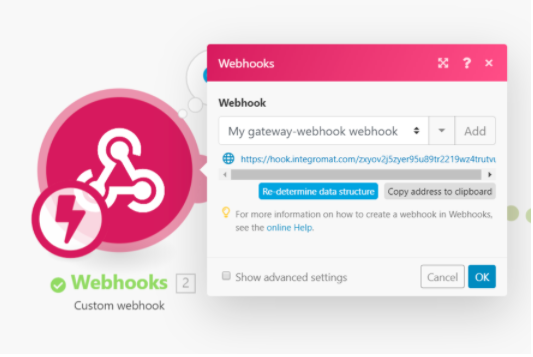
Step 5: We now need to create two new messages; Support out of hours and Support in hours.
Click the blue create message button at the top right of the screen. First, let’s create the in hours support message. With our bot, we are trying to drive customers to call our telephone support in working hours so we add a message asking them to give us a call.
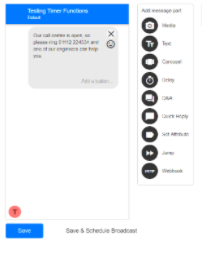
Click save and then click the create message button again to set up your out of hours message. In our example, we are going to direct them to the website or give them the option of sending us a message we can pick up when we open. Once done, save your message.
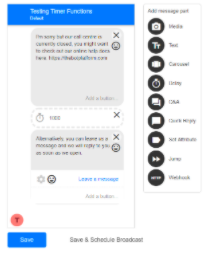
Step 6: We now need to set up the routing within our bot to ensure that the appropriate message is displayed at the right times. We need to go back to Make(formerly Integromat) and we need to build out our scenario. On the right hand side of the webhook, add a router. To do this, go down to tools at the bottom of the screen, click on flow control and select router. We want to add two possible options to our flow so click the + button in the centre of the router twice.
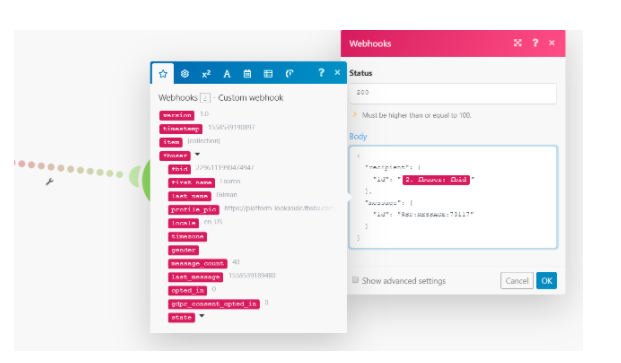
Let’s start with the in hours response. Click on one of the circles with a question mark and select Webhook and we want to add a webhook response. In the body of this response you need to add the following code:
{
  "recipient": {
    "id": "SELECT THE fbid FROM THE INCOMING WEBHOOK"
  },
  "message": {
    "id": "@BP:MESSAGE:DEEPLINKMESSAGEIDNUMBER"
  }
}
The “id” needs to be the fbid token from the custom webhook as shown in the below image. To find the deeplink message ID number, you need to go back to the bot platform, scroll down to your support in hours message and click the white deep link button. This will give you a URL such as https://m.me/371066253516379?ref=message:73117 The message ID number is the last 5 digits. 73117.
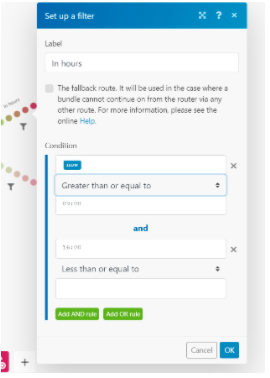
We now need to set up a filter, to ensure that this branch only triggers in hours. Click on the dotted line joining this new webhook response to the router. You now need to set up an in hours filter, that compares the current time (now) to ensure that the time operator is greater than or equal to your opening time AND less than or equal to your closing time. As shown below:
Step 7: We now need to repeat the above for the out of hours message. Add in another webhook response, but this time ensure that the deeplink message ID matches your out of hours message.
Add another filter, but this time you want to check that the current time is greater than your closing time OR earlier than your opening time.
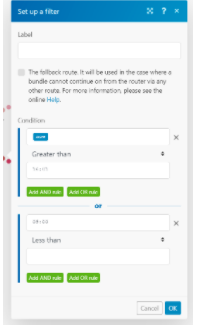
Save your scenario and turn the scenario on using the green slider at the bottom. Go back to the bot platform and ensure you push all the changes live. You are now ready to test your bot. Click test next to your welcome message and you should see your bot give the correct response based on your current time of day.
Updated 9 months ago
