Creating a Bot That Sends A Message To A User On Their Birthday
In this tutorial, we will create a bot that sends a message to your employees on their birthday.
In this tutorial, we will create a bot that sends a message to your employees on their birthday. For this tutorial, you will need access to The Bot Platform API. To request access, please contact us through our helpdesk.
For this tutorial you will need a Google sheet with all your employees’ birthdays listed and their email addresses.
Step 1 - Create your birthday bot
First we need to create our bot. Create a new Workplace bot and connect it up to Workplace. For help on how to do this, please see our bootcamp series of tutorials.
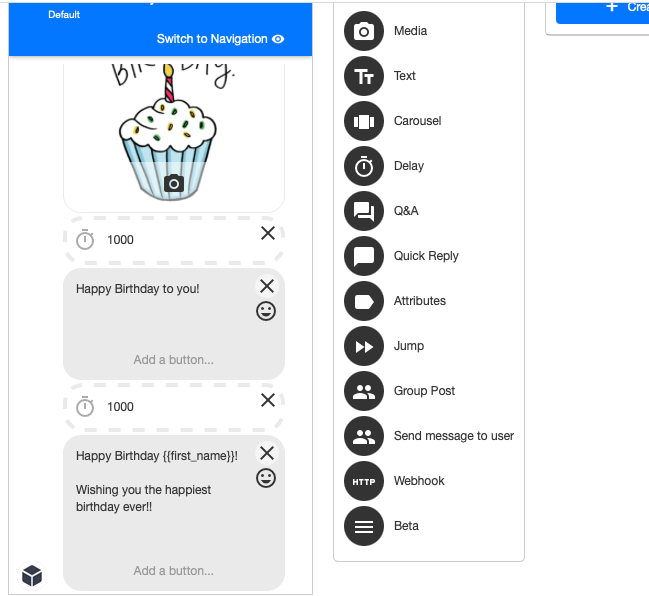
For our bot, we have created a simple bot, that wishes the person a happy birthday. As this is a simple bot, it only has the birthday wishes in the welcome message.
Step 2 - Creating our Make(formerly Integromat) scenario
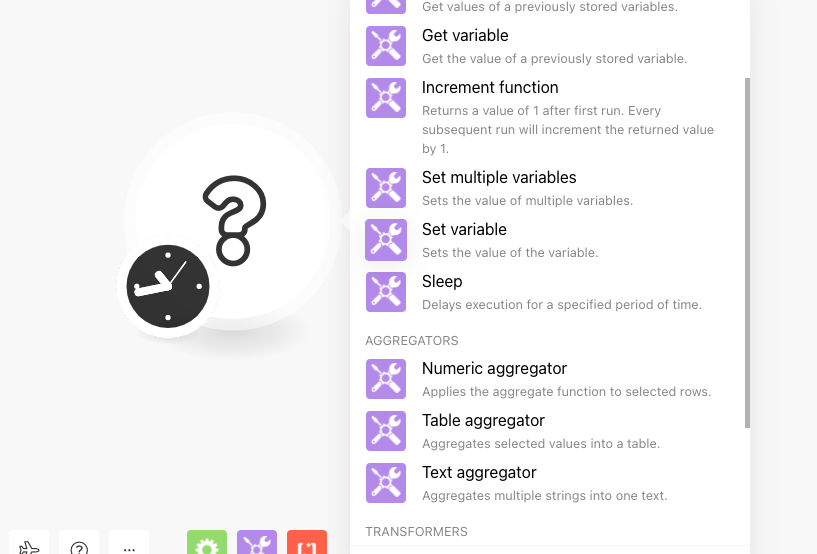
Head over to Make(formerly Integromat) and create a new scenario. When the new scenario loads, we want to click on the circle with a question mark in the middle. We want to search for a tools module and we want to add a Set Variable module.
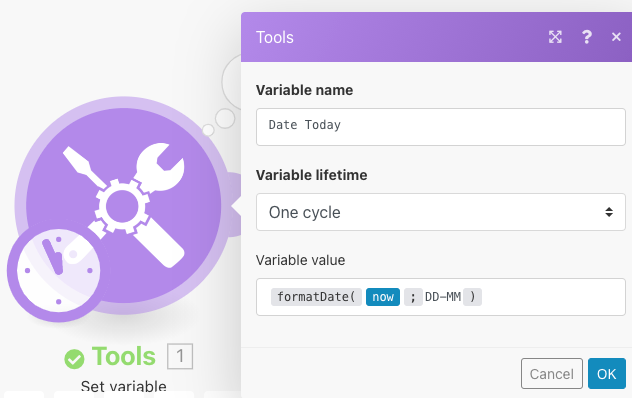
We will store today’s date in this variable, so give it a suitable name e.g. Date Today. Leave the Variable lifetime as one cycle. In the variable value, we want to add the function ‘formatDate’.
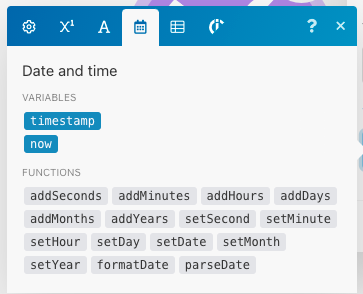
Before the semi-colon, you want to add the value ‘now’ and the other side of the semi-colon you want to add DD-MM or however you want your date formatted based on your geographic location.
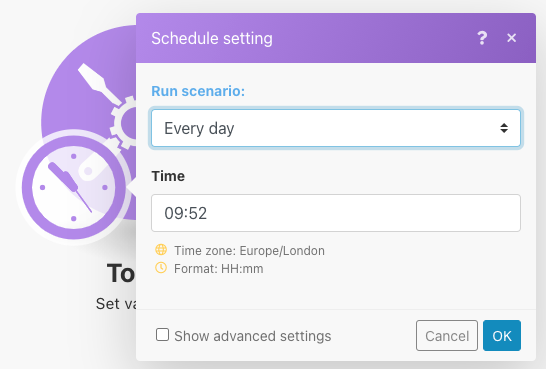
We need to set this scenario to run once a day to send out our birthday greetings, so click on the schedule at the bottom left of the screen (icon looks like a clock). Change the schedule so that it runs every day and set the time you would like your birthday greetings to be sent out.
Step 3 - Setting up our API access and adding our authorisation code
Once you have been granted access, you will have the API access option down the left hand side of your bot screen.
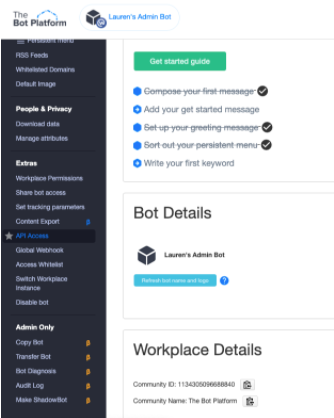
Click on the API Access option and then click create app at the top right.
You will then see the following screen.
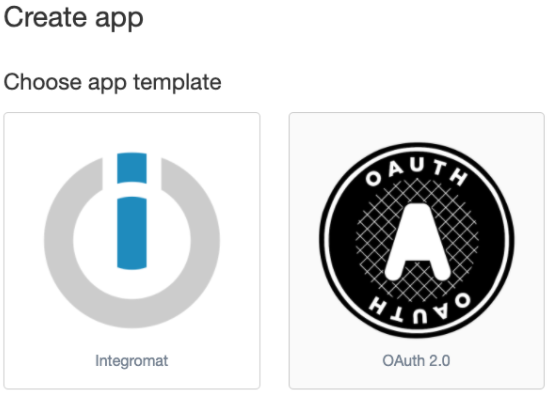
Click on OAuth 2.0. You will see the following screen:
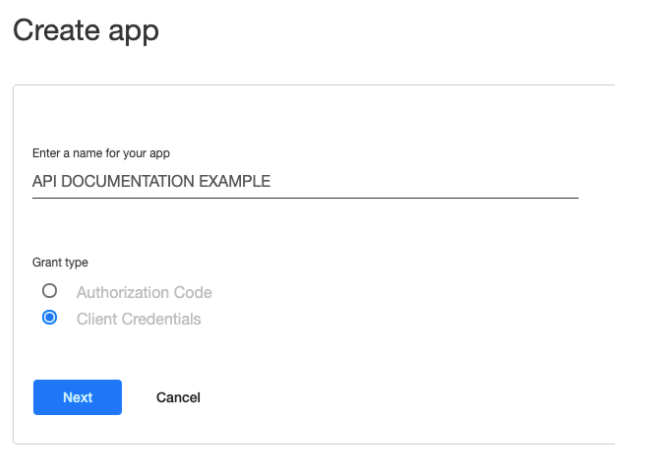
Select Client Credentials in the grant type and give your app a name. Then click next.
You will now see a screen as shown below. Your Client ID and Client Secret will only be shown once, so you need to make a note of them. They will be needed to use the API. When you have copied them out, you can click save changes. You can now use this to connect to your bot from external sources as outlined.
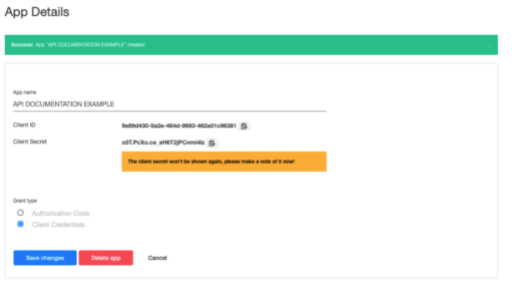
In order to use The Bot Platform’s API with OAuth you need to generate a bearer token using the Client ID and Client Secret from your app. Please note that a bearer token is only valid for 60 minutes. This means that you will need to generate a new bearer token every 60 minutes in order for your API connection to continue running, however this tutorial will show you how to automate this process.
Head back to your Make(formerly Integromat) scenario and we want to add another module. Click on the semi circle next to the create variable step and look for an Http ‘Make a Request’ module.
We need to set it up as follows:
In the URL field, you want to paste the URL https://api.thebotplatform.com/oauth2/token
You want to change the method to POST
The body type should be Application / x-www-form-urlencoded
Now we need to add some fields.
Create a new field and give it a key of client_id. Now paste in the Client ID from your app on The Bot Platform.
Create another field called grant_type. Use the value client_credentials in the value box.
Create another field called client_secret. Paste the Client Secret from your app into the value field.
Make sure the parse response checkbox is ticked and click ok.
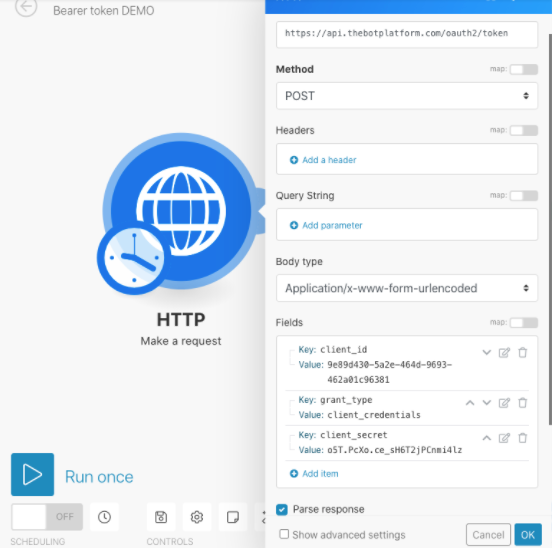
Now when we run this, it will generate the Bearer token we need to do the remaining steps.
Step 4 - Searching our spreadsheet
The next step is to search our spreadsheet for everyone who has a birthday today. After our HTTP module, you want to add a Google Sheets, Search rows module. We need to select our birthday list spreadsheet from the drop down and the sheet from the next drop down. For testing, we suggest you create a test spreadsheet with a couple of testers with today’s birthday.
In our filters, we need to search the Birthday column, for today’s date, so we want to search the Date column to see if it contains the variable we created in the first step ‘Date today’.
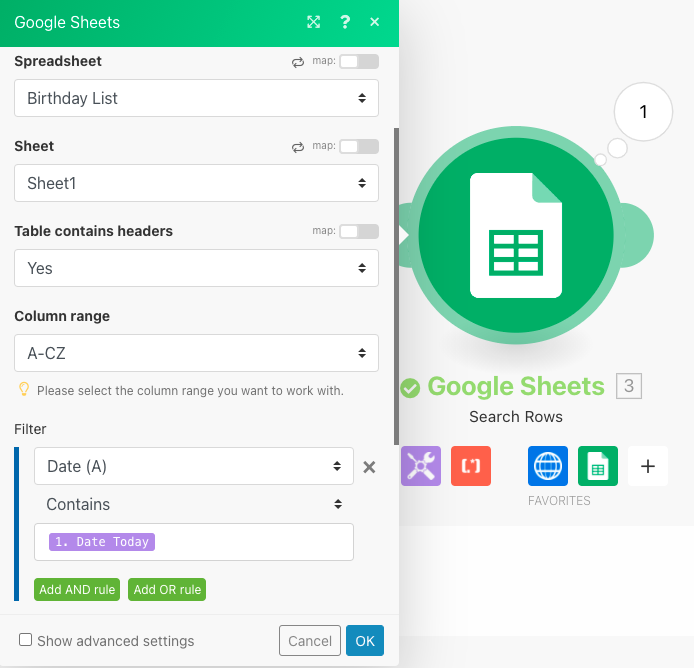
Now we have our list of people with birthdays today, we can push out messages to these people.
Step 5 - Pushing out our birthday message
We need to add another module to our Make(formerly Integromat) scenario. Look for a Create JSON module and add that in. Click add next to your data structure and in the next screen, give your structure a name like ‘Sending a preset message’. Now click on the Generator button and in the next screen, paste the following code:
{
     "data": {
          "type": "activity",
          "attributes": {
               "recipient": "[email protected]",
               "message": {
                    "id": "3fa85f64-5717-4562-b3fc-2c963f66afa6"
               }
          }
     }
}
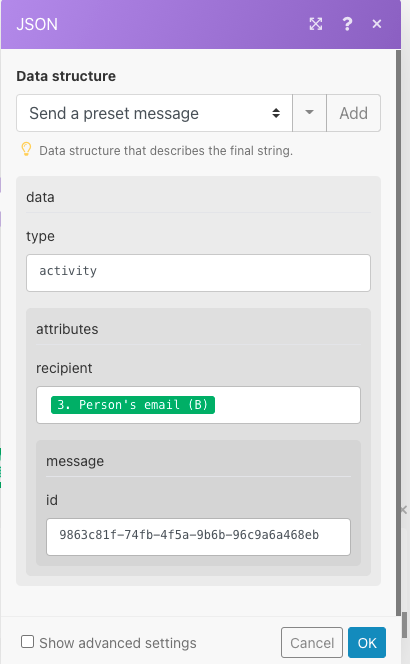
Click save, then save again and you will now have an option to enter data and attributes.
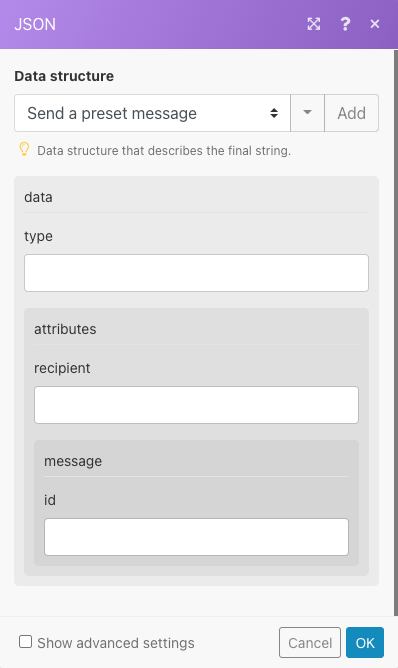
In the data box, type in ‘activity’
In the recipient box, you want to use the email of the person with the birthday, so we use that field pulled from the spreadsheet step.
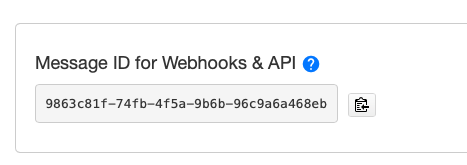
To get our ID we need to go back to The Bot Platform and our messages list. Next to the birthday message you want to send, there is an option button called Options. When you click on this, it will display the Message ID for Webhooks and API. Copy this ID into the Make(formerly Integromat) field ID. Then click OK.
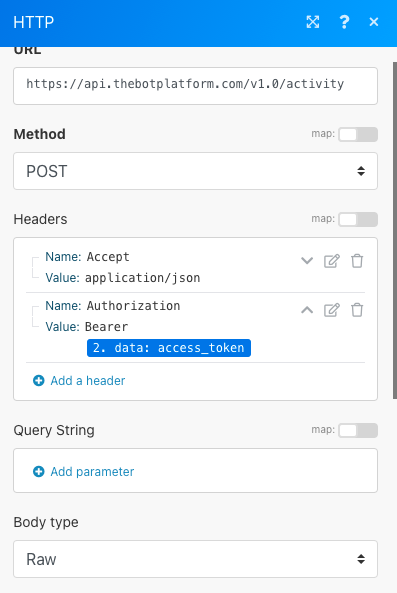
The final step is to push this message out so we need another HTTP ‘Make a request’ module. In the URL field paste the URL https://api.thebotplatform.com/v1.0/activity
Change the method to POST
Add a header Accept with a value of application/json
Add another header of Authorization with a value of Bearer and the access token your pulled through in your first HTTP module.
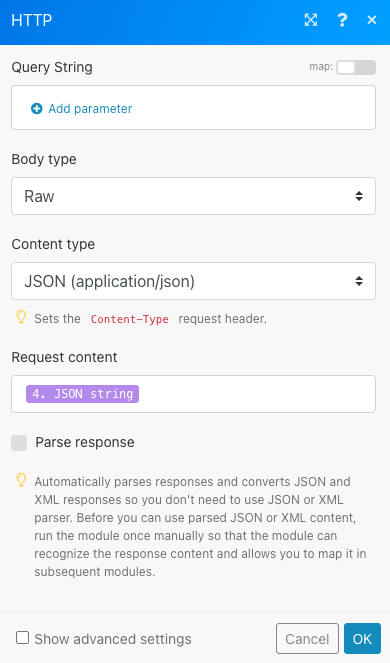
Change the body type to Raw
Change the content type to JSON
In the request content, add in the create JSON you created in the previous step.
When set up, it should look as shown below:
Add some test data into your spreadsheet and then click run once. Anyone with a birthday today, will now receive a birthday message.

Updated 8 months ago
