
Automated follow ups to managers and employees using bots and HRIS
Send automated follow up messages to managers and employees via a bot, based on a custom report in BambooHR.
Purpose
In this tutorial, we will use an existing custom report in BambooHR to check for a list of pending tasks. The pending task list will be sent to the manager of the team in the form of a carousel. The manager can then chose to send reminders to the team member for whom the task is pending.
Prerequisite
- A bot
- A Make.com account
- A BambooHR Admin login and API key
- Your favorite beverage 🍹 (Barbican Berry Burst for me!)
Demo
Here's the bot in action:
Manager receives pending items

Employee receives reminder
Setting up BambooHR Reports
As a first step, we will need a data source which will help us identify the audience who will be receiving the report summary as well as the users who will need follow up messages. For this use case, we will need to know the manager and the employees both, the former will receive a summary of the report via a bot and the latter will receive follow ups from the manager based on manager's discretion.
For a guide on how to setup reports in BambooHR, follow this link
For our user case, we will need the following fields in our report:
- Task name
- Work email (for employee)
- Reporting to (Manager name)
- Supervisor email (manager email)
Once your report is setup, make sure to save it and note the Report ID, this will be required in the next steps.
The Report ID can be found in the browser address bar when viewing the report.

The part towards the end after / is the report id. In this example above, it is '100'.
Configuring Make scenario
After creating a new scenario in Make, add your first module and look for BambooHR. We will chose the 'Make an API call' module as there is no native connector in Make that can get BambooHR report data.
We will configure this scenario based on API reference provided by BambooHR. Our aim is to pull data of a specific report configured in BambooHR.
The specific API call we are using can be found here
The configuration of the flow will look as follows:
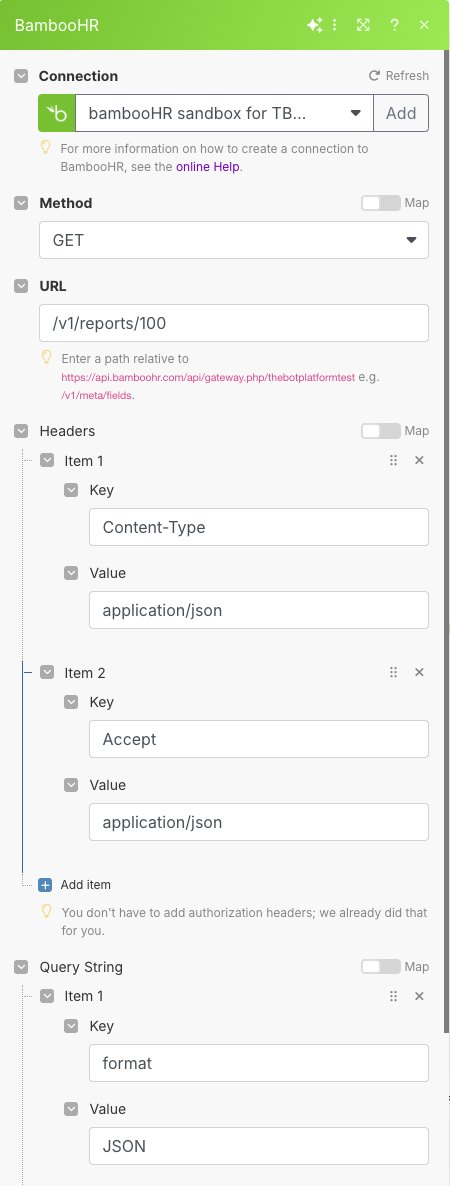
Here's the fields we've configured:
Method: Get
URL: /v1/reports/100
| Field | Key | Value |
|---|---|---|
| Headers/Item1 | Content-Type | application/json |
| Headers/Item 2 | Accept | application/json |
| Query String/ Item 1 | format | JSON |
After configuring the module, right click on it and click 'Run this module only'
As you can see in the image above, we got a list of staff and their pending onboarding tasks. We can now use this information to build our message which will be sent via the bot.
Set Variable module
In the next step, we will pass the value we obtained from the previous module into a variable. This will ensure we only pass the information we actually need for our survey as the BambooHR module contained 'body' and 'headers' element which we do not need.
Start by adding a 'Set Variable' module:

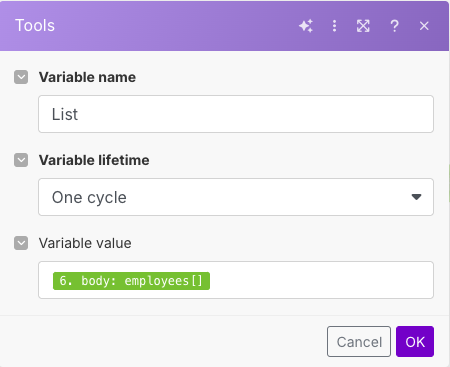
In the configuration, enter any name as the variable name. For our use case, I chose 'List'. In the value section on the module, input the 'employees' output obtained from the previous step. The configuration will look as follows:
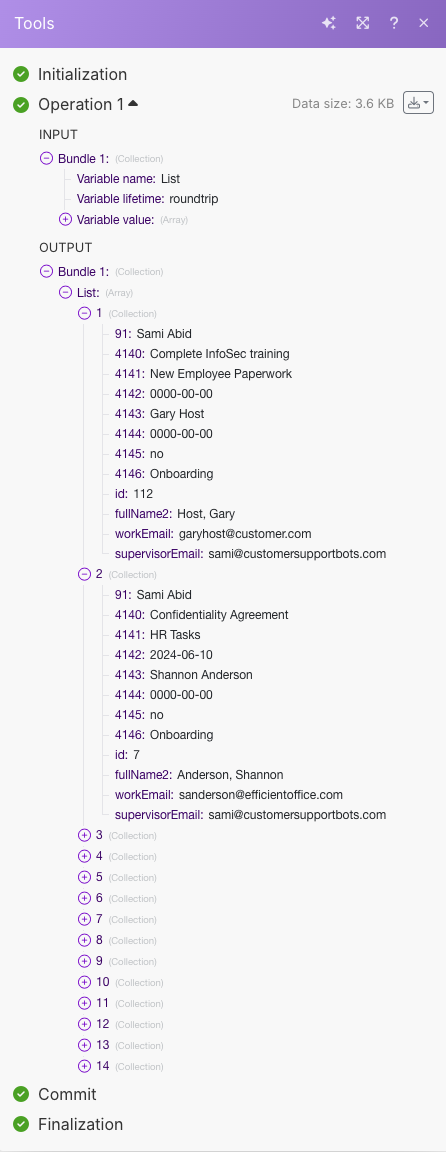
Sample dataAfter saving the changes, hit 'Run Once' to run the scenario, we will need to do this at every step so that sample data is available to map in the next module.
Iterator Module
In the next step, we will setup an iterator module. This will ensure the data we have mapped in the previous module is passed on as a list, we will need that for the next module. The iterator module helps us in splitting each employee as a separate item along with their task information.

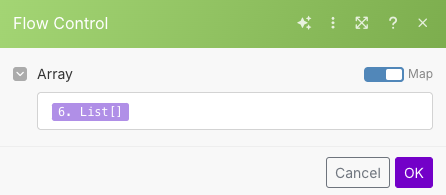
After adding the module, configure it by selecting the output from the 'Set Variable' module.
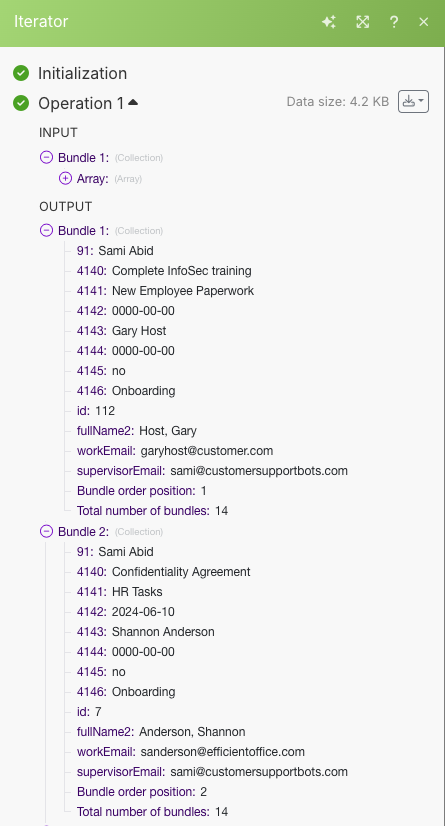
Similar to previous steps, hit the 'Run Once' button once again to get an output for the next module.
The output should show as follows:
Array aggregator
As the output is going to have multiple results, we will need some sort of formatting tool to store the various pieces of information, summarize them in human-readable format and store them in various variables. Hence we will utilize JSON as our framework for structuring our incoming information. For more information about JSON, please visit this link https://www.json.org/json-en.html.

After adding this module, leave the configuration to default, we will come back to this step shortly.
Create JSON module
Setup a JSON module in Make( which will feed information from the array aggregator. To do so, add another module and look for 'Create JSON'.
We now need to add a structure to our JSON module to format the information in a card as we have to present multiple results to the user. Click on 'Add' in the JSON module, give it a suitable name and click the 'Generator' button. In the sample data section, insert the following code snippet below:
{
  "data": {
    "attributes": {
      "messages": [{
        "attachment": {
          "type": "template",
          "payload": {
            "elements": [{
                "title": "A ticket to the theatre",
                "buttons": [{
                    "type": "postback",
                    "title": "View this lot",
                    "payload": "@BP:MESSAGE:83510"
                  },
                  {
                    "type": "postback",
                    "title": "Place a bid",
                    "payload": "@BP:MESSAGE:83510"
                  }
                ],
                "subtitle": "Did you want to bid?"
              },
              {
                "title": "A £100 voucher",
                "buttons": [{
                    "type": "postback",
                    "title": "View this lot",
                    "payload": "@BP:MESSAGE:83510"
                  },
                  {
                    "type": "postback",
                    "title": "Place a Bid",
                    "payload": "@BP:MESSAGE:83510"
                  }
                ],
                "subtitle": "Did you want to bid?"
              }
            ],
            "template_type": "generic"
          }
        }
      }],
      "recipient": "[email protected]"
    },
    "type": "external-activity"
  }
}
We are using a card with buttons in this use case. Once you have saved the data structure, your module will look as follows:

Press 'OK' to close the module for now, we will came back to this in a bit.
Save your scenario and go back to the array aggregator module. Under the 'Target structure type' dropdown, look for select the first JSON module. Here we will configure the message parts that need to be summarised from our 'Set Variable' module.
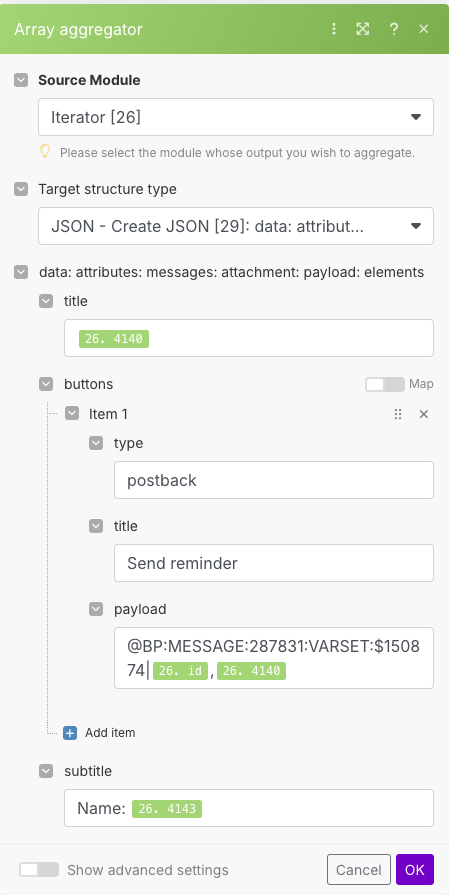
In the 'title' column, we will pass the name of the task which is referred to as '4140' obtained from the BambooHR API. Under 'subtitle' we are passing the name of the employee.
The 'type' and 'title' configuration fields are static text values. The 'payload' element is customisable and depends entirely on your use case. In our use case, we are using the payload button to activate a different message in the platform, we are attaching the employee id and task name in that message part. We can then use this activated message to activate another webhook scenario to send a reminder message to the employee.
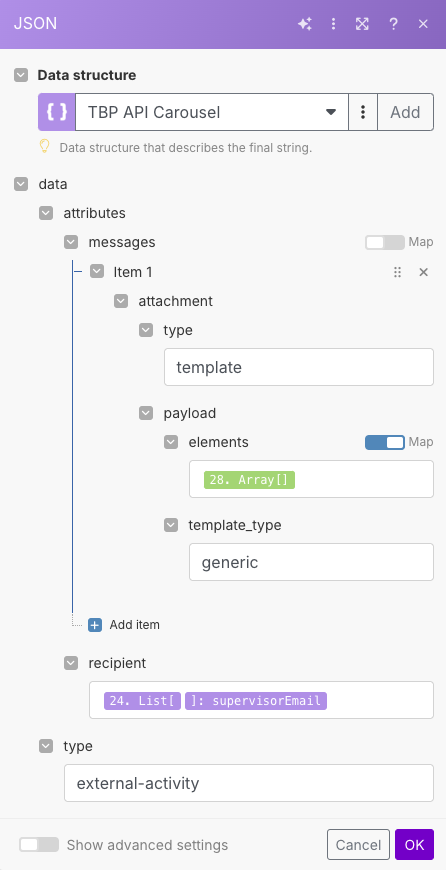
After configuring the 'Array Aggregator' we need to configure our JSON module. In the JSON module, use the array output from the previous module and the recipient ID.
The Bot Platform module
The Bot Platform Make ConnectorTo learn more about our official connector on Make.com and how to setup authentication, click here
At this point, we have successfully summarised our information and created it in the format of cards. In this step, we will create an introductory text message that will precede the task list, which will be presented in the form of cards.
For this purpose, we will add The Bot Platform module 'Send a free text message'.

For the configuration, use the output from 'Set Variable' module to pass the email ID of the manager and their name. The configuration looks as follows:
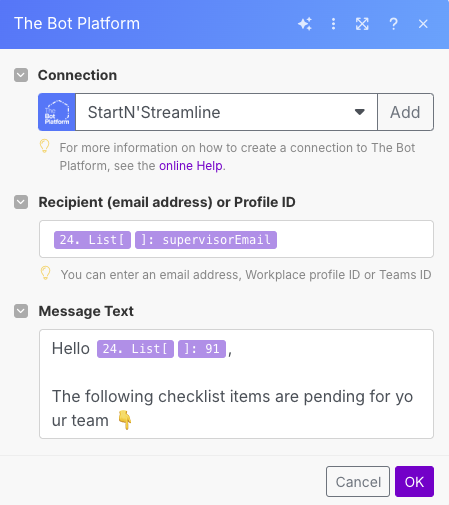
This message is just an alert to the manager about the information that is being sent.
HTTP Make a request
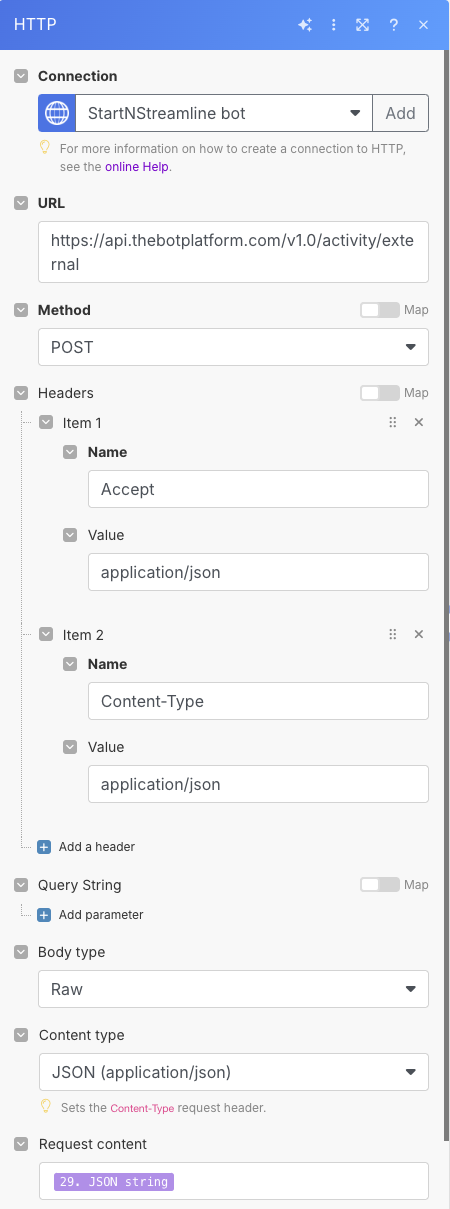
In the last step, we will pass the output from our 'Create JSON' module to this HTTP module. This is the module that will carry out the action of sending the cards to the user with the relevant task information and reminder button to the manager.

In the configuration of this module, we will include our authentication Bearer token and the JSON string we generated in the previous steps. The final configuration will look as follows:
Bearer token authenticationTo understand how this authentication works and how to set it up, please follow this [link](https://dev.thebotplatform.com/docs/how-to-generate-a-bearer-token-in-integromat}
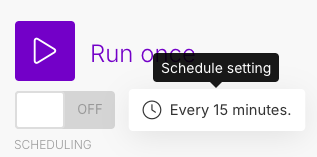
That's it! This was the last step. Make sure to save all your changes, save the scenario and turn it on. You can decide how often this scenario needs to run by configuring the scheduler in the scenario.

Learn more
If you enjoyed this tutorial and would like to build awesome integrations like these, Drop your details below and we’ll be in touch!
Updated about 1 year ago