Do You Still Need This Room Meeting Check In Bot
In this tutorial, we create a bot that checks in with people who have booked a meeting room to check whether they still need the room that day or whether it can be cancelled. It then cancels the room if no longer required.
In this tutorial, we create a bot that checks in with people who have booked a meeting room to check whether they still need the room that day or whether it can be cancelled. It then cancels the room if no longer required.
Complete our bootcamp series for the basics of setting up a bot.
First, we need to set up our API connection for this bot to work. You need to request access to the API for this tutorial to work. You can do this through Intercom.com
Login to the bot platform and create a new Workplace bot. Connect it up to your Workplace instance. Scroll down to API access on the left hand side.
Click on ‘Create App’ and then select Make(formerly Integromat).
Give your app a name and click next.
You will now have a screen as follows:
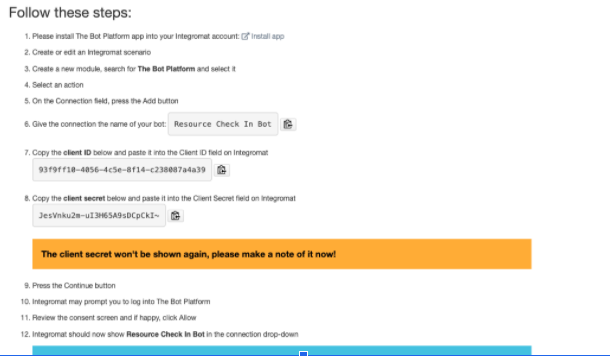
Make sure you leave this screen open as you will need the client ID and client secret from this screen and once you close it, you cannot access it again.
Now we want to head over to Make(formerly Integromat) to create our event search scenario. Create a new Make(formerly Integromat) scenario. Add a Google Calendar search events module as your first module. If this is your first time using Google Calendars with Make(formerly Integromat), you will need to connect them up first by clicking on the Add at the top next to connection. Once you have hooked up your connection, you will then be able to select the calendar you want to check in the calendar ID box. Select the calendar that represents your meeting rooms. Then in the start time, you want to use the pre populated variable Now. You want to get all the rooms that day, so in the end date box, you want to use the addDays function to get the date 1 day from now.
When finished setting up this module, it should look as follows:
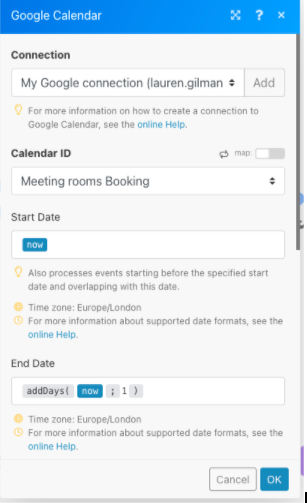
If you run this scenario, you will see that it pulls back all the bookings for that day.
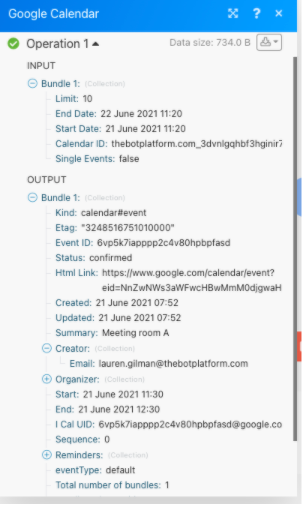
For each person, we now need to set those attributes within the platform and send out the messages to see if that person still needs the room.
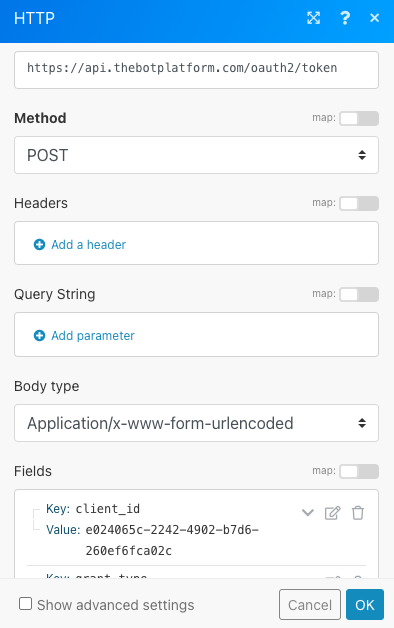
First we need to set up our API access using the credentials generated in the first part of this tutorials. So in our Make(formerly Integromat) module, we want to add another module to our flow that is a HTTP Make a request module.
We need to set it up as follows:
In the URL field, you want to paste the URL https://api.thebotplatform.com/oauth2/token
You want to change the method to POST
The body type should be Application / x-www-form-urlencoded
Now we need to add some fields.
Create a new field and give it a key of client_id. Now paste in the Client ID from your app on The Bot Platform.
Create another field called grant_type. Use the value client_credentials in the value box.
Create another field called client_secret. Paste the Client Secret from your app into the value field.
Make sure the parse response checkbox is ticked and click ok.
At the moment, the date coming out of our calendar search is not in a very user friendly format.

We want to make this easier to read so we need to set the format of our start and end times.
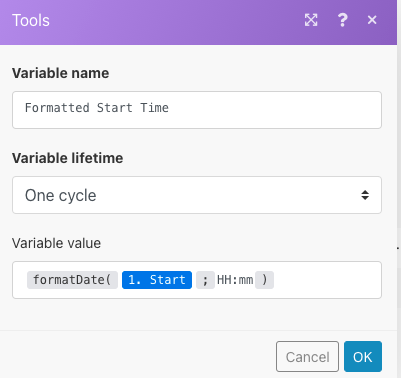
In Make(formerly Integromat), add a Tools Set Variable module. Give your variable a name of Formatted Start Time. In the variable value field, you want to use the formatDate function. You want to turn the Start Time pulled through from your events search and change the format to HH:mm. Note, you must use lower case mm or else it will put the month in!
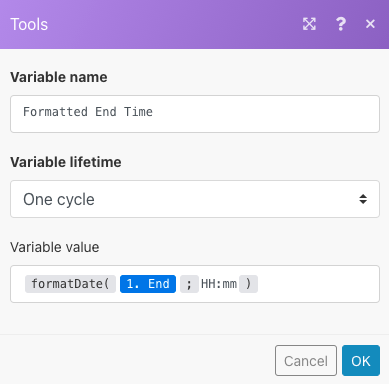
We want to repeat this step but formatting our end time.
Now we want to set these times for each user within the platform and ask if they still want the room.
Let’s go back to The Bot Platform and finish setting up our bot. First we want to go and create the attributes we need for our bot to work. Go to the Manage Attributes screen and we want to create 4 attributes; Meeting Room Name, Meeting Start Time, Meeting End Time, Event ID.

Now head over to our messages and let’s create the ones we will need. Go into your Welcome message and create a new message that uses the attributes we created in the last step. Then we want to add in a message with buttons to ask them if they still need that room.
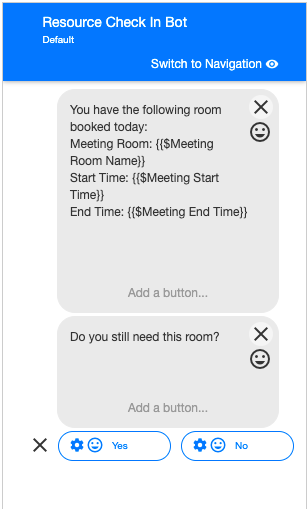
When they click yes, you want a simple message that confirms that the room is still theirs.
When they click no, we want to take them to a message that says the room is now cancelled. We will set up this route when we have finished the check in part of the bot.
Now we have set up the basic bot flow and created our attributes within the platform, we can populate them using Make(formerly Integromat).
Head back to Make(formerly Integromat) and we want to add a Create JSON module to the end of our flow.
In the module, click Add next to Data structure, give it a name e.g. Set multiple attributes, and then click on the Generator button. Paste in the following sample code:
{
     "data": {
          "type": "user",
          "attributes": {
               "state": [
                    {
                         "userattribute": {
                              "id": "497f6eca-6276-4993-bfeb-53cbbbba6f08"
                         },
                         "value": "hello"
                    },
                    {
                         "userattribute": {
                              "id": "497f6eca-6276-4993-bfeb-53cbbbba6f08"
                         },
                         "value": "hello"
                    }
               ]
          }
     }
}
Click save and then save again and you will now see that you have some boxes you can complete. In the Type field, add ‘user’
Now under state, click the + symbol. Now we want to use the IDs of the attributes we just created within The Bot Platform. Go to the Manage Attributes page and you will see a list of your attributes, along with an ID number field. Look up the ID of the Meeting Room Name attribute and paste that into the ID field on Make(formerly Integromat). Then in the Value box, we want to use the Summary pulled through from our search events step.
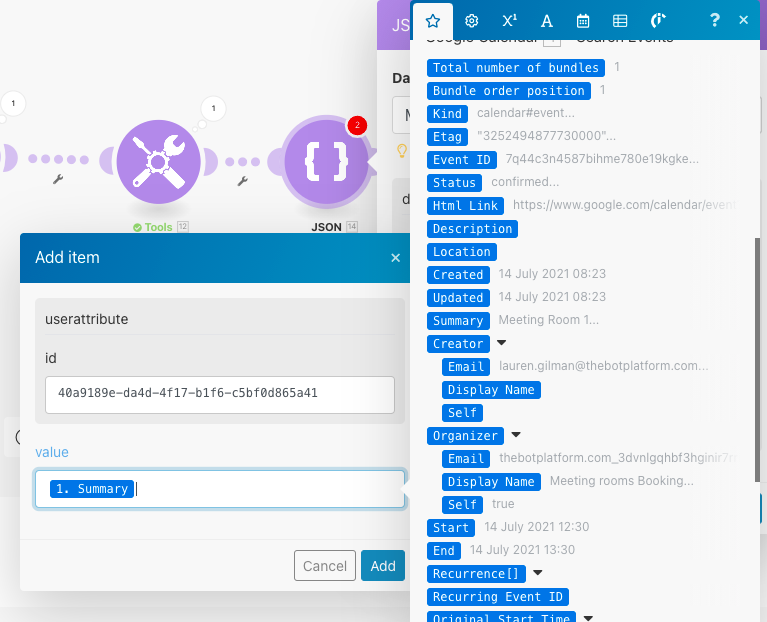
Now we want to set up our start time, so click the + symbol under state again.
This time find the ID of the Meeting Start Time attribute and paste that in. In the value field, we want to use the Formatted Start Time variable we created in a previous module.
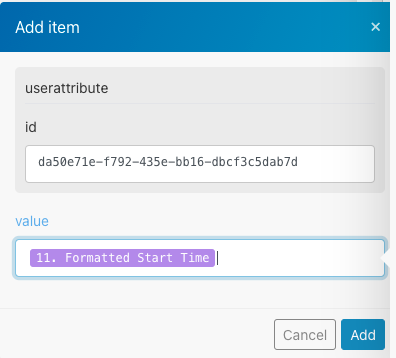
We want to do the same with our Meeting End Time.
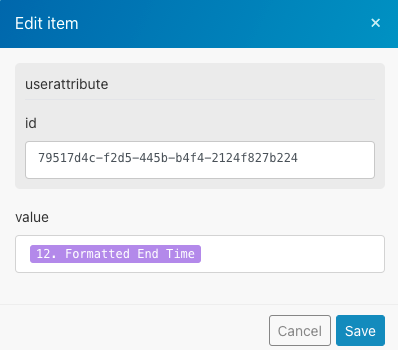
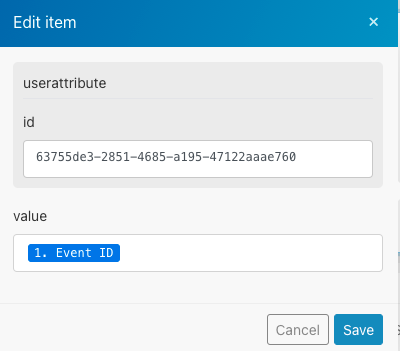
Then we want to add Event ID
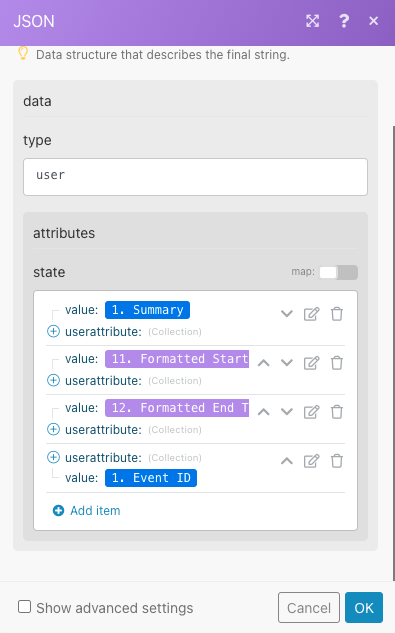
When completed, this module should look as follows:
We now need to add another module to our Make(formerly Integromat) scenario that pushes these changes into our bot. So add a HTTP Make a request module.
In the URL field, we want to paste the URL ttps://api.thebotplatform.com/v1.0/users/ but we need to add the user we want to send this message to at the end of the URL. Use the information pulled through from the events search step to get the email address of the person who has booked the room.
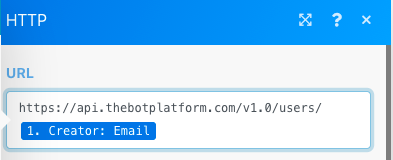
Change the method to PATCH
Under headers, add two headers as follows:
Name: Content-Type
Value: application/json
Name: Authorization
Value: Bearer {The Access Token you created in the first HTTP request Step}
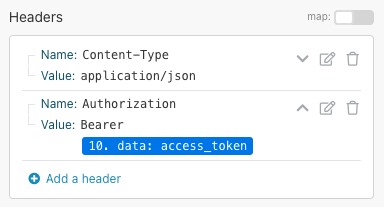
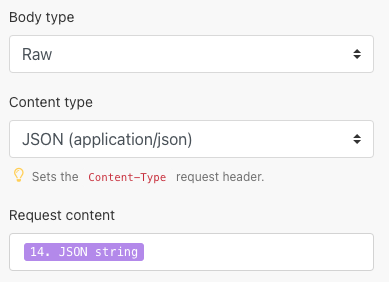
Set the Body Type to RAW
Set the Content Type to application/JSON
In the Request content field, use the JSON you created in the previous step.
When finished click Save. This module sets the attributes in The Bot Platform.
Now we want to trigger the message to the user.
Add another Create JSON module to your Make(formerly Integromat) scenario.
Next to Data Structure, click Add and give it a name ‘Sending a Message’
Click generator and paste in the following example code
{
     "data": {
          "type": "activity",
          "attributes": {
               "recipient": "[email protected]",
               "message": {
                    "id": "3fa85f64-5717-4562-b3fc-2c963f66afa6"
               }
          }
     }
}
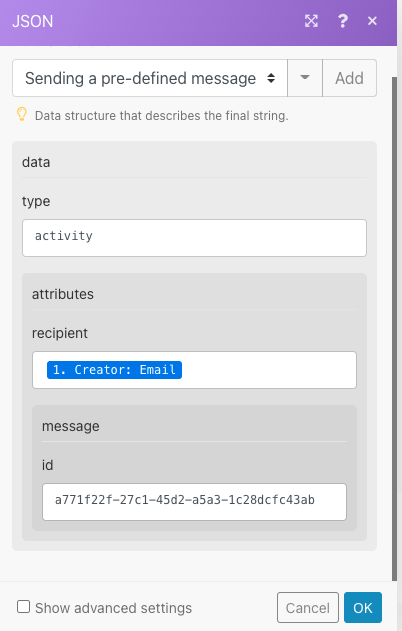
Populate the new fields that appear as follows:
Type - activity
Recipient - use the creator email address pulled from the search events module
ID - Go to the messages list on The Bot Platform. Click on the options button next to your welcome message, copy the ID and paste it into this field
The final step is to trigger this message. Add an HTTP Make a Request module.
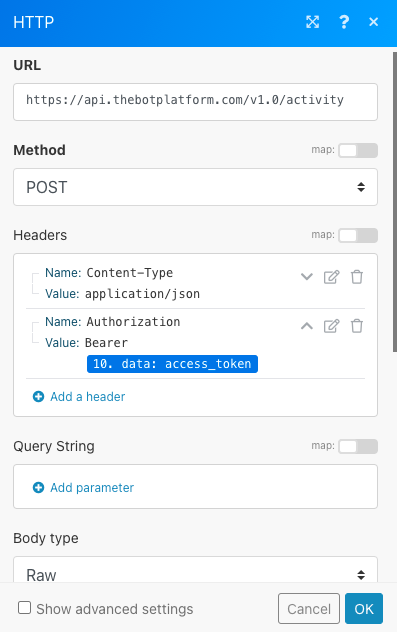
In the URL field paste https://api.thebotplatform.com/v1.0/activity
Change the method to POST
Under headers, add two headers as follows:
Name: Content-Type
Value: application/json
Name: Authorization
Value: Bearer {The Access Token you created in the first HTTP request Step}
Set the Body Type to RAW
Set the Content Type to application/JSON
In the Request content field, use the JSON you created in the previous step.
Now click OK and let’s run the scenario to test it.
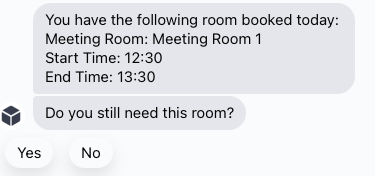
That is the first part (and hardest part!) of our scenario set up.

The next step is to set up the cancellation part of our flow.
Create a new Scenario in Make(formerly Integromat). Our first module needs to be a Custom Webhook. Add a new Webhook and copy the URL. Go back to your bot and in the cancel confirm message you created add a webhook message and paste in the URL. Run this once and test your bot, making sure you click the cancel button on your bot.
Our next module is a Google Calendar Delete Event.
Make sure the calendar ID map slider is off and select your meeting room calendar from the list.
Now turn the event ID map slider on and use the Event ID pulled through from your webhook. Then click OK.
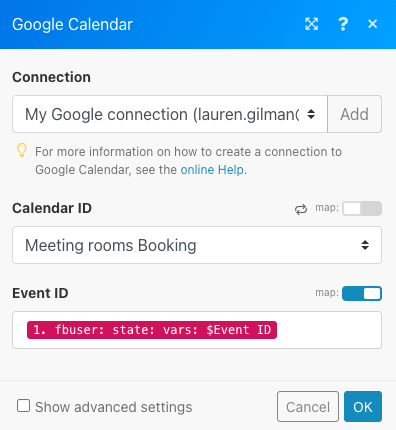
Now save your scenario and turn it on. Now you can create and cancel a few rooms to test it works.
At the moment all bookings are sent out at the start of the day. You can adjust and extend this tutorial to send out bookings an hour before the room is booked by changing the frequency that the scenario runs and by changing the Start time and end time searched for in your very first module.
Updated 8 months ago
