How to upload an image via a bot
How to upload an image via a bot
Knowledge level: Intermediate
Pre-Requisites:
- Computer
- A functioning bot from thebotplatform.com
- A Make(formerly Integromat) Account
- A Google Drive account
- A Google Sheet to capture the image links
- A cup of coffee
Overview
In this tutorial, we will use a bot to upload an image and store it in a cloud drive of your choice. To achieve this, we will need to create a simple bot that asks the user to upload an image. Once the image has been uploaded, we will use a middleware to capture the uploaded image to a Google Drive folder and store the link in a spreadsheet along with the uploading user’s information.
Step 1: Setup your bot
First we need to create a basic bot that sends the user a message to upload a picture. This can be done in 3 simple steps as outlined in the flow below:
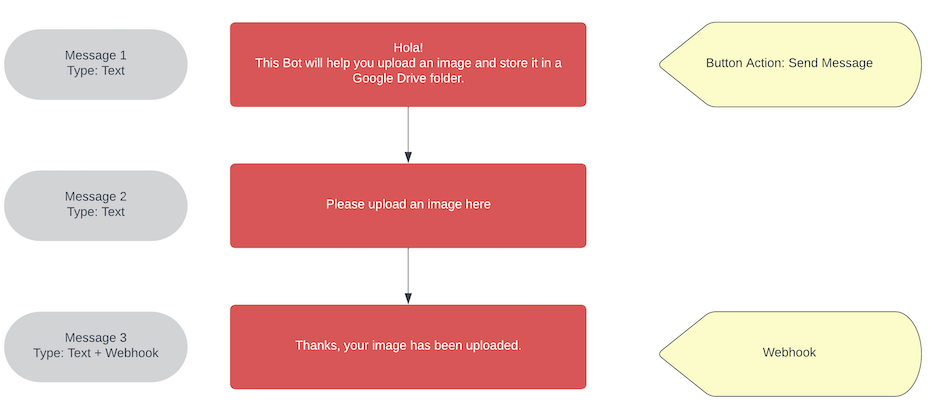
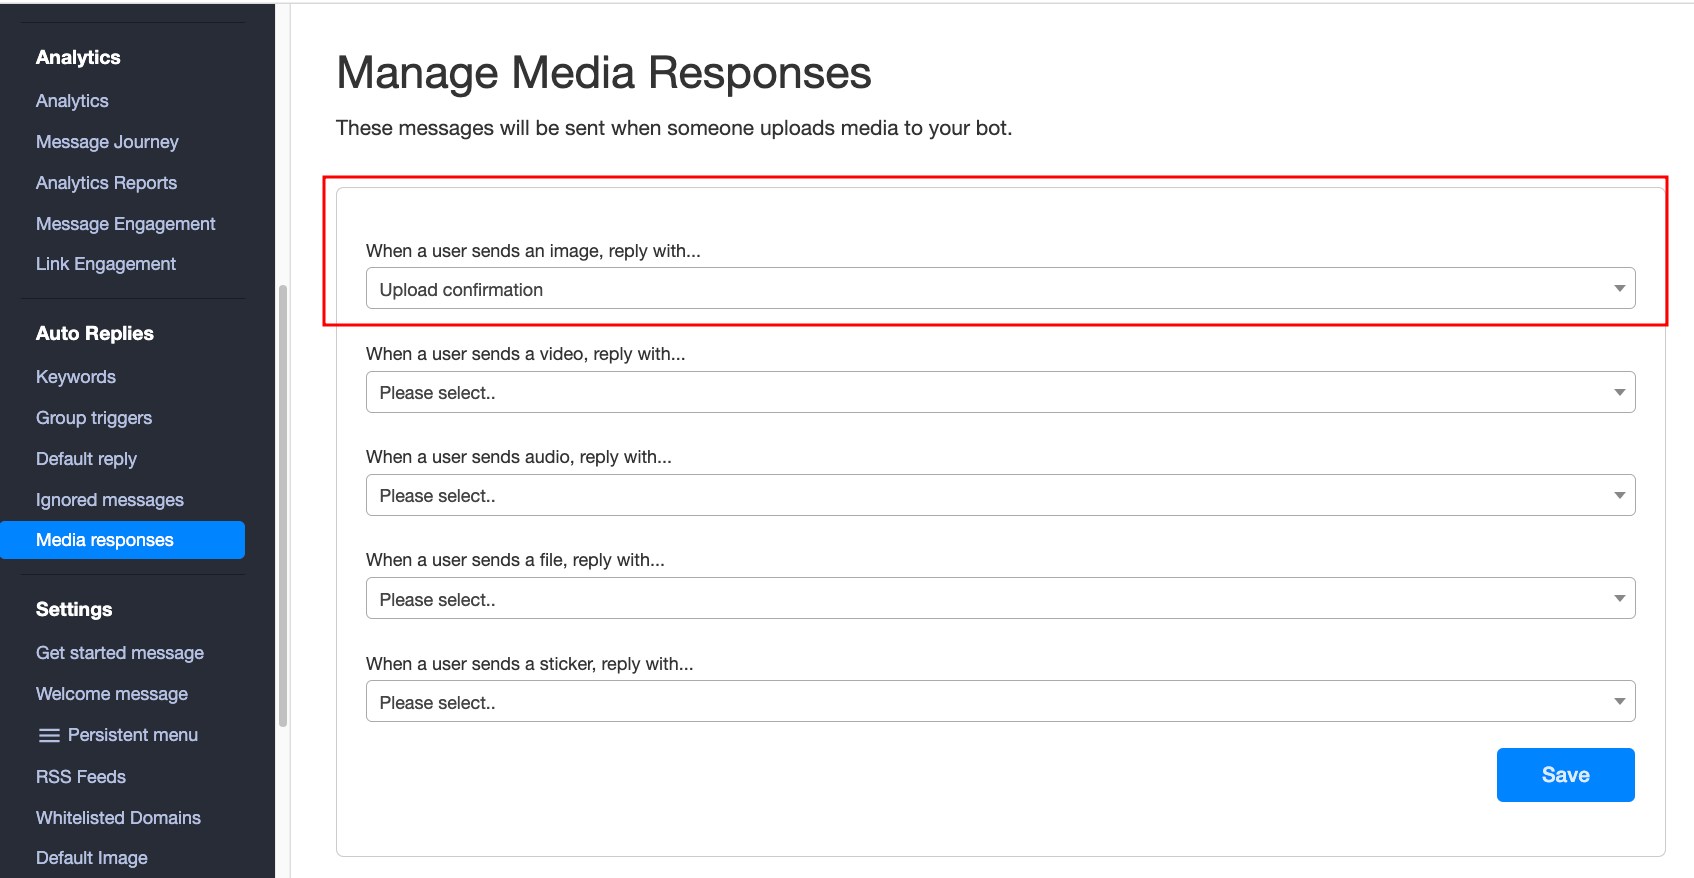
Message 1 & 2 will be simple text messages. Message 2 will ask the user to upload an image in order to receive the image. Once this is done, we need to configure the bot’s response towards receiving Media. To do this, click on ‘Media responses’ under ‘Auto Replies’.
Under the section ‘When a user sends an image, reply with’ choose the message the user will receive. In our use case, this will be Message 3.
Step 2: Setup Webhook in Make(formerly Integromat)
In this step, we will set up the webhook which will be used in Message 3 to receive the image in our middleware. As we are using Make(formerly Integromat) as our middleware, login to www.make.com
Create a new scenario and click the + sign to add a new connection. From the list, search for ‘Webhook’ and choose ‘Custom Webhook:
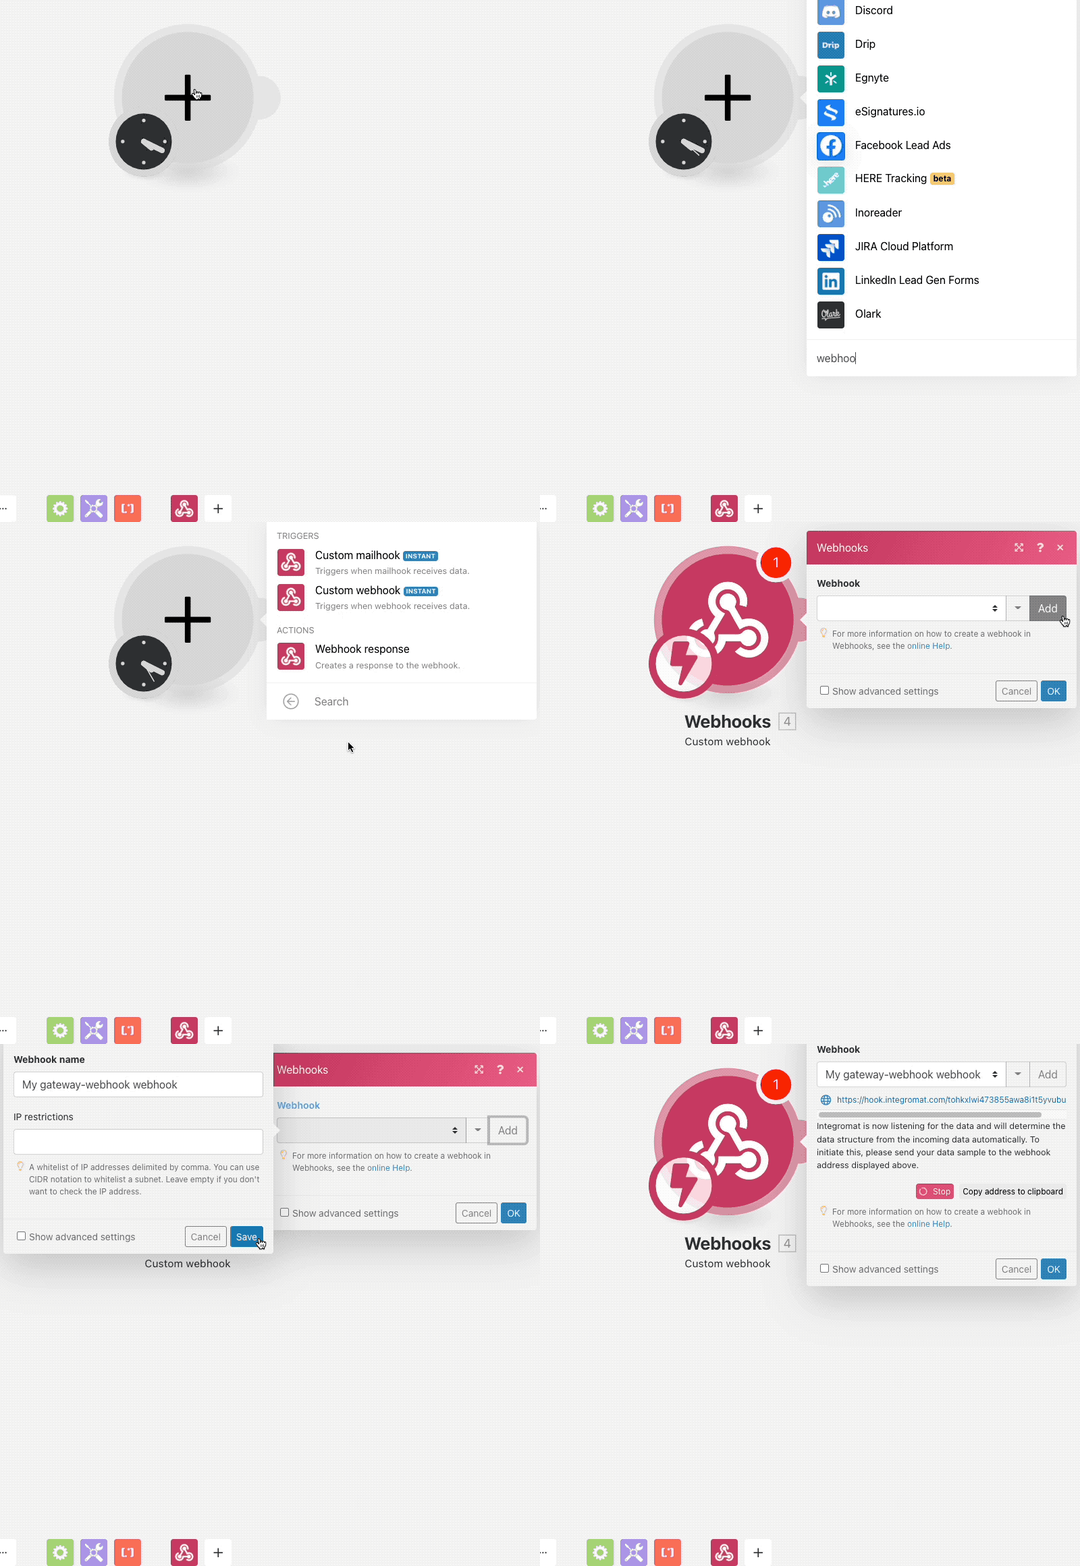
On the next screen, click on ‘Add’ and give the webhook an appropriate name. Click on Add, your webhook is now ready to receive information from the web:
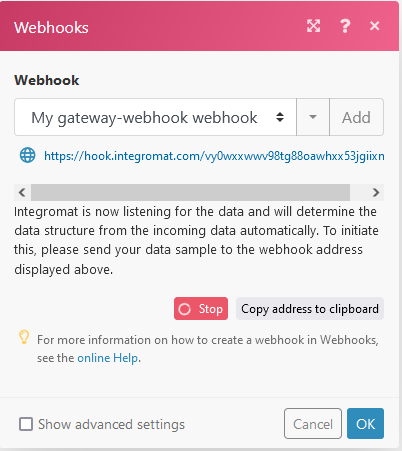
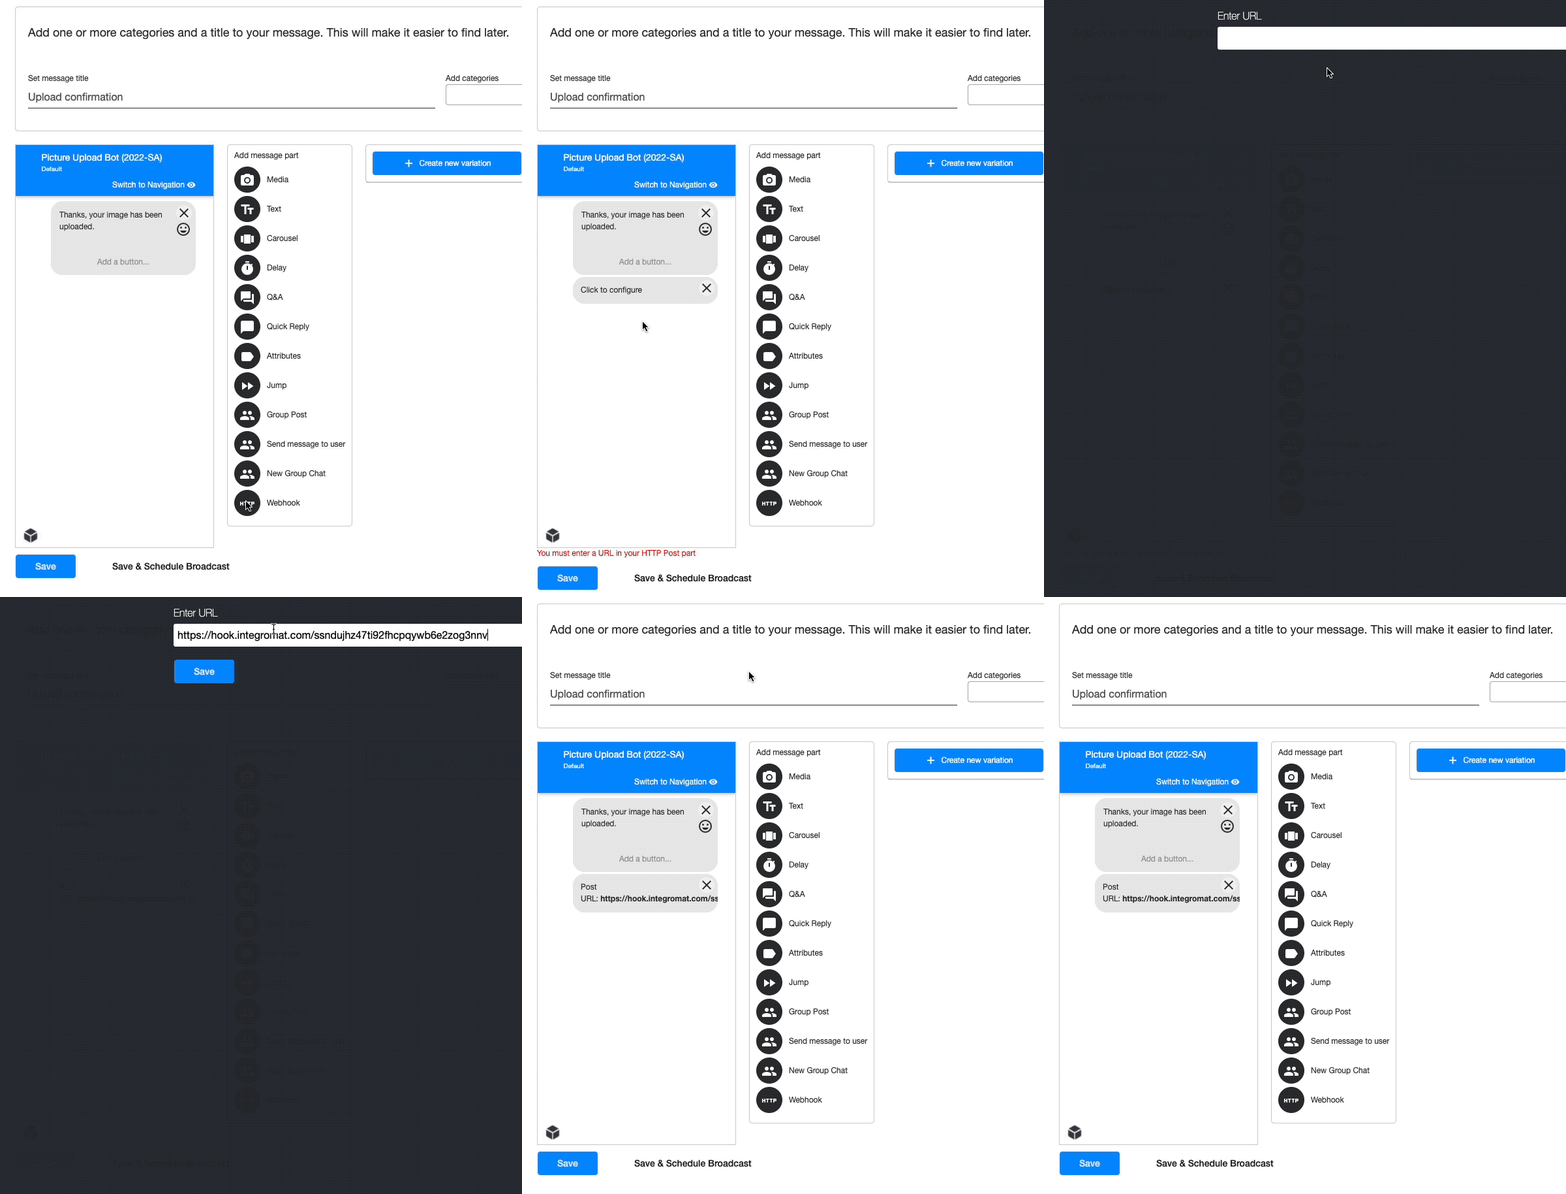
Now, go back to your bot and add the webhook to Message 3 by editing the message and adding ‘Webhook’ below the message text.
Step 3: Add data from incoming webhook to HTTP module
After configuring the webhook, we need to define the data structure of the incoming information from the bot to the webhook. To do this, click ‘Run Once’ on your Make(formerly Integromat) scenario.
Go back to your bot and click on ‘test’ to run through the bot. Once you have completed uploading the image and Message 3 has been received from the bot, we can use the information received in Make(formerly Integromat) to configure it further.
When you go back to the Make(formerly Integromat) scenario, you will notice a bubble appear on top of the Webhook module, this means that your webhook ran successfully and received information from the bot.
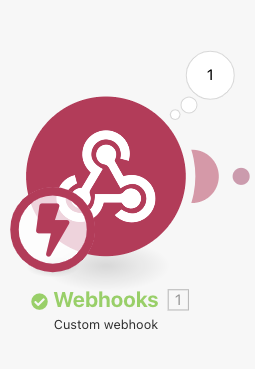
Let’s expand on the information by clicking on the bubble on top of the module. Doing so will reveal as below:
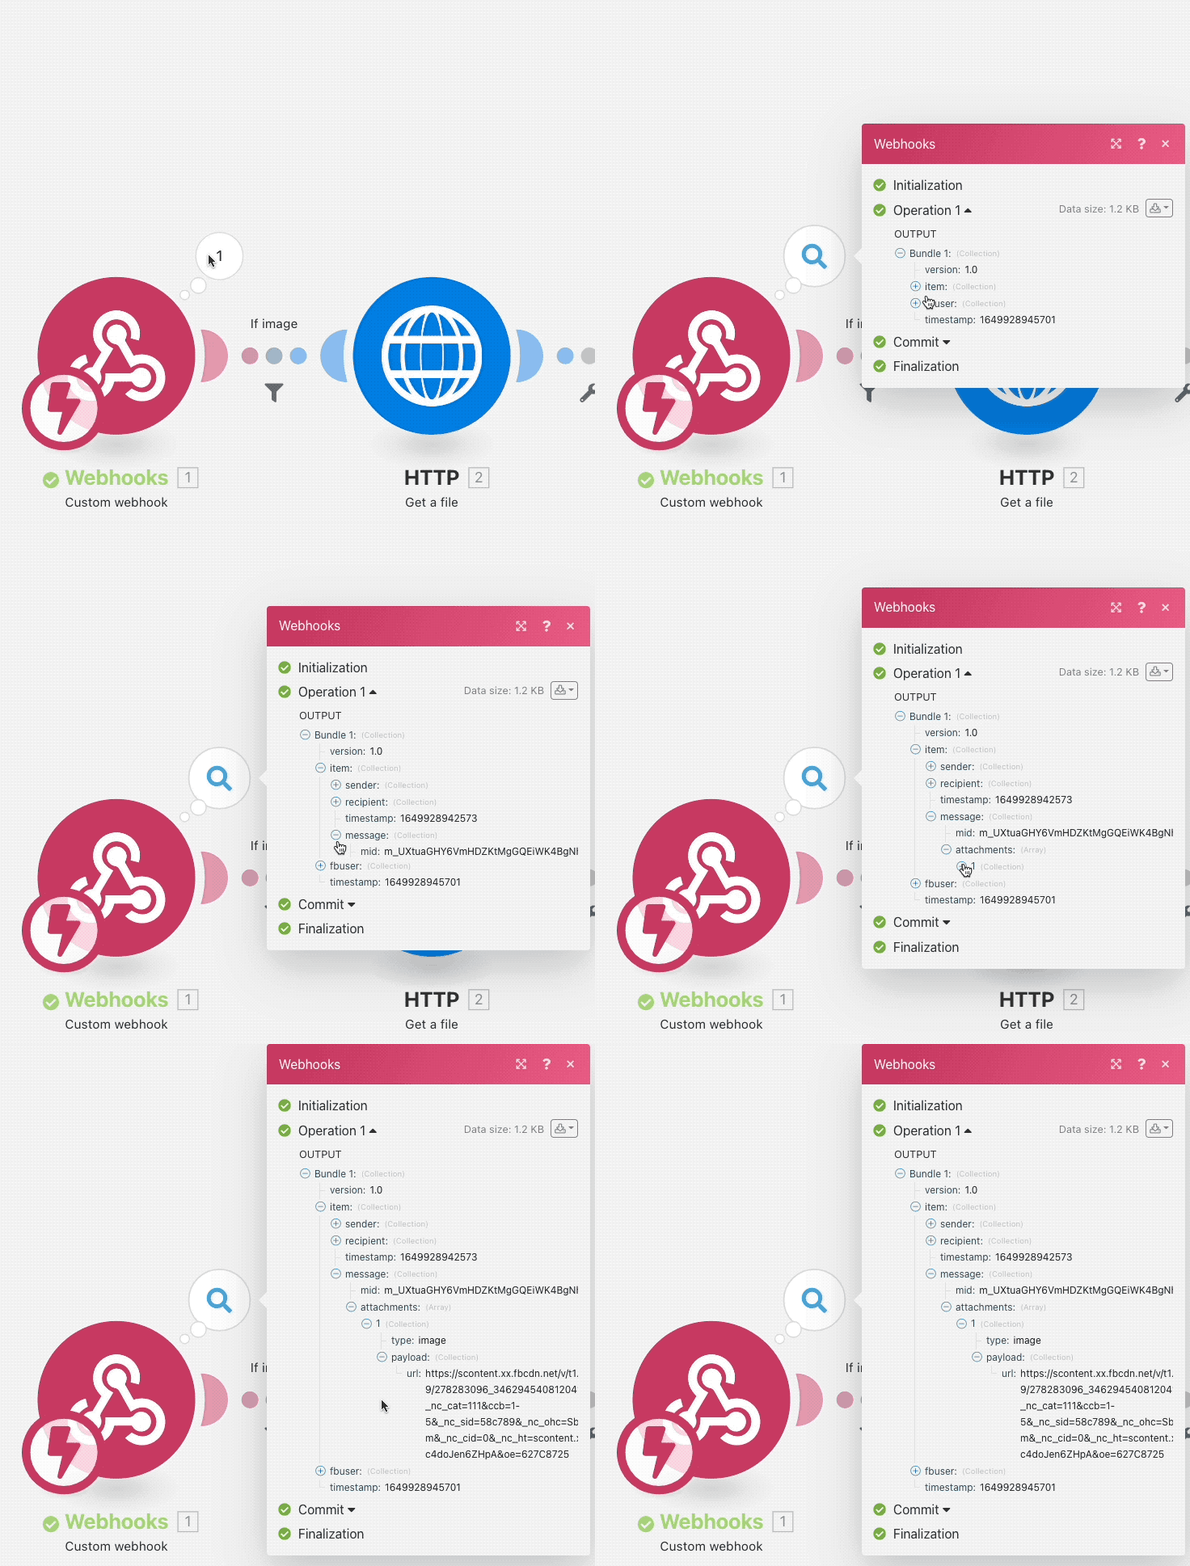
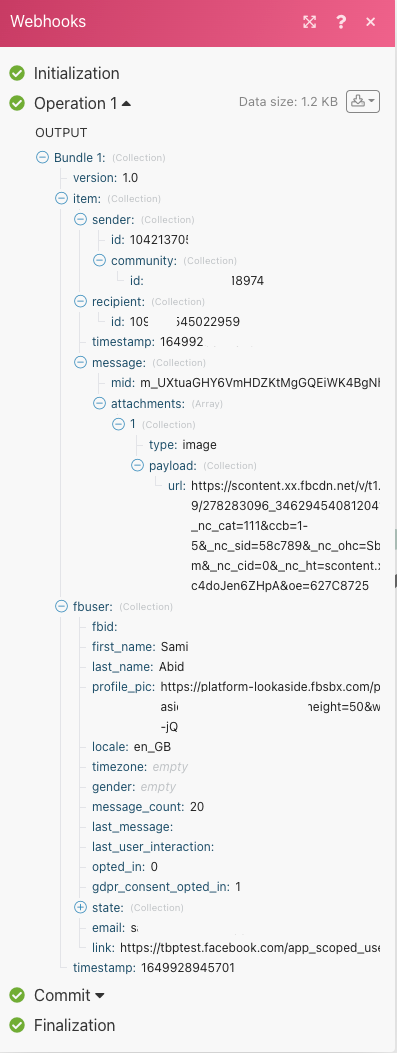
There are various pieces of information that can be seen here but we only need the image link, name and id of the user for our use case. The image information can be found under the ‘message’ section and user information can be found under the ‘fbuser’ tab of the webhook.
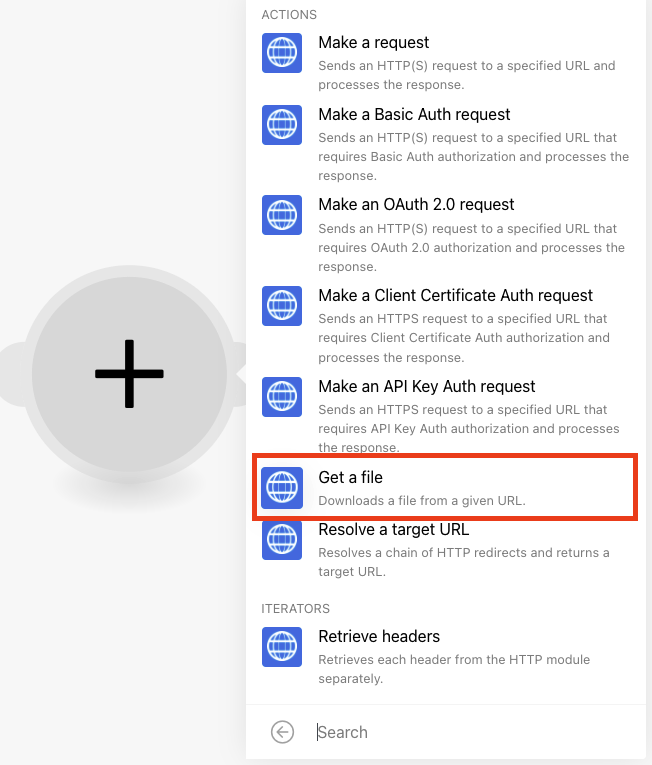
Our next step is to extract the image as a file from the webhook. To do this, add a new module to your Make(formerly Integromat) scenario and look for ‘HTTP’. Specifically, we will choose ‘Get a file’ from the HTTP module to be able to download the image as a file.
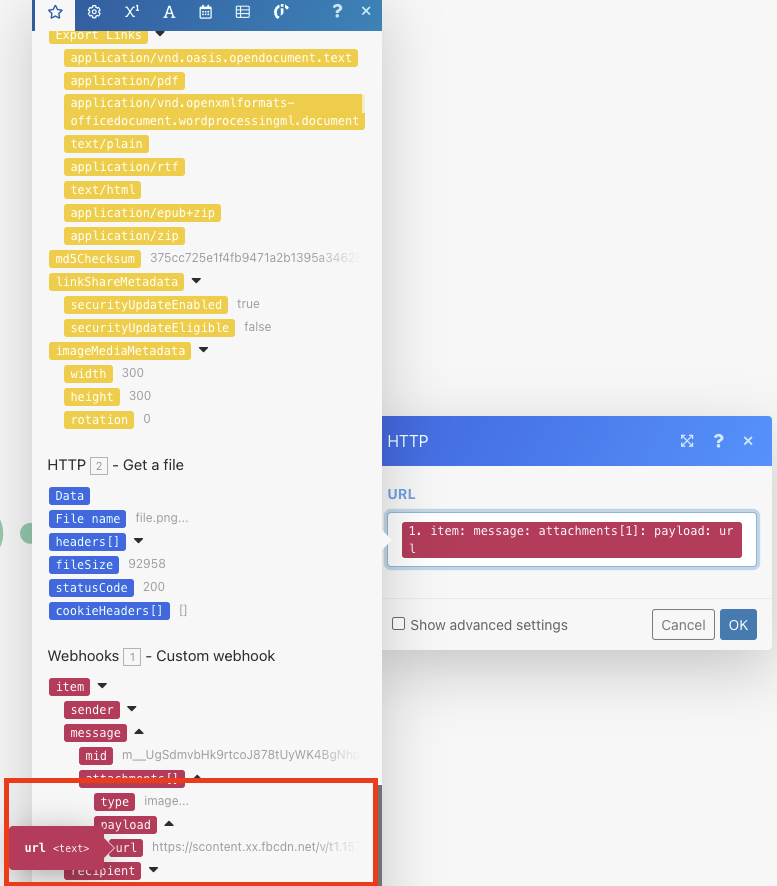
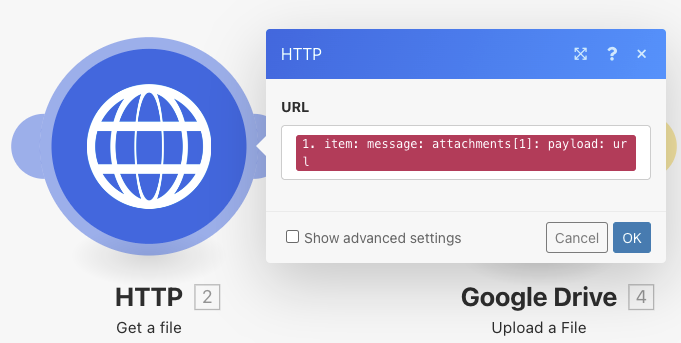
As demonstrated in the steps above. After choosing the HTTP module, we use the webhook information and point the HTTP module to the payload URL to obtain the file.
Step 4: Add another module

After obtaining the file, we now need to upload the file to a Google Drive folder. This is done by choosing the ‘Google Drive’ module and picking the ‘Upload a file’ option.
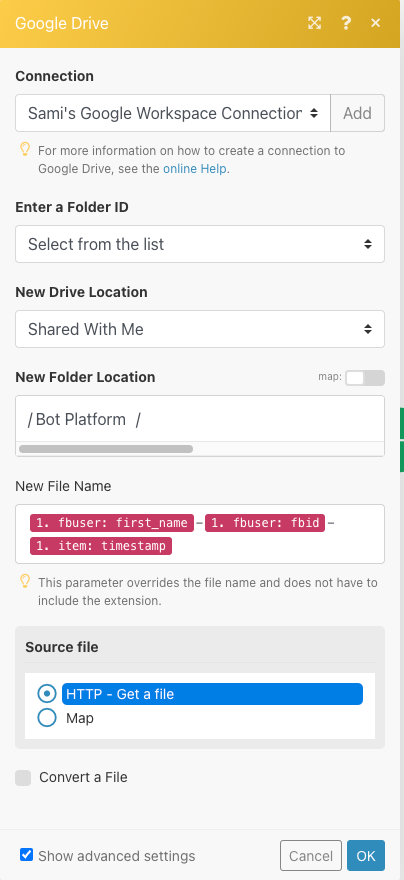
Select a folder of your choice to upload the file into. For filename, you can choose information from the webhook. In our usecase, we have used the first name of the user and their Workplace ID and the timestamp to ensure the filename is unique to each upload.
Please ensure under ‘Source file’ you choose ‘HTTP - Get a file’.
This step brings us close to completing our workflow.
So far, we have obtained the image from a webhook using the HTTP node and are uploading it to a Google Drive folder.
Step 5: Link incoming information to Google Sheet
In this step we are going to add the link of the upload file to a Google Sheet along with some additional information. For this use case, we are inputting the following information:
First Name
Last Name
Workplace ID
Image link
In order to input this information to a Google Sheet, we will add a new module to our scenario and pick Google Sheets -> Add a Row (add a row)
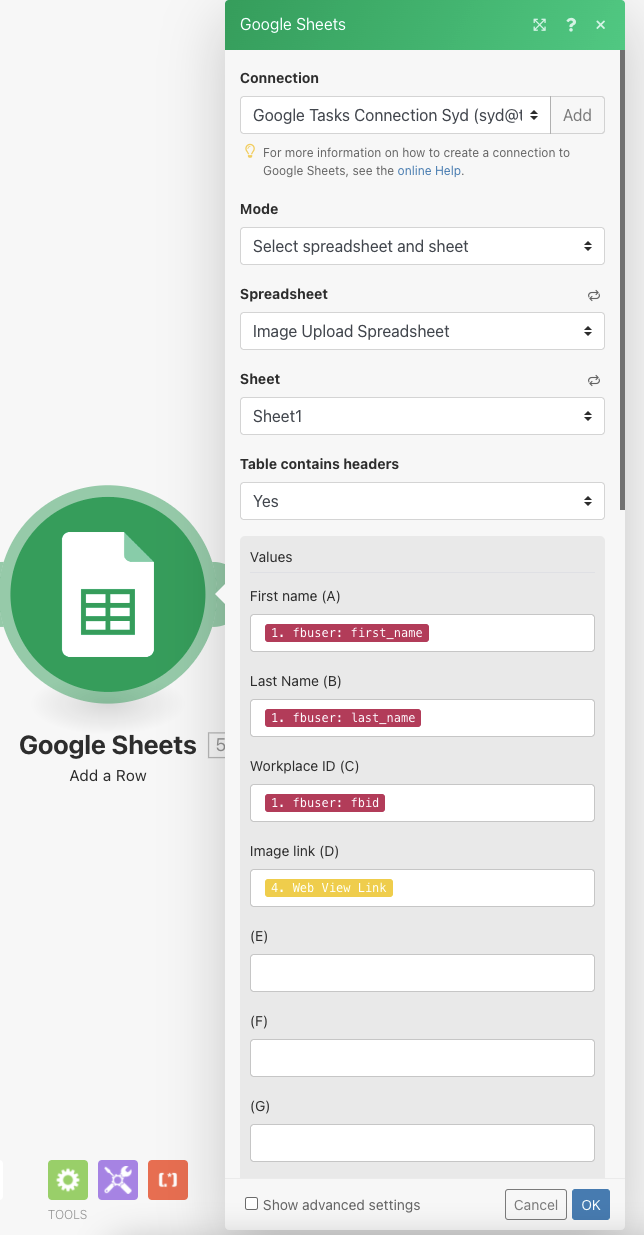
Choose a Google Sheet of your choice and a relevant Sheet. Under values, choose the relevant information from the Webhook and Google Drive module. In the example above, we have picked fbuser: first_name, fbuser: last_name from the webhook module. For the Image link, we have picked ‘Web View Link’
Step 6: Add filter to only run the flow when an image is present
The final step is to ensure that this flow only happens, once an image has been uploaded. So we need to set up a filter at the very start that checks to make sure that there is a URL in the payload field as follows:
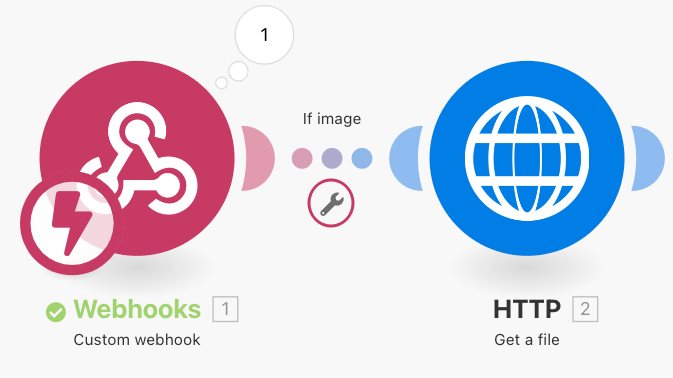
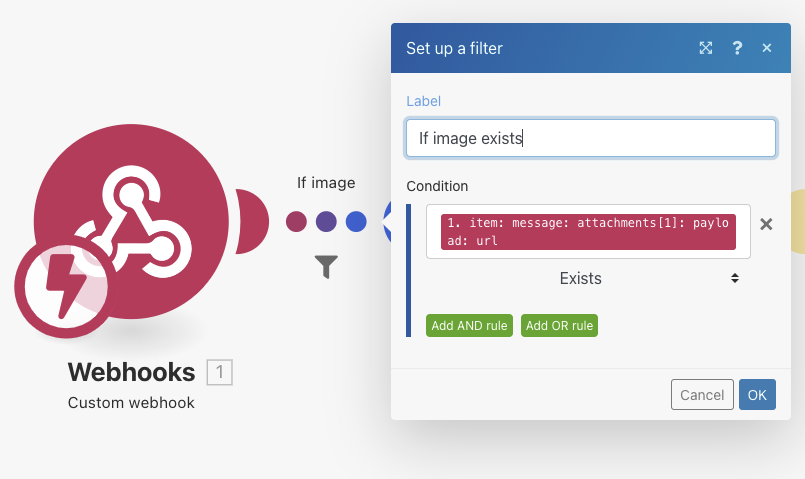
This was the last step needed to complete the setup. Please do not forget to save your scenario and turn it on after completing the required configurations.
Once the flow runs successfully, the following information will be added to your Google Sheet:

Happy botting!
Updated 9 months ago
