Restaurant Review and Image Upload Bot
In this tutorial, we will create a bot that records a restaurant review and takes an image of the food and uploads this information to a spreadsheet on Google Drive.
In this tutorial, we will create a bot that records a restaurant review and takes an image of the food and uploads this information to a spreadsheet on Google Drive. We can then use this as a restaurant review database bot (which we will demonstrate in a later blog post).
Step 1
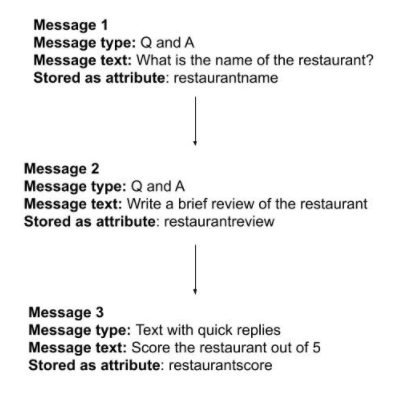
First we need to create a basic bot that collects the name of the restaurant, a brief review of the restaurant and a restaurant score out of 5. These details are stored as attributes in the platform.
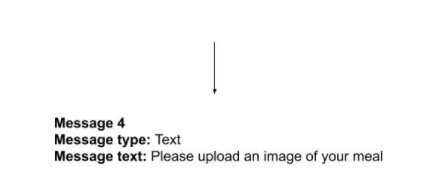
We then need to create a message that asks the user to upload an image of their meal. This message needs to be a plain text message as we do not need to store the actual image as an attribute in the platform. Our bot flows as follows:
Step 2
We now need to set up the final stage of the bot. Create a new text based message that says something like “Thanks, your review has been uploaded”
We now need to set the bot response to the image upload. In the left hand menu, scroll down to auto replies and find the media response option. Now we need to set the message that is displayed ‘when a user sends an image, reply with’ and from the drop down, choose the final review completed message you just created. That means that when a user uploads an image, your final message will be triggered.
Step 3
Now we need to head over to Integromat to set up our upload flow. We start by creating a new scenario and setting up a new webhook. Once you have the link for your webhook, we need to go back to the Bot Platform. find the media response message you just created and add this webhook to that message.
Step 4
Now run through your bot by clicking ‘test’ next to your welcome message. Run all the way through to the image upload message, but stop when you get there.
When you get to the image upload question, head back to integromat and click the ‘Run once’ button on your scenario. You can then go ahead and upload your image to the bot.
When you head back to Integromat, you should now see the data has been pulled through. If you expand out the sections, your integromat data should look like the following image.
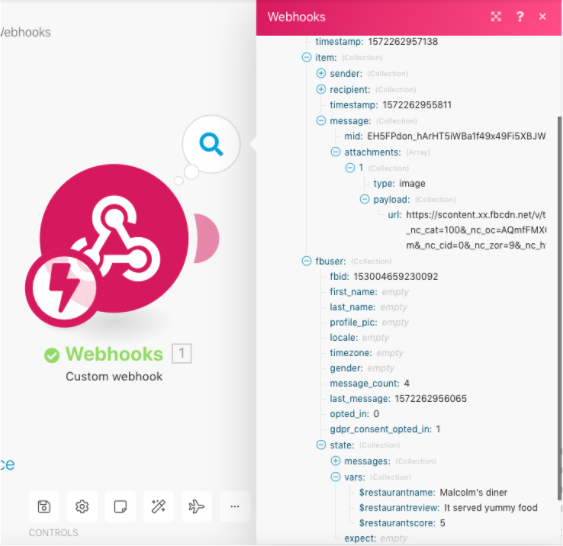
Under the fbuser section and under vars, you can see it has pulled through the variables from the questions you have asked.
Under the item, message, attachments, payload, you can see it has created a URL. If you copy this URL into a browser, it will show you the image you have just uploaded.
Step 5
We now need to download this image, so we can re-upload it to our folder on Google Drive. In integromat, add a HTTP module and choose the ‘Get a file’ option. In the URL field, paste the URL of your image that is pulled through from your webhook.
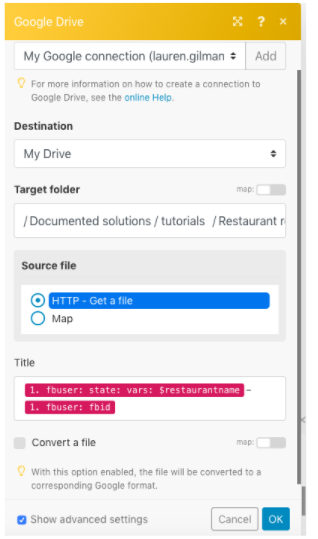
We now want to push this image into a chosen folder on Google Drive. Add a Google Drive ‘Upload a file’ module. Navigate to the folder you would like to store the images, and in the source file, ensure that your HTTP module is selected. We also want to rename the image to reflect the restaurant and the person creating the image, so click on the show advanced settings box at the bottom.
In the title field, you can use the variables pulled through in the webhook. Our example is shown below:
Step 6
We now want to add the review and a link to the image into a Google spreadsheet.
Add a Google sheets ‘Add a row’ module into your Integromat scenario. Create a spreadsheet with four columns; Restaurant Name, Restaurant Review, Restaurant Score and Food Image.
Navigate to this spreadsheet within the module and save the variables into the correct fields on your spreadsheet. For the image field, you want to pull through the Web Content Link from the upload to google drive module. Your module settings should look as follows:
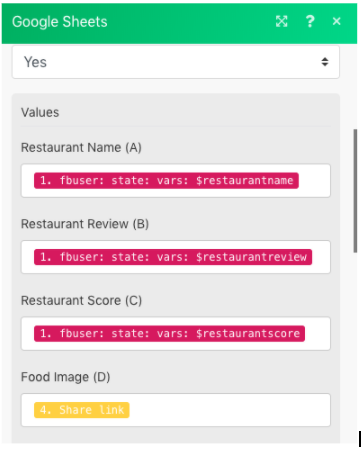
That is it. Now if you run through your bot from start to finish, you should then find that you have a new row in your spreadsheet as follows:

Updated 8 months ago
