Using the TBP API to return information in Zapier
In this tutorial, we will show you how to set up the TBP API so you can send information back to your bot users through Zapier.
In our example, we are creating a bot that sends a user a random joke pulled from a spreadsheet. The same process could be used to create a phone directory, a shift look up bot, or any other bot that pulls information from a spreadsheet and returns it to the user.
First we set up a basic welcome message within our bot that asks the user to push a numbered button to grab a joke from the spreadsheet.
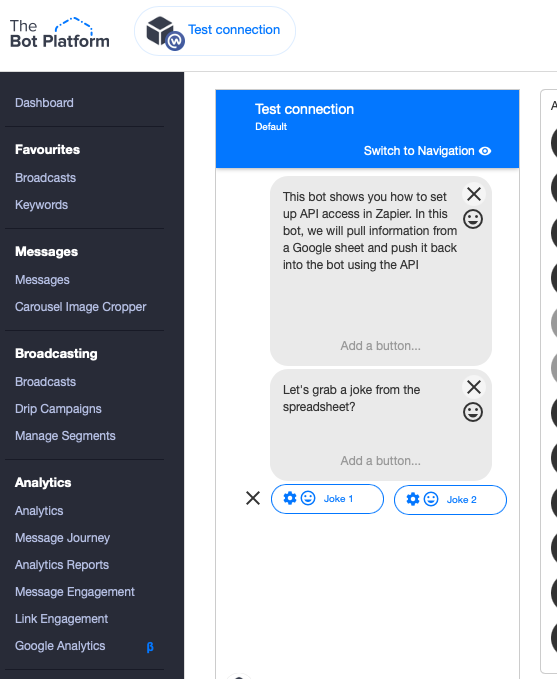
When the user clicks on the get a button, it then takes them to another message which we will set up shortly.
Next we need to set up API access to our bot. Please note that you will need to request access to The Bot Platform API through Intercom before you can use it the first time. Click on the API Access option in the left hand menu bar.
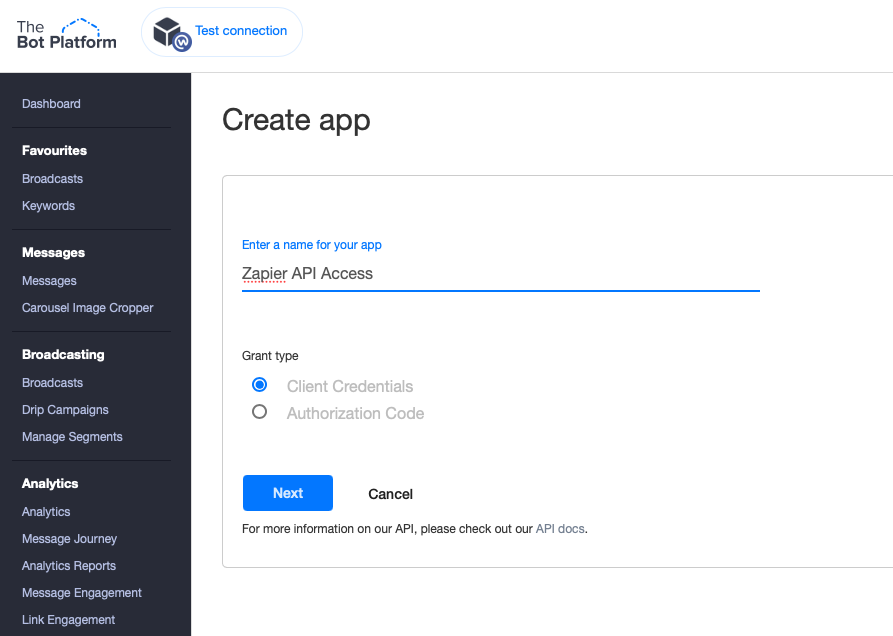
Give your connection a suitable name and make sure the grant type is set to ‘Client Credentials’
Then click Next.
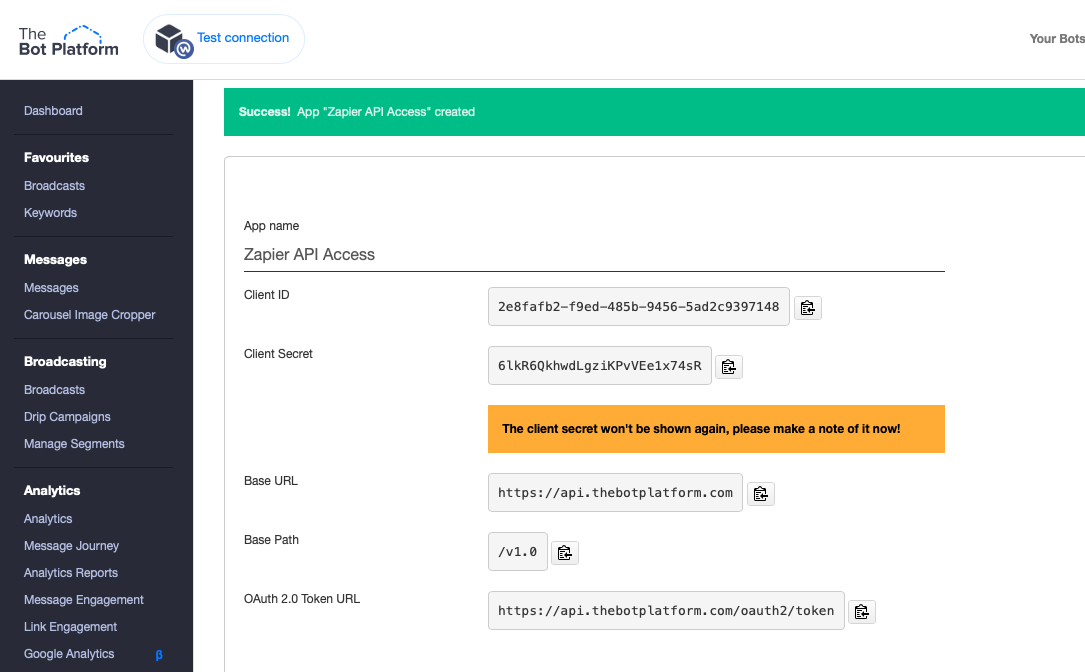
You will then be taken to a screen as shown above. You need to make a note of the client ID and the Client Secret as we will need these later on, and they are only shown once on this screen.
You then want to head over to Zapier and create a new zap. Our trigger should be a webhook. You want to use a Webhooks by Zapier module and your Trigger event needs to be a Catch Hook.
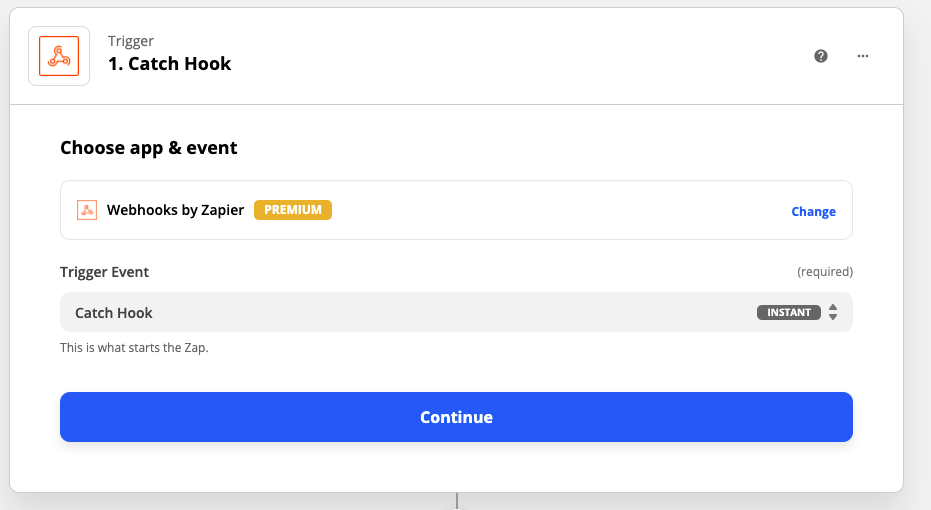
Click continue and then you will see a webhook URL has been generated. Copy that URL and then go to the message after you have clicked the generate a joke button within your bot.
Add in a Webhook message and paste in the URL you have just generated in Zapier.
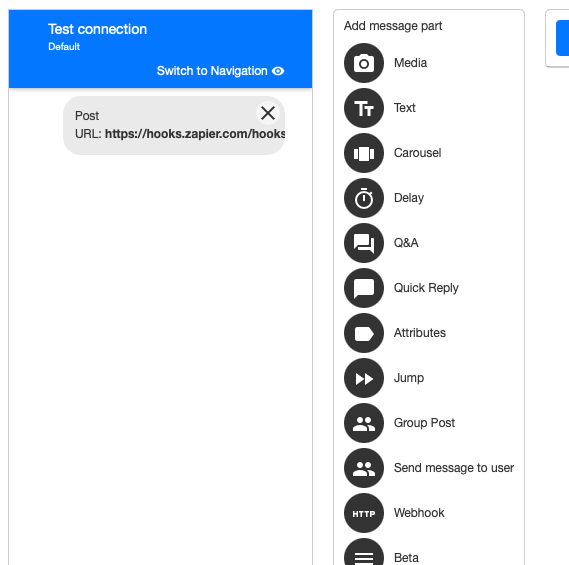
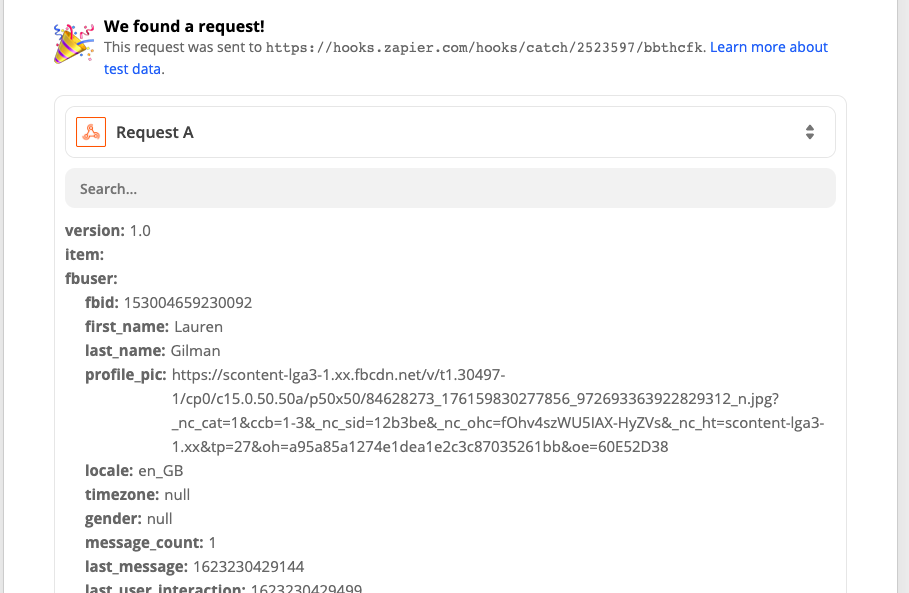
Push the changes live and then test your bot in its current state. Now go back to Zapier and test your trigger.
You should see that it has now pulled through your details from your bot.
Our next step is to add an action step to our Zap. We want to use a Google Sheets module and our action event is to look up spreadsheet row. Find your spreadsheet in the next few drop downs.
Make sure you look up the spreadsheet row that corresponds to the Joke number they selected through the quick replies. When done, this step should look as follows.
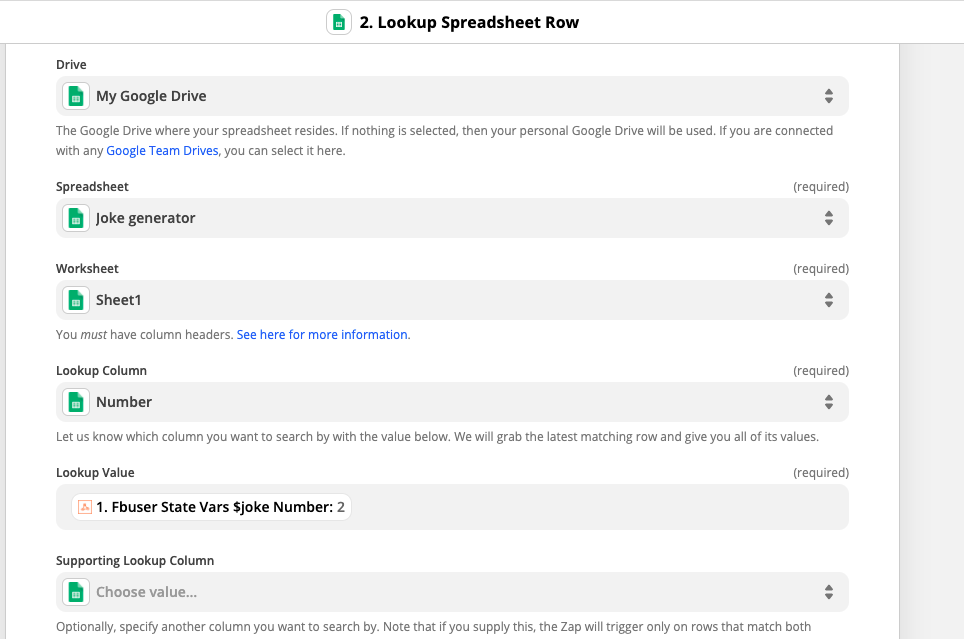
Test the step to make sure information is pulled back.
Our next step is to set up the API within Zapier to push that information back to our bot user.
We now need to add in another Webhooks by Zapier module, but this time, we want to set our Action Event to POST.
Our URL needs to be https://api.thebotplatform.com/oauth2/token
The Payload type needs to be Form
Then in our data section, we need to add three fields.
client_id which needs to be the Client Id you copied when you set up your API app.
client_secret which needs to be the client secret you copied
grant_type which needs to be client_credentials
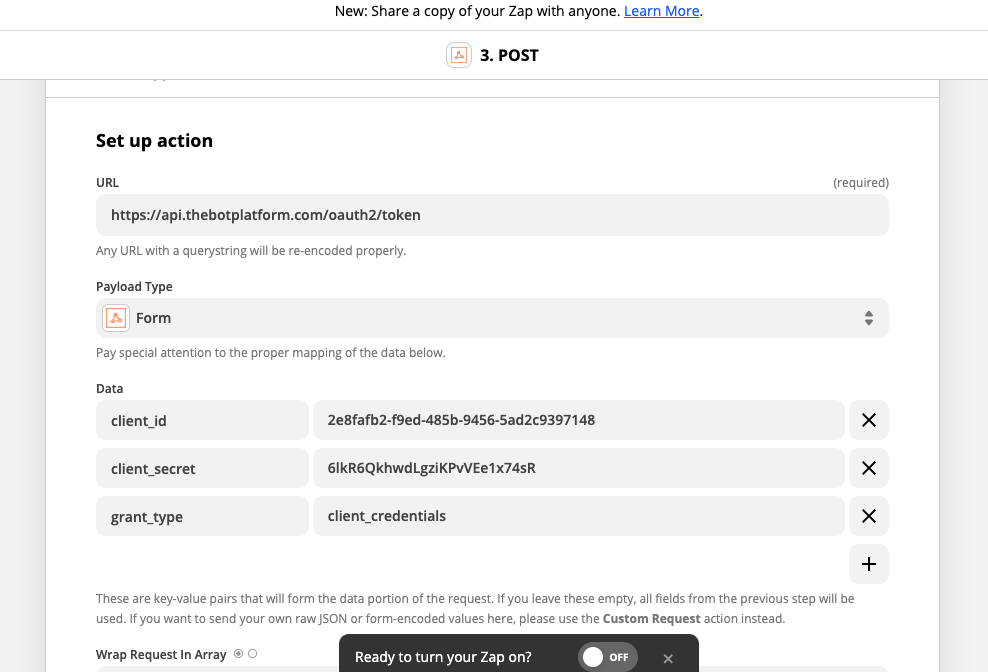
Now test this step and it should generate a bearer token, which we will need to use to send the message back to the Bot Platform.
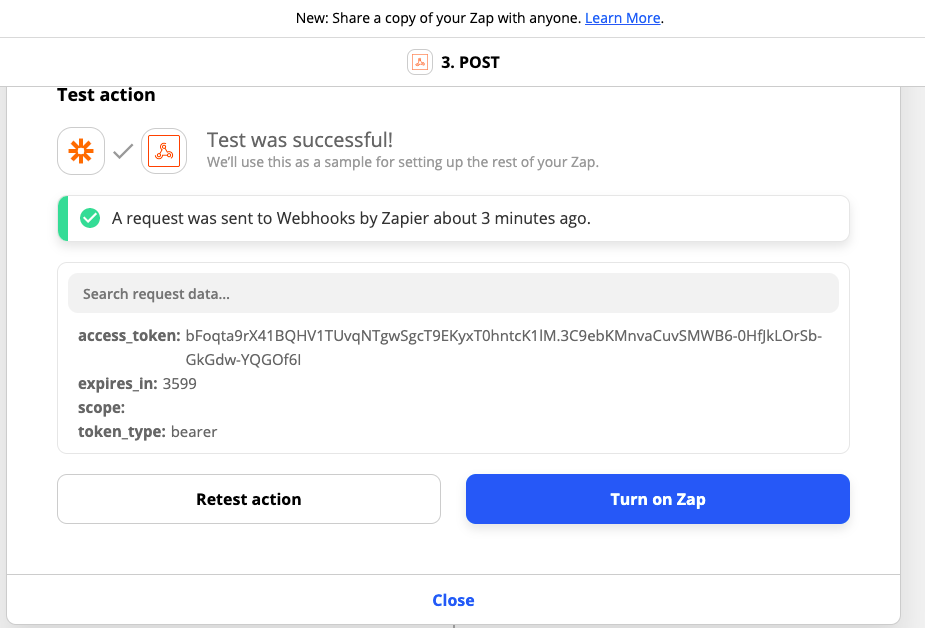
The final step is to add in another Webhooks by Zapier module and we want custom request this time.
Set the method to POST, the URL needs to be https://api.thebotplatform.com/v1.0/activity/external
In the data box, you want to use the following code:
{
	"data": {
		"attributes": {
			"messages": [{
				"text": "Hello"
			}, {
				"text": "World"
			}],
			"recipient": "[email protected]"
		},
		"type": "external - activity "
	}
}
But then you need to swap out the two text responses for the data from your spreadsheet. You need to change the recipient to the email address pulled through in your catch hook step from part 1.
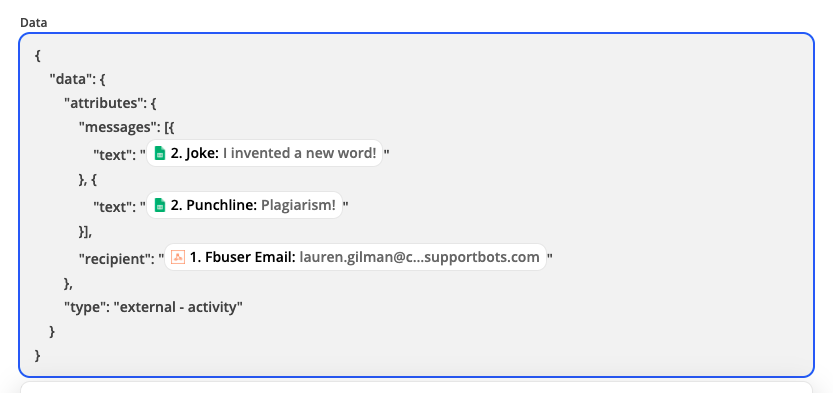
Next you want to add three headers. Authorization Bearer (Token generated by the previous webhook step, Accept and Content-type as shown below:
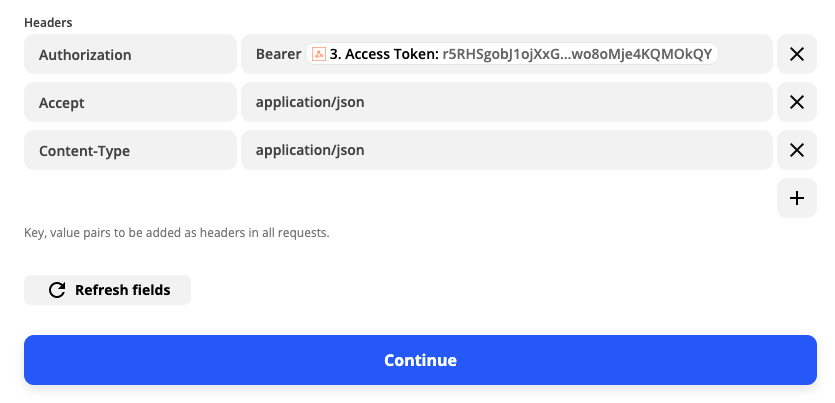
Now click continue, turn on your zap and it is good to go.
Updated 7 months ago
